


🪟 Elevate your view, protect your vibe.
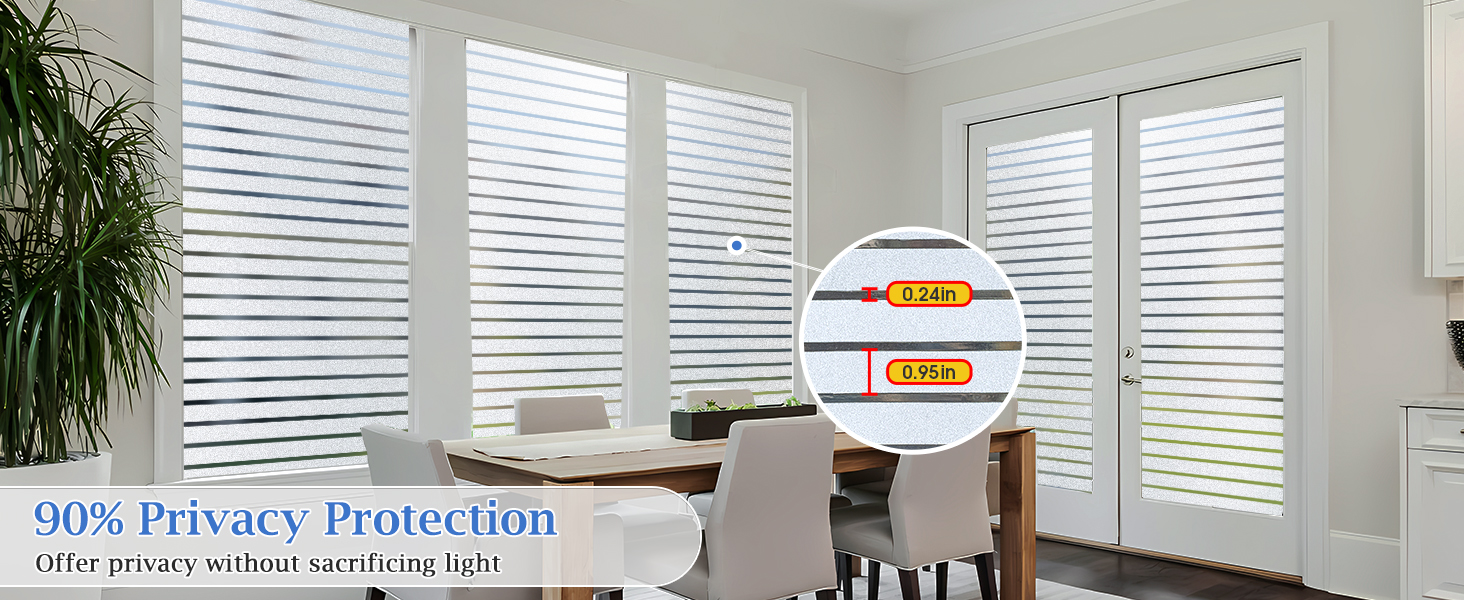
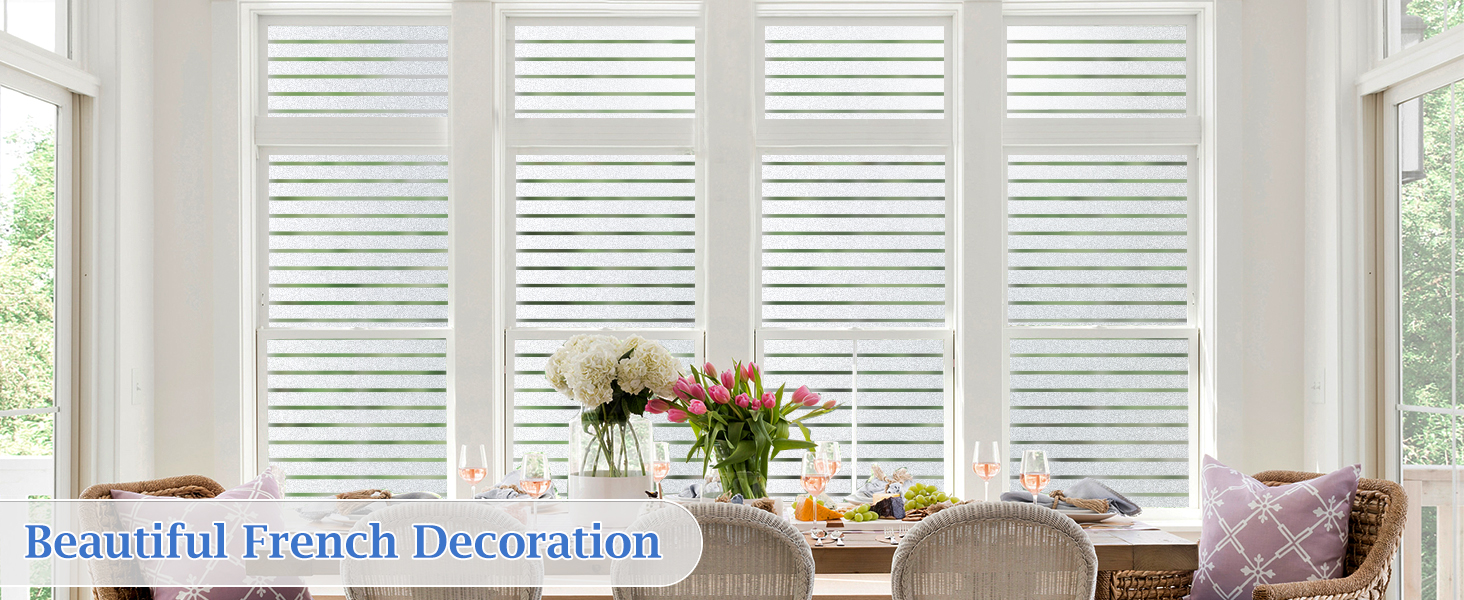
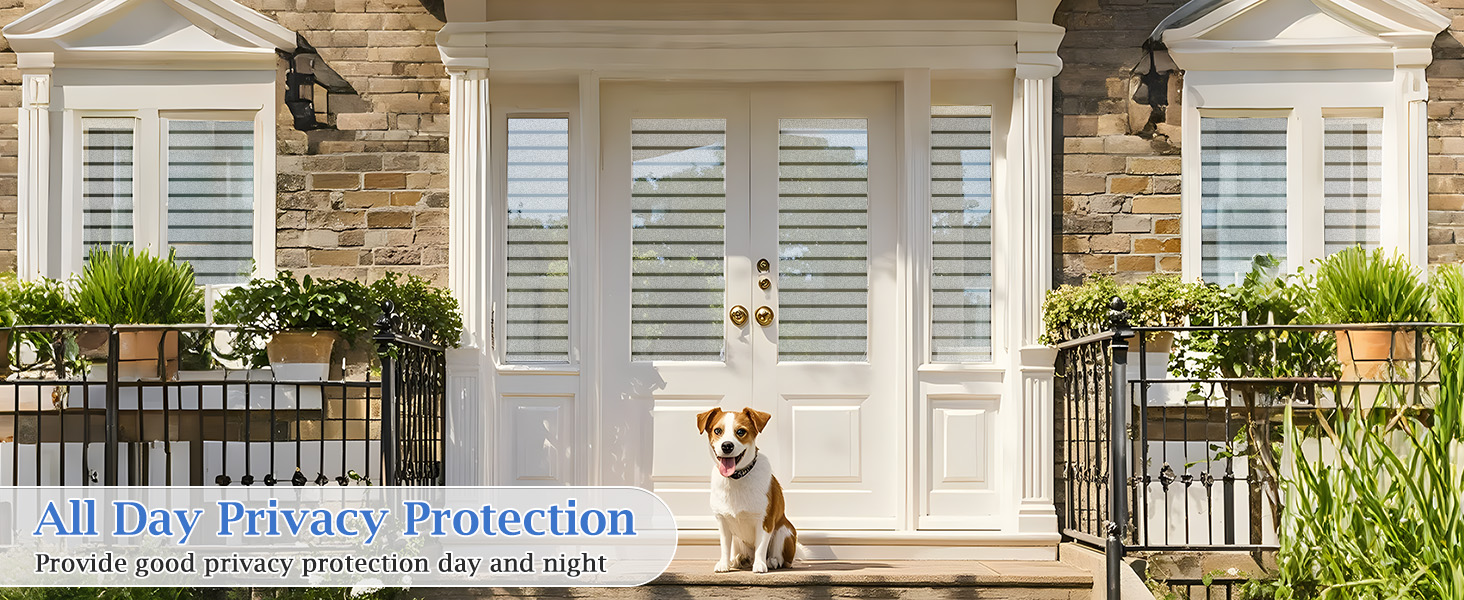
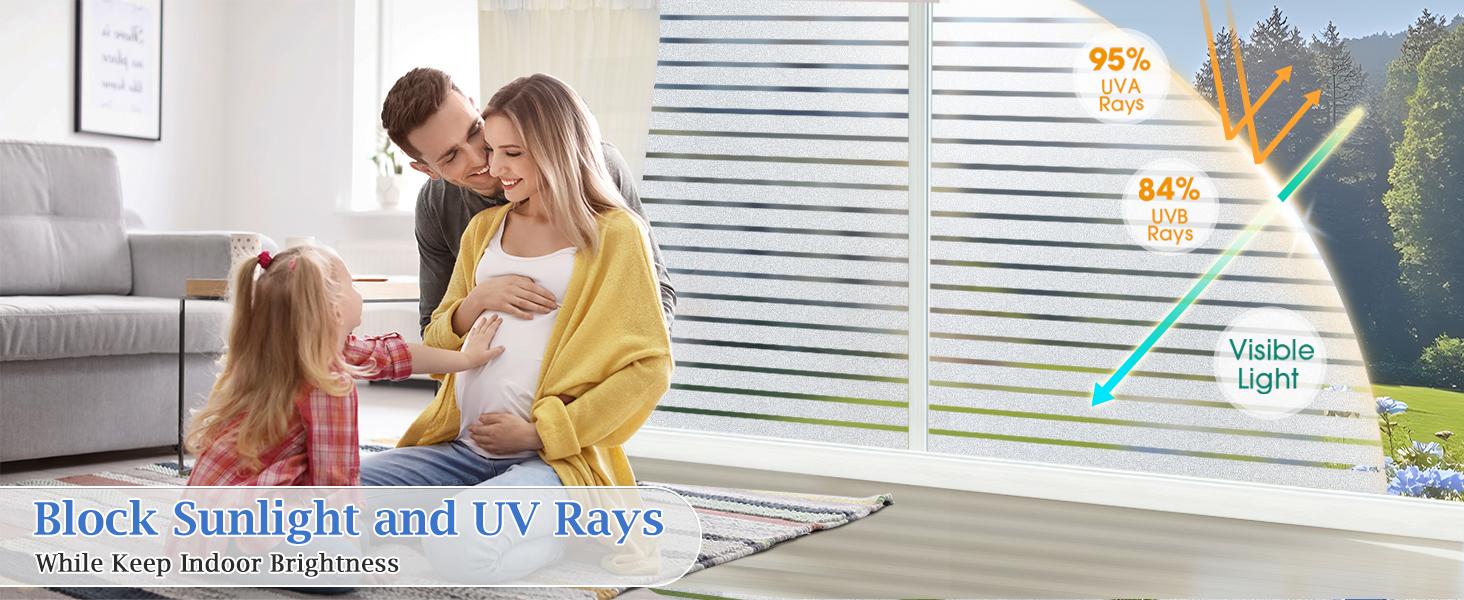
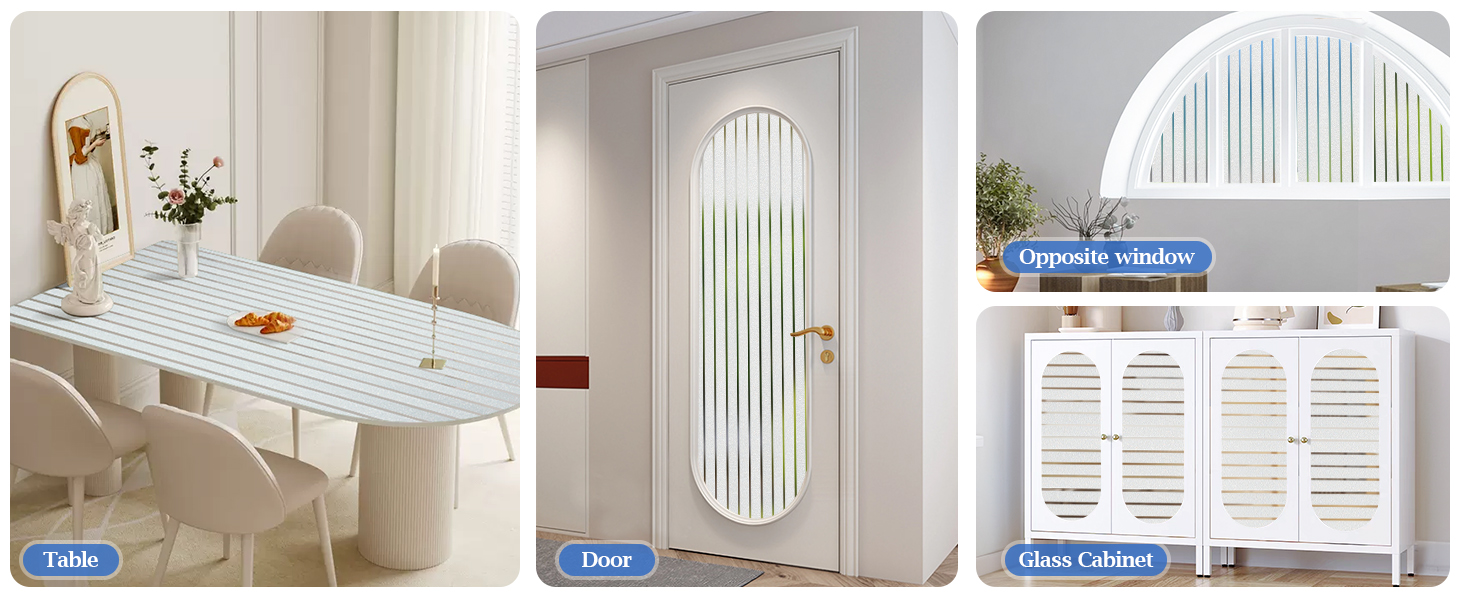
The Viseeko Window Privacy Film offers a 17.5x78.7 inch static cling vinyl with a unique frosted stripe design that provides 98% privacy and blocks up to 95% of harmful UV rays. Easy to install without adhesive, it’s reusable and perfect for home or office spaces seeking stylish, non-permanent window privacy and UV protection.
| Item Dimensions L x W | 78.7"L x 17.5"W |
| Size | 17.5 x 78.7Inches |
| Installation Method | Static Cling |
| Color | Frosted Stripe |
| Ultraviolet Light Protection | Yes |
| Material Type | Polyvinyl Chloride (PVC) |
E**N
Beautiful, simple easy to install.
This window cling was better then I expected! I love the way it looks, from inside or outside it looks like blinds. And it provides complete privacy from people outside, but still let’s in daylight and I can peek out from the cracks if I want to see out.**It took me a few minutes to realize remove the film. Don’t forget this step. Use the sticker provided or strong tape like packaging tape to remove the thin plastic film from the corners.I measured and cut mine to fit my windows. The I used a scraper to press it on the glass, you can probably use an old credit card. If you have a razor blade you can use that to cut off excess from the side if your measurements are a little off.I loved this product. Did the job quick an easy took me about 20 mins to cut to size, remove film, wet, and press, finish.
M**S
Easy DIY Project with pleasing results
Purchased in early December 2022. Weather finally warmed up enough for me to start this project (sliding glass patio doors).Tools used: squeegee, paper towels, pen, scissors, glass cleaner, spray bottle with clean water, cellophane tape, yardstickTried cutting the material with an xacto knife. Didn't work well. After measuring, traced a line on the film with a pen and cut using scissors. Much better, also much straighter line!Separating the backing from the film was a pain. One suggestion was to attached cellophane tape to both sides of one corner. The idea being to pull on the tape in opposite directions to get the separation started. This kind of worked but not always. I kept at it until it worked.Cleaned the windows with glass cleaner and a squeegee. Then misted the glass liberally with clean water and positioned the film against the window. This part of the process would go better with 4 hands, one holding the top against the glass, the other the bottom away from the glass. Not all that hard to get the film to lay flat and clear out bubbles.I opted to position the film such that the bars ran horizontal. The film cut this way will cover about 1/2 of the door so two pieces completed a door. One roll used for each door.The doors are 31.5" wide. I cut the film for the first door right at 31.5" which resulted in some other lap on one side. I guess the film stretched some perhaps when removing the backing. Trimming the excess did not go well but it finally got done. The second door was completed using a 31" piece of film to provide some space on each side. The second door went much easier.Only time will tell if the film holds up. I live in Georgia (USA) and the summer sun can be brutal on plastics. If the film stays in place, I'd likely buy again if needed.Installation Time: About 60 minutesPros:1. Not terribly expensive2. Looks good3. A DIY projectCons:1. Not a permanent solution
K**R
Very Nice Look - But pattern repeat is not perfect
These are pretty easy to install, and they look great. I put them in my garage windows that face the front of my house, because previously I had window blinds but they got filthy with dirt & bugs and were impossible to keep clean. These give the look of window blinds (especially from the outside), but allow in some light and can wipe clean. You can see images when looking from inside to outside, but you can't really see anything but shadows from the outside looking inside.The only difficult thing about installing them is trimming the perimeter to the edge of the window after placing them. The film is very pliable and difficult to cut especially in the corners. It sill looks fine, but my cuts were jagged. Be sure to have a good sharp cutting blade on your utility knife.One note - if you are a perfectionist like me: The pattern repeat is not consistent through the roll. You can see in the pictures, my windows have 2 panes side x side. I used the first half of the roll on the left window pane, the 2nd half on the right window pane. But even though I cut the top edge at exactly the same spot in the pattern, the stripes do not line up farther down the window. If I had to do it again, I would have bought the size 2x as wide, and cut both window panes from the same place on the roll to be sure the patterns matched. Also I checked the price and would have saved about $20-30 if I had done that.
T**A
Great product
It covers the window so no one can see inside - easy to apply and comes in many designs.
J**N
Great privacy
Very easy to use. Looks great
A**R
Photos are misleading
Overall it looks good, but seller photos are misleading. The stripes are vertical not horizontal. I also thought the stripes would be a little wider. We had to run to Home Depot to buy a squeegee and film cutter before we got started. Installation/application went ok. The edges are a little tricky to get to stick and remove all water and bubbles. IMO, a full kit should’ve been included along with recommendations on how to cut the film. We ended up using a straight edge and razor to cut the film. Definitely a 2-person job for large windows.
K**N
Happy Customer! Definitely recommend
The media could not be loaded. Definitely recommend this product, super happy with the outcome a d fairly easy to install. Minor hiccup getting the film off, my recommendation is to use the corners to apply the tape! 100% recommend though
L**C
Great Product - 2 person Job
Great product, it looks great on our kitchen windows. I recommend you follow the instructions exactly. It is a 2 person job, one to help position and hold and one to slowly roll the film onto the window. Spray lots of water so you can make small adjustments. We had a cutting board, Exacto knife and metal ruler for clean cuts. We shall see how it looks once the water dries.
Trustpilot
1 month ago
5 days ago
3 days ago
1 month ago


