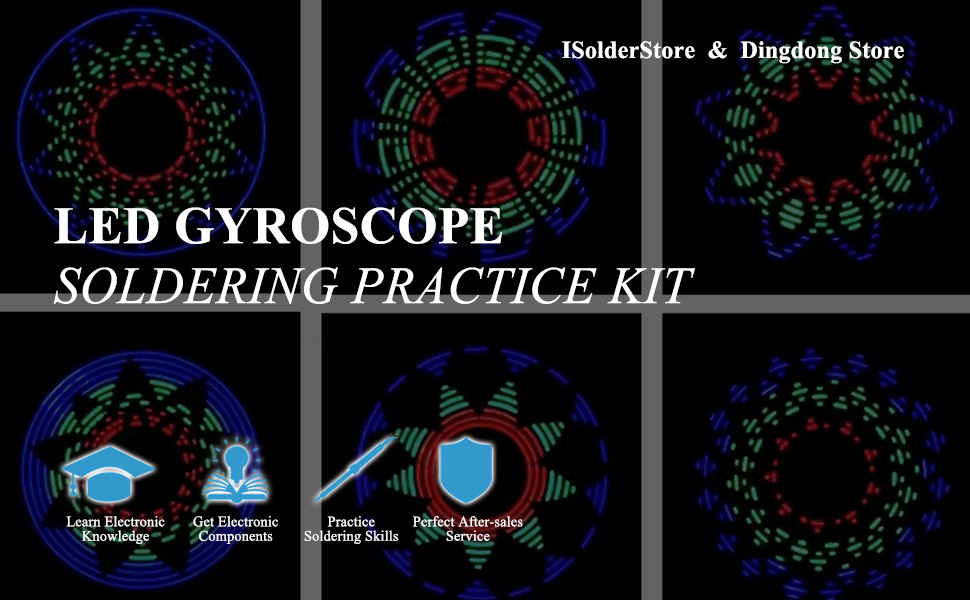
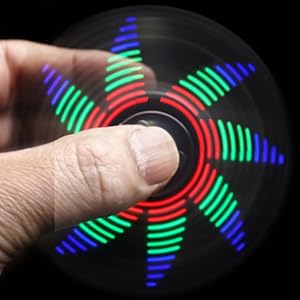
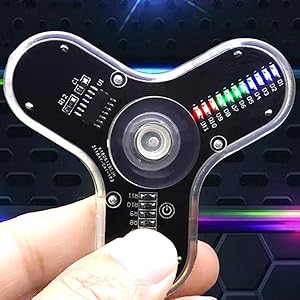
🌀 Light up your skills with the ultimate LED gyroscope DIY challenge!
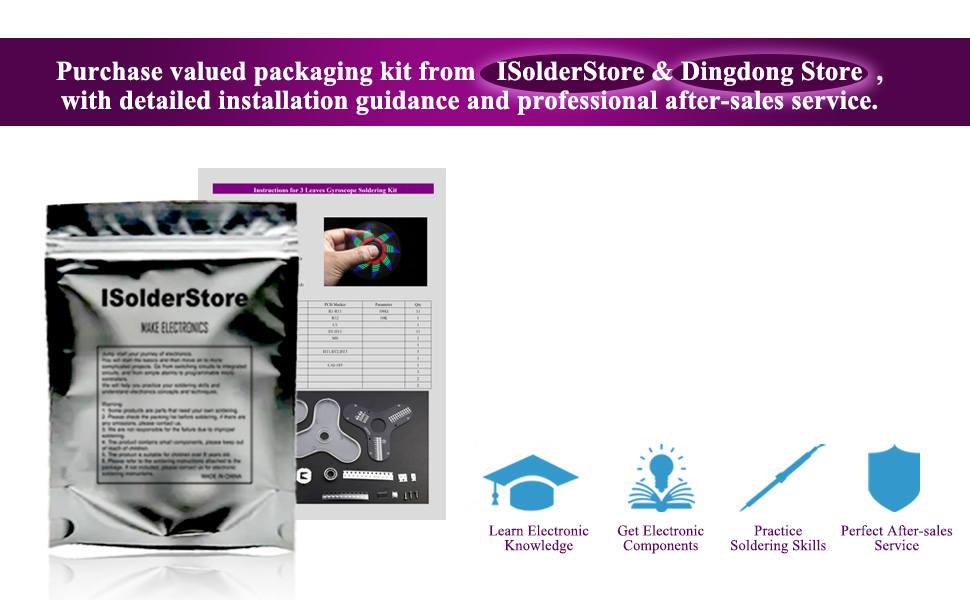
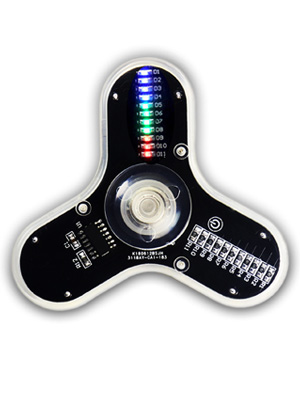
The ISolderStore 3 Leaves LED Rotating Gyroscope DIY Kit is a compact, battery-powered soldering project designed to enhance electronic assembly skills. Featuring multi-pattern LED lights and detailed English instructions with QR code support, it offers a rewarding hands-on experience ideal for both beginners and enthusiasts. Perfect for STEM education and family bonding, this kit combines fun with practical learning in a sleek, portable design.
Manufacturer | ISolderStore |
Part Number | ISolderStore |
Item Weight | 1.44 ounces |
Product Dimensions | 6.7 x 2 x 1 inches |
Item model number | Gyroscope Kit |
Size | 3 Leaves SMD Kit |
Material | Plastic |
Shape | Gyroscope-NEW |
Power Source | DC Powered |
Voltage | 3 Volts |
Item Package Quantity | 1 |
Display Style | LED |
Included Components | No |
Batteries Included? | No |
Batteries Required? | No |
T**N
Super Fun Kit!
The media could not be loaded. I bought this neat little kit to learn how to solder surface mount devices. The kit is super nice. Unfortunately, I learned that I couldn’t do it, as the parts are TINY and I have essential tremor/familial tremor that makes my hands shake just a little too much. Too bad you can’t get a thru-hole equivalent kit. People looking for a fun little kit with steadier hands will love this.UPDATE: I found out I have Parkinson’s along with the essential tremor, and I decided I wasn’t going to give up making this kit! Make sure you have the necessary tools, fine gauge solder and 3 CR2016 batteries. If you’ve never soldered any electronic kit before, I’d still start with a conventional “thru hole” kit before advancing to this or any other SMD kit. That being said, the result is a super cool toy and a steal at less than $10, including batteries!
M**T
Good kit
This was a good practice kit. I was afraid it would be too easy but it had very small parts and was hard to solder. I'm not a great solderer and I have to tackle some small soldering and doing this gave me the confidence that i can probably do it.I took one star off because the instructions were very unclear and it was hard to determine which part was which. These parts are tiny and they do have things written on them, but you can't see it without a microscope. Simply putting identifiers on the pictures in the instructions would have made the process easier.I also couldn't find 1620 batteries anywhere in my local area. I had to use 1632 but they're a little thicker so i had to adjust the battery holders a little bit. So, but 1620 batteries if you don't already have them.Overall this project took me maybe 2-3 hours. I enjoyed the project once i figured out which parts were which. The kit came with extra leds and resistors in case you lose them.
T**S
Super Duper Cool
The media could not be loaded. I have a severe case of Pneumonoultramicroscopicsilicovolcanoconiosis-XH01, diagnosed by some of the finest Scandinavian doctors in the world. My hands also shake so it's difficult to get keys into locks and solder small, pinhead-sized surface mount components. I was so excited to get this kit and start working on it as I couldn't find it anywhere else. You get 6 of each color mini LED (red/blue/green) with 11 places set for you on the PCB and you can opt for 3 of one color (red) since you won't get 4 of each on the board. Mini LED's are marked green at the positive end for observing correct polarity upon placement. Only the mini LED's and chip need correct polarity and orientation on the board. I recommend a light coat of solder on all the solder pads prior to starting, it makes it easy to hold each component in place with a tweezer while you heat the pads and then solder just flows where it needs to. You only get 1 chip resistor the same size as the LED's - if you sneeze it out of the park it's game over. Take your time, it's worth it.Tools needed:Soldering penSolderMagnifying visor or lensTweezerInstruction sheet was double-sided, and informative enough to get it assembled without messing with some strange QR code. Total assembly time 1.5 hours. Found a 10-pack of CR1620 3-volt cells for $5.39 here and I'll probably buy another one of these to make as a gift.
I**C
Bamboozled
*This kit contains a printed circuit board with high-quality microcircuit components, but thecomponents are incredibly small and require precision tools for attaching or detaching, which may notbe readily available.*This DIY kit can be a fun project for those with the required tools and expertise. Take your time anddon't be afraid to ask for help.Are you interested in a DIY project that is both fun and challenging? This kit might be exactly what you are looking for! It contains a printed circuit board with high-quality microcircuit components such as microchips, transistors, and LEDs that are comparable to those found in the latest tech devices.However, the components are incredibly small and require precision tools for attaching or detaching, which may not be readily available. While it can be a fun project for professionals, novice hobbyists may find it challenging.When I opened the package, I found the project quite tricky. The tiny components made it difficult to read the text on them, and the instructions were not very clear. Unfortunately, I ended up losing some of the parts, which were absorbed into the environment.In conclusion, this DIY kit can be a fun project for those with the required tools and expertise. If you're a novice, it might be challenging, but don't let that discourage you. Take your time, and don't be afraid to ask for help. It's a great conversation starter, and the result could be a fantastic piece of tech that you can show off to your friends and family.
J**.
This is extraordinarily hard and needs microscope
Tiny resistors size of pencil lead make sure you have a microscope as this is maximum difficulty. Have built many small projects with som but this is nightmare difficulty
K**Y
Make sure to check all connections!
So, I modified mine slightly. The only available batteries I could find were just a bit too big. So I soldered the battery holders using the batteries themselves as spacers.I am happy to say it worked. The board also tolerated my desoldering of the original connections without losing any pads, which is a plus for a clutz like me. Finally found a loose connection on the board, and the lights all came on properly.The designs are fun, and seeing it light up properly for the first time is very rewarding.
G**N
Surface Mount Aint for Newbies
My son had done through-hole soldering until this project, and found it extra frustrating at the start.However: learning how to solder surface mount projects is very useful, and this is a great and inexpensive way to learn it. Start with a small bead of solder on each contact on one side before you mount the LEDs, then melt and add the LEDs one by one, and they'll learn a useful process. Just which I had that tip for my son before he started...
Trustpilot
3 weeks ago
1 month ago