🎬 Elevate your viewing game—because your screen should be as ambitious as you are!
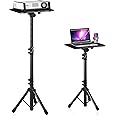
The TOWOND Projector Screen and Stand offers a massive 150-inch, wrinkle-free polyester display with a 160° viewing angle, supporting both front and rear 4K HD projection. Designed for quick, tool-free setup and lightweight portability at 11.5 lbs with a carry bag, it’s perfect for indoor and outdoor use—from backyard movie nights to professional presentations.


| Operation Mode | Manual |
| Viewing Angle | 160 Degrees |
| Screen Finish | 160°wide Viewing Angle,Anti-crease,Wrinkle-free |
| Mount Type | Tripod Mount |
| Screen Dimensions | 150 inch |
| Item Dimensions W x H | 130"W x 102"H |
| Material | Polyester |
Trustpilot
1 month ago
3 weeks ago