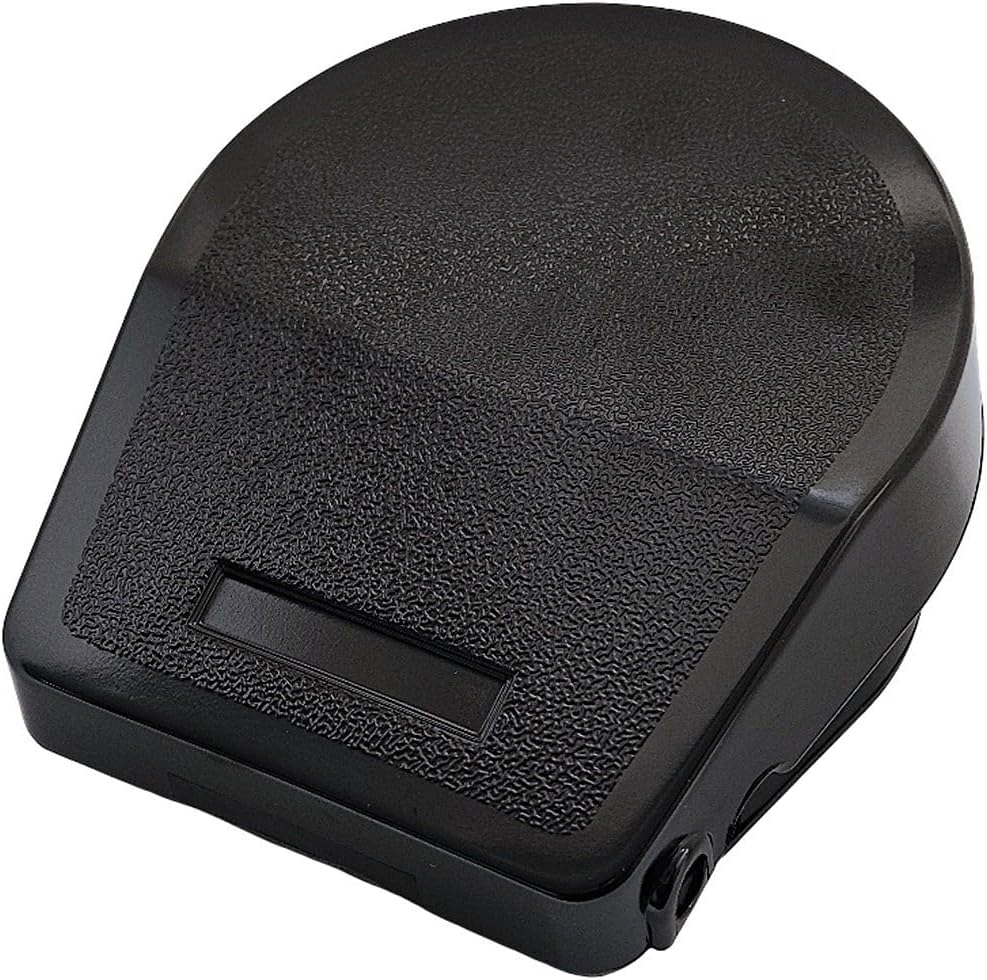


YDK Sewing Machine Universal Foot Control Pedal - Will Fit Brother, Singer, Janome, Toyota & More Sewing Machines
Product ID: 48978471
🔧Easy DIY installation kit
⏱️Precise speed control restoration
⚙️Universal compatibility with major brands
Desertcart purchases this item on your behalf and handles shipping, customs, and support to Argentina.
⚡ Step on it: Upgrade your sewing game with universal speed control!
The YDK Universal Foot Control Pedal is a high-quality replacement pedal compatible with major sewing machine brands like Brother, Singer, Janome, and Toyota. Designed to restore precise speed control, it features an ergonomic design and includes all necessary hardware for a quick, DIY installation. Backed by decades of expertise from Europe’s leading supplier, this pedal transforms your sewing experience with reliable performance and comfort.
| ASIN | B007D5JX5S |
| Best Sellers Rank | 536,367 in Home & Kitchen ( See Top 100 in Home & Kitchen ) 721 in Sewing Machine Parts & Accessories |
| Brand | IPC Sewing Parts |
| Colour | White |
| Customer Reviews | 4.4 4.4 out of 5 stars (1,162) |
| Date First Available | 30 May 2012 |
| Item Weight | 410 g |
| Material | Lead |
| Model Number | 9542846 |
| Package Dimensions | 13.7 x 12 x 6.2 cm; 410 g |
J**J
Great - Easy job and simple swap over. Machine now working again.
This was a replacement for a pedal on an old (1970s) sewing machine. I am fairly sure that the actual problem I had was only the capacitor in the old pedal as the machine was running on at full speed - however it just seemed as good an option to replace the entire pedal unit (I may swap the capacitor in the old one at another time, just didn't have time to be hunting around for individual components and the original pedal was also a bit tatty and held together with tape!). These are reasonably well made pedals and you will find lots of information on here and other places on the net about wiring them etc, but I just wanted to say that for the price and ease of just buying a new pedal this worked a treat for me. These work on the "switched" live wire and see the review on here with the pics that tell you how to do it...I followed that one and it was all fine (although I have a fair bit of experience with this type of stuff anyway). I brought mine from Couling Sewing Machines and their service was absolutely excellent as I ordered over the bank holiday weekend and it still came within two days - way quicker than the listing! Thanks Couling! Totally recommend this to anyone who needs a generic foot switch for their machine! Good luck :-)
A**K
Restored speed control to our sewing machine
We have an E&R Classic Sub 22 machine which isn't used much. It was needed recently but there the pedal had lost its speed control and would only act as off or full speed. Ordered this to try get some control back. What a great kit. It is designed to replace your existing pedal but using the existing cable, The kit comes with the pedal and bottom plate, 5 screws (3 for the plate and 2 for the cable anchor), the plastic cable anchor, 3 different insulating sleeves and two crimp/solder on spade terminals. We popped the base off the existing pedal by levering near its pivot point (see photo), The existing cable was attached to the board by two spade terminals and the cable entry secured by a metal plate. The plate lifted up with pliers and we gently wiggled the spade terminals from the base (photo shows pedal after removing the cable with terminals at the bottom and cable securing plate lying on the right). The existing spade terminals easily slid onto the new pedal without the need to use the new spade connectors. A bit of whittling down of the plastic block securing the old cable had it fitting into the new pedal recess and could then secure it with the new anchor plate (see photo). Three screws to secure the base and it was done in less than 10 minutes. A quick test and the speed control was restored The unit seems well built with a clever mechanism to vary the speed or fully pressed to connect the power straight through. The shape of the pedal is much better than the original cheese wedge shape and is very comfortable to put your foot on. Definitely a comprehensive kit which would be usable even if the existing pedal hadn't had spade connectors. Definite improvemend in quality on the existing pedal and has restored the speed control to our machine, the lack of which was making it almost unusable. Definitely recommended if your pedal has given up or is just acting as an on/off switch.
C**K
Good replacement for old Singer
Bought this as a replacement pedal for a very old Singer. Relatively easy to fit - not much harder than wiring a plug. You do need to crimp the tab connectors, but this can be done with a pair of pliers if you don't have a crimping tool. The pedal itself is very solidly constructed with a thick plastic body. It functions better than the old pedal - finer control and doesn't rush away when starting up.
S**N
very quick & easy to switch over (our old sewing machine pedal had ...
Came with all the bits needed to attach your existing sewing machine cable, very quick & easy to switch over (our old sewing machine pedal had exactly the same type of connectors). Seems to work fine. The only criticism I have is that when you first press down the pedal it doesn't seem to have a gradual take up - it hums louder and then suddenly starts running at full speed. Once it's running, you can slow it down and speed it up. So not ideal, but good enough for the money.
L**Y
Good robust pedal. Easy to fit and should last for years. Recommended.
This is a nice sized and robustly made pedal. The plastic is hard and similar to bakelite. The shell is around 3mm thick. This was a major consideration for me as a foot pedal takes some punishment. Mine arrived with all the parts present -well packaged and with the bottom plate detached. This is a breeze to fit. No worries, simple and logical. Three pins sewing machine leads have two positve pins and one negative, in many cases the centre one. One positive is permanent feed for the light - if it came on with the pedal wouldn't that be fun!!! The other pin comes from the pedal, or to be more accurate it is a 'switch lead' ( I'm a qualified electrician). The pedal is a single wire - single pole switch, the same method as used on most domestic lighting. On the photo, with no lead attached, on either side of the green capacitor the outside two gold tabs are the terminals for the two wires of your switch lead - the cable from the old pedal. Some may require desoldering from your dead switch and moving across, but many already have spade connectors in place and just require swapping. The grey box is from a Brother x5 and shows the simple set up. Because it is a switch lead and not a true pos and neg supply it should not matter which way around - it is just closing the circuit. On the final photo you can see where I've cut back the plastic cable cover where it enters the pedal - its only for aesthetics/neatness - but the leads now swapped over are clearly in place. After that just reroute the cable and affix the base plate - Job done. It looks like it belongs to the machine. For those who need guidance remember not to work on this item when still plugged in. Don't laugh I saw somebody do just that! Long nosed pliers would be useful for the connectors and a Phillips 2 to close the case and the cable clamp.
K**X
New Lease of Life for Mother's Brother
Bought to replace a failed “Sew-tric” foot pedal on a 1962 Brother sewing machine. Had previously ordered a cheaper alternative from Amazon but that one did not include some necessary screws and the cord-grip, so was returned. Photos and comments from previous reviews for this item were invaluable in knowing where the wires were to be connected, but I still made a mess of it. The package includes a pair of clips to attach to the end of the wires, which should then slide on to the corresponding spades in the foot pedal. However, in soldering the wires to the clips, some of the solder ran into the clips and obstructed the channels such that they would no longer slide onto the spades in the foot pedal – perhaps I should have just “crimped” the clips onto the wires instead of soldering, but too late now. Repeated attempts to force the clips on kept bending the spades, which were then in danger of breaking off which would have been game over. To solve this, I cut off the clips, stripped back the wires, hooked them through the holes in the spades and soldered them directly in place. After assembling the controller, plugging everything in and pushing down the pedal, the sewing machine eased back into life, at which I couldn’t help but do a little dance of joy and hug my mother. A couple of months later and the new pedal is still going strong. It is very pleasing that a complex, well-engineered sewing machine, used regularly for over sixty years without other issue, has been given a new lease of life by such a reasonably priced replacement controller. Recommended, as long as you have at least some idea of what you're doing.
P**D
Works well
I bought this bare foot control so that I could keep the existing cables and, in particular, the plug that connects it to the machine. The controller is a simple rheostat, works well and is replacing an electronic unit that only gave "Off" or "Full Speed".
M**N
Not universal.
The listing doesn't mention that if your machine has a separate power cable and foot cable, this is not a suitable fix. I had to find that info, in all caps, on an external site. This is my job, and I'm delayed several days now.
V**L
Perfekt für Husqvarna
Meine über 40 Jahre alte Husqvarna Nähmaschine hat sich sehr über dieses Ersatzteil gefreut und kann nun hoffentlich viele weitere Jahre ihren Dienst tun.
C**Z
Funciona para Refrey 427 Transforma
Perfecto para Refrey 427 Transforma, el montaje no es difícil. En mi caso no tuve que pelar cables ya que coincidía con los del pedal anterior. Ahora puedo controlar la velocidad de costura de la máquina.
C**N
Facile da montare, soddisfa le aspettative
È proprio quello che avevo bisogno xké il cavo ancora come nuovo, un amico di famiglia l'ha montato sul pedale che ha impiegato solamente 10 minuti. Lo sto usando tanto. È perfetto
C**N
Bon produit conforme à mon attente
Parfait cet article correspond exactement à ce que j'attendais. J'ai pus changer facilement la pédale de ma machine TYOTA, la voilà repartie pour de nombreuses années
C**E
Veel beter dan de elektronische universele pedalen
Ik heb twee elektronische pedalen met snoer geprobeerd voor mijn Elna. Allebei waren ze van licht plastic, hadden ze een slecht passende stekker en hielden ze er snel mee op. Dit pedaal is zwaarder van kwaliteit en het originele snoer doet het gelukkig nog goed, want de losse snoeren met de juiste stekker passen ook slecht. Het is best makkelijk om het snoer te bevestigen. Een smal platbektangetje is handig voor de metalen lipjes.
Trustpilot
2 months ago
5 days ago