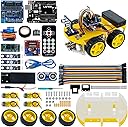


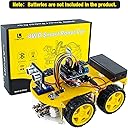
LAFVIN LAFVIN Smart Robot Car Kit Include UNO R3,Ultrasonic Sensor, Bluetooth Module for Arduino with Tutorial
Product ID: 409494328
Details
- Assembly RequiredYes
- BrandLAFVIN
- Item Weight907 g
- Item dimensions L x W x H25.4 x 19.3 x
- ThemeScience
Desertcart purchases this item on your behalf and handles shipping, customs, and support to Argentina.
desertcart.in: Buy LAFVIN LAFVIN Smart Robot Car Kit Include UNO R3,Ultrasonic Sensor, Bluetooth Module for Arduino with Tutorial online at low price in India on desertcart.in. Check out LAFVIN LAFVIN Smart Robot Car Kit Include UNO R3,Ultrasonic Sensor, Bluetooth Module for Arduino with Tutorial reviews, ratings, specifications and more at desertcart.in. Free Shipping, Cash on Delivery Available. Review: Excellent value, has a few issues - I'm in the process of assembling it currently. Issues and comments so far: 1) The plastic pieces are laser-cut out of acrylic and have a protective adhesive paper on both sides that you will want to peel off (unless you like the look of that over the clear plastic) 2) The manual calls for M3*8mm screws to attach the motor driver board to the baseplate, but the kit included M3*6mm screws (correct according to the label in the bag) which are too short to reach through the 1/4" acrylic baseplate. This required a trip to Home Depot to acquire some M3*10 screws (Hint: they store the metric screws in drawers way down the aisle from the rest of the machine screws) which work but are *almost* too long. You just need four of them as the 6mm screws work fine for mounting the Arduino on the thinner upper deck. 3) There is one acrylic piece with a right-angle bend used to mount the ultrasonic transducer. This is made by laser-cutting a flat part and then heating and bending the end, likely by hand. In my case, the bend is less than 90 degrees and will result in the transducer pointing down at the floor without some kind of shim or other adaptation. I ended up only installing the two bottom spacers and gently tightening the nuts which gave it just the right level of upward angle to compensate. 4) As all the other reviews correctly point out, the system is powered by two 18650 batteries but no way to charge them is provided and most people will need to acquire a separate charger (that will probably cost more than half what the entire kit costs). It should be clearly stated in the product description that everything you need is not in fact included. 5) The connection of the ultrasonic transducer assemby to the servo is not illustrated and is fiddly. You need to attach the servo arm that comes with the servo to the servo FIRST (it won't fit through the middle hole in the tranducer assembly tab) with the small screw incuded with the servo arms. Then they want you to use the servo mounting screws to attach the acrylic bent tab of the assembly to the servo arm, which requires you to use only the outer holes to avoid hitting the servo, and those screws are way to big for this and do not align well with the holes in the servo arm. 6) The assembly instructions really don't touch on wiring everything together, and have you mount the top deck before getting into the experiments where they talk about wiring the motor driver board which is between the two decks and not possible to wire with the top deck installed. 7) There are specific experiements and code for operating each of the sensors etc. separately, but most of these do not involve the car actually being driven. It's not yet clear if there will be enough storage to load all the required drivers to operate everything together. There's only one complete robot experiment provided which is a line following application. You're pretty much on your own to do anything cool like using the servo and ultrasonic transducer to scan the area in front and choose a path say. 8) While there are four motors, one for each wheel, the motor driver board only has two outputs in differential (+/- bidirectional) drive mode so the two left motors are wired together and the two right motors are wired together. I'll update as I make further progress. Otherwise, it's a great kit due to the large number of components you get. The UNO 3 compatible, the sensor shield, the motor-driver board, bluetooth module, 3x line sensor modules, IR receiver, ultrasonic transducer, and servo for example. There's lots of potential for re-using all this in other experiments. The software all comes on a CD, but there's a QR code on the CD that points to: (a google drive URL that desertcart won't let me post) where you can download the contents of the CD if you no longer own a computer with an optical drive. Review: Carro 4WD Smart Robot Car - Me gustó que viene muy completo, y lo malo es que algunas de sus piezas son muy pequeñas y las puedes perder... Y cuando lo estás usando y se llega a topar con un objeto se le afloja su sensor ultrasonico.

| ASIN | B07JN46YSW |
| Assembly Required | Yes |
| Brand | LAFVIN |
| Country of Origin | USA |
| Customer Reviews | 4.1 out of 5 stars 161 Reviews |
| Is Assembly Required | Yes |
| Item Dimensions | 25.4 x 19.3 x 8.9 Centimeters |
| Item Weight | 2 Pounds |
| Item dimensions L x W x H | 25.4 x 19.3 x 8.9 Centimeters |
| Manufacturer Part Number | LA-016 |
| Model Number | 8541582531 |
| Theme | Science Fiction |
| UPC | 781520418727 |
G**E
Excellent value, has a few issues
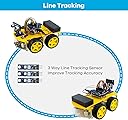
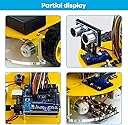
I'm in the process of assembling it currently. Issues and comments so far: 1) The plastic pieces are laser-cut out of acrylic and have a protective adhesive paper on both sides that you will want to peel off (unless you like the look of that over the clear plastic) 2) The manual calls for M3*8mm screws to attach the motor driver board to the baseplate, but the kit included M3*6mm screws (correct according to the label in the bag) which are too short to reach through the 1/4" acrylic baseplate. This required a trip to Home Depot to acquire some M3*10 screws (Hint: they store the metric screws in drawers way down the aisle from the rest of the machine screws) which work but are *almost* too long. You just need four of them as the 6mm screws work fine for mounting the Arduino on the thinner upper deck. 3) There is one acrylic piece with a right-angle bend used to mount the ultrasonic transducer. This is made by laser-cutting a flat part and then heating and bending the end, likely by hand. In my case, the bend is less than 90 degrees and will result in the transducer pointing down at the floor without some kind of shim or other adaptation. I ended up only installing the two bottom spacers and gently tightening the nuts which gave it just the right level of upward angle to compensate. 4) As all the other reviews correctly point out, the system is powered by two 18650 batteries but no way to charge them is provided and most people will need to acquire a separate charger (that will probably cost more than half what the entire kit costs). It should be clearly stated in the product description that everything you need is not in fact included. 5) The connection of the ultrasonic transducer assemby to the servo is not illustrated and is fiddly. You need to attach the servo arm that comes with the servo to the servo FIRST (it won't fit through the middle hole in the tranducer assembly tab) with the small screw incuded with the servo arms. Then they want you to use the servo mounting screws to attach the acrylic bent tab of the assembly to the servo arm, which requires you to use only the outer holes to avoid hitting the servo, and those screws are way to big for this and do not align well with the holes in the servo arm. 6) The assembly instructions really don't touch on wiring everything together, and have you mount the top deck before getting into the experiments where they talk about wiring the motor driver board which is between the two decks and not possible to wire with the top deck installed. 7) There are specific experiements and code for operating each of the sensors etc. separately, but most of these do not involve the car actually being driven. It's not yet clear if there will be enough storage to load all the required drivers to operate everything together. There's only one complete robot experiment provided which is a line following application. You're pretty much on your own to do anything cool like using the servo and ultrasonic transducer to scan the area in front and choose a path say. 8) While there are four motors, one for each wheel, the motor driver board only has two outputs in differential (+/- bidirectional) drive mode so the two left motors are wired together and the two right motors are wired together. I'll update as I make further progress. Otherwise, it's a great kit due to the large number of components you get. The UNO 3 compatible, the sensor shield, the motor-driver board, bluetooth module, 3x line sensor modules, IR receiver, ultrasonic transducer, and servo for example. There's lots of potential for re-using all this in other experiments. The software all comes on a CD, but there's a QR code on the CD that points to: (a google drive URL that Amazon won't let me post) where you can download the contents of the CD if you no longer own a computer with an optical drive.
M**L
Carro 4WD Smart Robot Car
Me gustó que viene muy completo, y lo malo es que algunas de sus piezas son muy pequeñas y las puedes perder... Y cuando lo estás usando y se llega a topar con un objeto se le afloja su sensor ultrasonico.
D**D
Great Product to teach and learn
I bought this for my 9yo son so he can get a head start on learning robotics. It is too advanced for him by himself now, but It is a good kit for me to teach him. I would highly recommend this as a starter. This kit has everything you need to make the car and it has the sensor board that can be used in other projects. (I will be buying the sensor variety pack too). It does require some basic knowledge of electronics (it is not as easy as Legos, but not as hard as building a homemade circuit on a breadboard), Even the completely inexperienced can find on-line tutorials to learn how to solder and learn a little about how the sensors work and how they can be hooked up. The instructions likely seem hard to people who have no basic knowledge.
R**N
Is this the robot car for you? (Skip to the end for my conclusion)
This kit has everything needed to build a robot car but if your not proficient building and programming with the Arduino you will struggle to get it working. You will need a charger for the 18650 batteries that are included in the kit and I recommend a Nicore charger like the I4 as it will charge almost every type of rechargeable battery including AA AAA AAAA C D 18350, 18500, 18650, etc. The assembly instructions start at lesson 4 Installation Method in the pdf. The instructions walk you through several tutorials to teach you how each device works which is good but what they don't tell you is that you need to disconnect some items and rewire for the next lesson. Finally after going through each lesson you will need to disconnect all the wiring you have done at the Expansion board and look at the sketches (code) provided in order to figure out which wire goes to which connection as the instructions do not tell you. (Code Lessons 11 - 14) The instructions also do not tell you that you must remove the plug in jumpers for Enable A and Enable B on the motor driver board. (Just move them to the unused pins so they don't get lost) In my opinion after completing lessons 10 the car should be completely and properly wired and should not require rewiring to get it to work except disconnecting the Bluetooth when uploading a sketch. (By the way there are no Code lessons 0 - 4) I recommend installing all the wiring for the motor driver before mounting the upper acrylic section and the motor negative (Black wire) goes toward the logic pin side of the connector and the motor positive (Red wire) towards the driver chip. If you are going to use the "android bluetooth rc car controller app" by Andi Co. you will need to change the sketch to us F for forward instead of U. Tip: The screws for mounting the motor driver to the acrylic bottom panel are too short but the screws for the battery holder are longer than needed so you can just swap these four screws. WARNING: the motor screws will come loose and need to be re-tightened frequently and if you decide to use thread locker like Loctite be very careful not to get any on the acrylic as it will destroy it. I plan on using Elmer's school glue on the threads, it should hold good enough and won't destroy the acrylic. I have three dogs, one could care less, one who barks and follows it's every move and one who is scared of it and will keep it's distance while barking at it. Best dog toy ever. Conclusion: If your looking for something that you assemble and it's ready to go this is not the robot car for you but if you know how to work with Arduino's and can interpret which pins are being used for which functions then this car may be what your looking for. It's a great price even factoring in the cost of a good quality universal charger like the Nicore I4. There are cheaper chargers some as low as $2.99 USD but the Nicore is the one I recommend.
J**.
Having some issues, over all okay
It comes with some issues 1) it doesn’t comes with instruction, you need to go to its website and download the instruction and code. 2) the code is having some issues, you need to debug or rewrite the code yourself, otherwise it won’t work. The good thing is there’s so many similar products on the market, you can use their code as reference and modified for your own. 2) the it receiver is bad. 3) missing some screws.
Trustpilot
2 months ago
5 days ago