


🪄 Unblock the magic of printing!
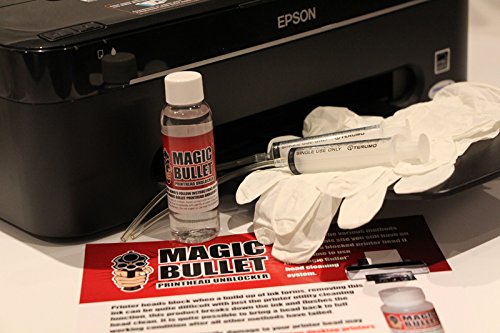
The Magic Bullet Print Head Cleaner and Unblocker Kit is a professional-grade solution designed for all Epson desktop printers. It effectively flushes and cleans printer heads, removing internal ink build-up without the risk of damage from harmful chemicals like IPA. Complete with easy-to-follow instructions, this kit is the go-to choice for maintaining optimal printer performance.
Z**9
I almost threw away my beloved printer.
I almost threw away my beloved printer and bought a new one....My old Epson CX3800 printer was printing strangely. Sometimes, the images would be very blue...sometimes yellow... I tried changing ink cartridges and cleaning the heads (I now know this is the absolutely WRONG thing to do) Finally, it stopped printing magenta and yellow, completely. The print head was completely clogged.I searched online and found the video for Magic Bullet Print Head Cleaner and, while it looked too good to be true, if it would save my beloved Epson printer, I was willing to try it. Besides, I have TONS of ink I've stocked up and I just hate to waste it.Armed with a full roll of paper towels, the Magic Bullet kit, a headlamp, a pair of reading glasses, and some medical gloves (the kit comes with gloves but I wanted better ones), I set off to clean out my printer.The first challenge, figuring out where the heck I'm supposed to hook up those tubes from the syringes. I couldn't move my print head around like it shows in the videos. So, I popped out the cartridges, closed the door, and slid the print head over...ever so carefully. I really didn't want to break it. I do love this printer. I folded the paper towel and slid the print head back, just like in the video...so I thought. Opened the door, sucked up 2 ml into the syringe, and hit the magenta first. It took some pressure to get that first ml in, then I let it sit for half an hour as directed.Next was the Yellow. Then, why not....cyan and black. Thank goodness there were two syringes so I could do two colors at once.When it was finished, I moved the print head over to get the paper towel out and found that it had not been under the print head while I was cleaning. I had a mess on my hands but, thankfully, I was wearing gloves. I cleaned out all that excess ink, excited to try my printer!I printed the head cleaner, as advised, and proceeded to print out a picture of my daughter.Challenge 2....well, the magenta worked. She came out all red.Back into the printer I go, steeled by the knowledge that I had actually gotten the magenta to print! Second pass, the instructions say to suck up some of the ink into the syringe and push it back. Back and forth...back and forth... Did that and this time one of the tubes on the syringes let loose. Another mess but it wasn't all that bad.Did the back and forth for all colors and, again, the paper towel was not under the print head. If there's a secret to that, I wish someone would let me know. Cleaned up the mess, ran the head cleaner, printed the picture and it's perfect!Just to prove, I ran this quick little color test page (it's draft mode on plain, white paper) but look at the colors.This stuff really works. Before you throw out that printer because the print is all yucky, try Magic Bullet Print Head Cleaner.A few things I learned along the way...1. The head cleaner on your printer that's supposed to push ink out can make the problem worse. If you run more than two cycles of the head cleaner, stop and go get Magic Bullet. You're just wasting ink and making a mess.2. Supposedly, you can make your own print head cleaner. I went first with Magic Bullet because it came with the syringes, as well as the rest of the kit, and it was Prime so it arrived quickly.3. Print regularly on your printer. Letting it sit causes the ink to dry on the print head. Regular printing will keep it running smoothly.4. Wear a headlamp or use a flashlight. It's dark inside there.5. Lots and lots of paper towels and don't forget the gloves.Thanks, Magic Bullet! Good stuff.
G**B
I'm ordering again!
Wow. And Wow.I had such a clogged printer. It had been sitting for over a year and there was nothing coming out of any nozzle. I could not even get any flow through the syringe in any but one of the heads; not at first at least. But with patience and just getting the Magic Bullet solution in contact with the input ports on the head, they all eventually loosened and I was able to push some solution through.I had to perform a full cleaning twice on each nozzle and a third time on two. I also made a point to change the paper towel beneath the head on each nozzle cleaning. That allowed me to see the ink and notice that the last of the 2 ml of solution actually came through clear.But I am amazed. There is no way I could have salvaged that print head without this product, the right tools to deliver the solution, and the You Tube videos to show me how.My printer is an Epson Artisan 1430 Wide carriage.
Q**E
Print Head Cleaner and Unblocker Kit (Magic Bullet)
I have an Epson Artisan 837. I had to print 200 bookmarks. First 100 printed perfectly. Second batch colors were way off. The Cyan and Yellow weren’t printing. Did 2 or 3 head cleanings - nothing. Didn’t want to buy another printer so I tried the Magic Bullet Print Head Cleaner and Unblocker Kit. I liked that it had two syringes and I did both clogged heads at the same time. I left them in for about 3 hrs. - not 30 minutes that it suggested. I pushed the cleaner fluid in a couple of times and sucked it back up the same before removing them. Did a test print paper and the Cyan and Yellow bars showed up but faintly and with bands. I thought I would have to do the process all over again but decided to print one bookmark to see how it looked. It came out perfect! I quickly printed the last 100 and they were all great. What a relief since I needed them to be done in two days. I don’t know if I wasn’t using those two colors enough and the heads clogged up but I read afterwards that you should print out a rainbow picture or a picture with lots of coloring it EVERY DAY to keep the ink cartridge heads from clogging up. I really love my Epson Artisan 837 and I did not want to have to replace it. Magic Bullet saved me from having to do that. I am THRILLED with this product. It was worth every penny! BTW - make sure you use the plastic gloves! Great product!
S**H
Worked for fixing our IPF760 Print Head Error
We purchased a used IPF760 for quite a steal, knowing full well the price they were selling it for it probably wasn't "in perfect working order" when they discontinued use. Low and behold initial setup we found the printer had a "print head error" and was requiring a replacement. With the print heads running between $350-$450 depending on if you are willing to risk buying from a non-authorized Canon seller, we figured we'd give this stuff a shot. We followed a video we found online and initially thought it was a done deal when one of the nozzles was clearly blocked after a long-overnight soak (a rubber gasket expanded in size vs. expelling the liquid out the nozzle). We let the liquid sit inside there for around 5-6 hours and tried to push it through and it worked. Stuff cleared out the blockage and saved us from a costly new printhead. Obviously this is a replacement part and some day we will have to replace vs using this product but for the time being we're happy.Downside, it only has enough product for 1 try. Theoretically this is enough and for the cost still totally worth it, but if you read about these print head problems, they occur because of infrequent use of the large format printers and in our business that will likely be the case as well so I wouldn't be surprised if we have to buy more. In the meantime we will try to at least run test prints periodically.
C**L
It does work !!
I have an Epson Artisan 1430 that's been sitting unused with pigment ink CISS installed for over 4 years, all inks in the CISS were dried up, and when I needed to use it recently and replaced with new dye ink tanks, all 6 color print heads were clogged and the blank one was 100% clogged while the others were partially clogged. Some I was able to clear after 10+ times of head cleaning but the black printhead was still 100% unusable. I even gone to remove and soak the printhead with windex and alcohol with no luck. This was my last resort before having to certify my printer as dead. As advertised, it helped getting it back to 100% clear. I practically had to force inject the solution into the black nozzle, but after 4-6 clean, I have to say that it helped my case. Epson doesn't use heating elements to expel ink from the nozzles while HP does (At least on many of their model), so I'd say this solution will work on printers that doesn't use heat to expel inks. It may not worth it for the lower end printers since the cost of the solution isn't cheap and by the time I'm done, I used more than half of the tiny bottle. But I must say that it worked and saved my printer. I was able to print over 50 photos without any issues after the cleaning that night. The included TWO injectors and tubing really helped me. I used one on the black inlet while using the other one to draw addition solution and swap without having to contaminate anything.
J**C
it works! hot dam it works, no thanks to epson.
I own a Epson ET-7700 printer, and I only own for a year now because it's one of the few Epson tank printers that has photo black and bulk ink black for text printing. and still prints on dvd'r discs. my bulk black ink head had gone down 10% before it stopped working so If I do what Epson's tells you to do, that is run all the cleaning modes on the printer none of them seem to work or was readable.I got this kit and I first was a little skeptical about doing it because I have never performed open heart surgery on a printer. but I very much do recommend to you try if you feel comfortable doing so and understand you are voiding your warranty by doing so, if you do so watch the videos on youtube maybe watch 3 or 5 of them before you buy this and do this. but if done right it does work and I am so happy because this printer was wasting ink like you never seen.ohh you will need needle nose pliers, if you don't have a set buy them with this.Good luck my friend and give this a try just don't do it on a weekday. take your time watch some videos about how to do it right, clog printerhead and it will work.. but don't do it tell you understand them clearly.
U**R
It works
I was given an Epson 215 that hasn't printed for more than 5 years and the ink was all dried up in it. I managed to get it to print again with this kit after one cleaning. There are still issues, it's not fully unclogged and I'll have to do it a second time (probably let it the liquid soak longer), but I'm very satisfied with the kit that comes here and the youtube video link on the card that explains how to use it. You do need to push the straws hard to get them on the print cones. A couple of other reviews say it broke their printers.. I do not understand how it could. It's a liquid that you push slowly through a straw, which will dissolve the ink, that's all. You're going to have to print 5 to 10 pages before the printer prints well again so that the cleaner is flushed out. If you ran head cleaning many times, maybe your ink cartridges are empty, or they were dried too, so watch out for that as well. It's not the fault of this kit if you also ran out of ink.
A**R
It destroyed my printhead.
Syringe and tubes were fine, it worked with Windex with warm water, and I quickly scanned which was what I needed (I couldn't use my all in one printer due to the nozzle blockage. Then I used this magic liquid. I read the instruction guide and followed all steps, thinking i wanted to have a perfection. But it rather destroyed my printer...... it gave me another error code on my Epson printer. And my printhead didn't work at all. I thought I should've stopped when I tried it with WIndex, at least I was able to use the printer without any error code. Now I'll throw it out and will just buy a laser one.
S**P
Worked for my R2000!
I took a chance on this product to clear a blocked print head on my R2000 printer. It hadn't been sitting for very long and was only slightly blocked but doing the built in head cleaning only marginally improved the print.I purchased this and followed the instructions included and the video on their website. The syringe's tubes are a bit of a choir to get on the top of the printer head feed needles but once on there it worked sealed nicely. I only had one really clogged print head so I shot 2ml of fluid through it. I placed a piece of paper towel underneath the print head before doing this as the video suggests. The papertowel collected all the runoff and I performed a print head cleaning to clear out any fluid. I did an alignment check afterwards and it came out perfect.
Trustpilot
1 day ago
3 weeks ago
