Desertcart purchases this item on your behalf and handles shipping, customs, and support to Argentina.
🔥 Elevate your backyard BBQ game with pro-level smoking precision!
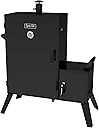
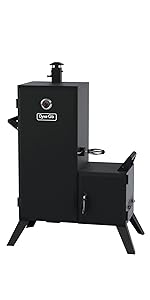
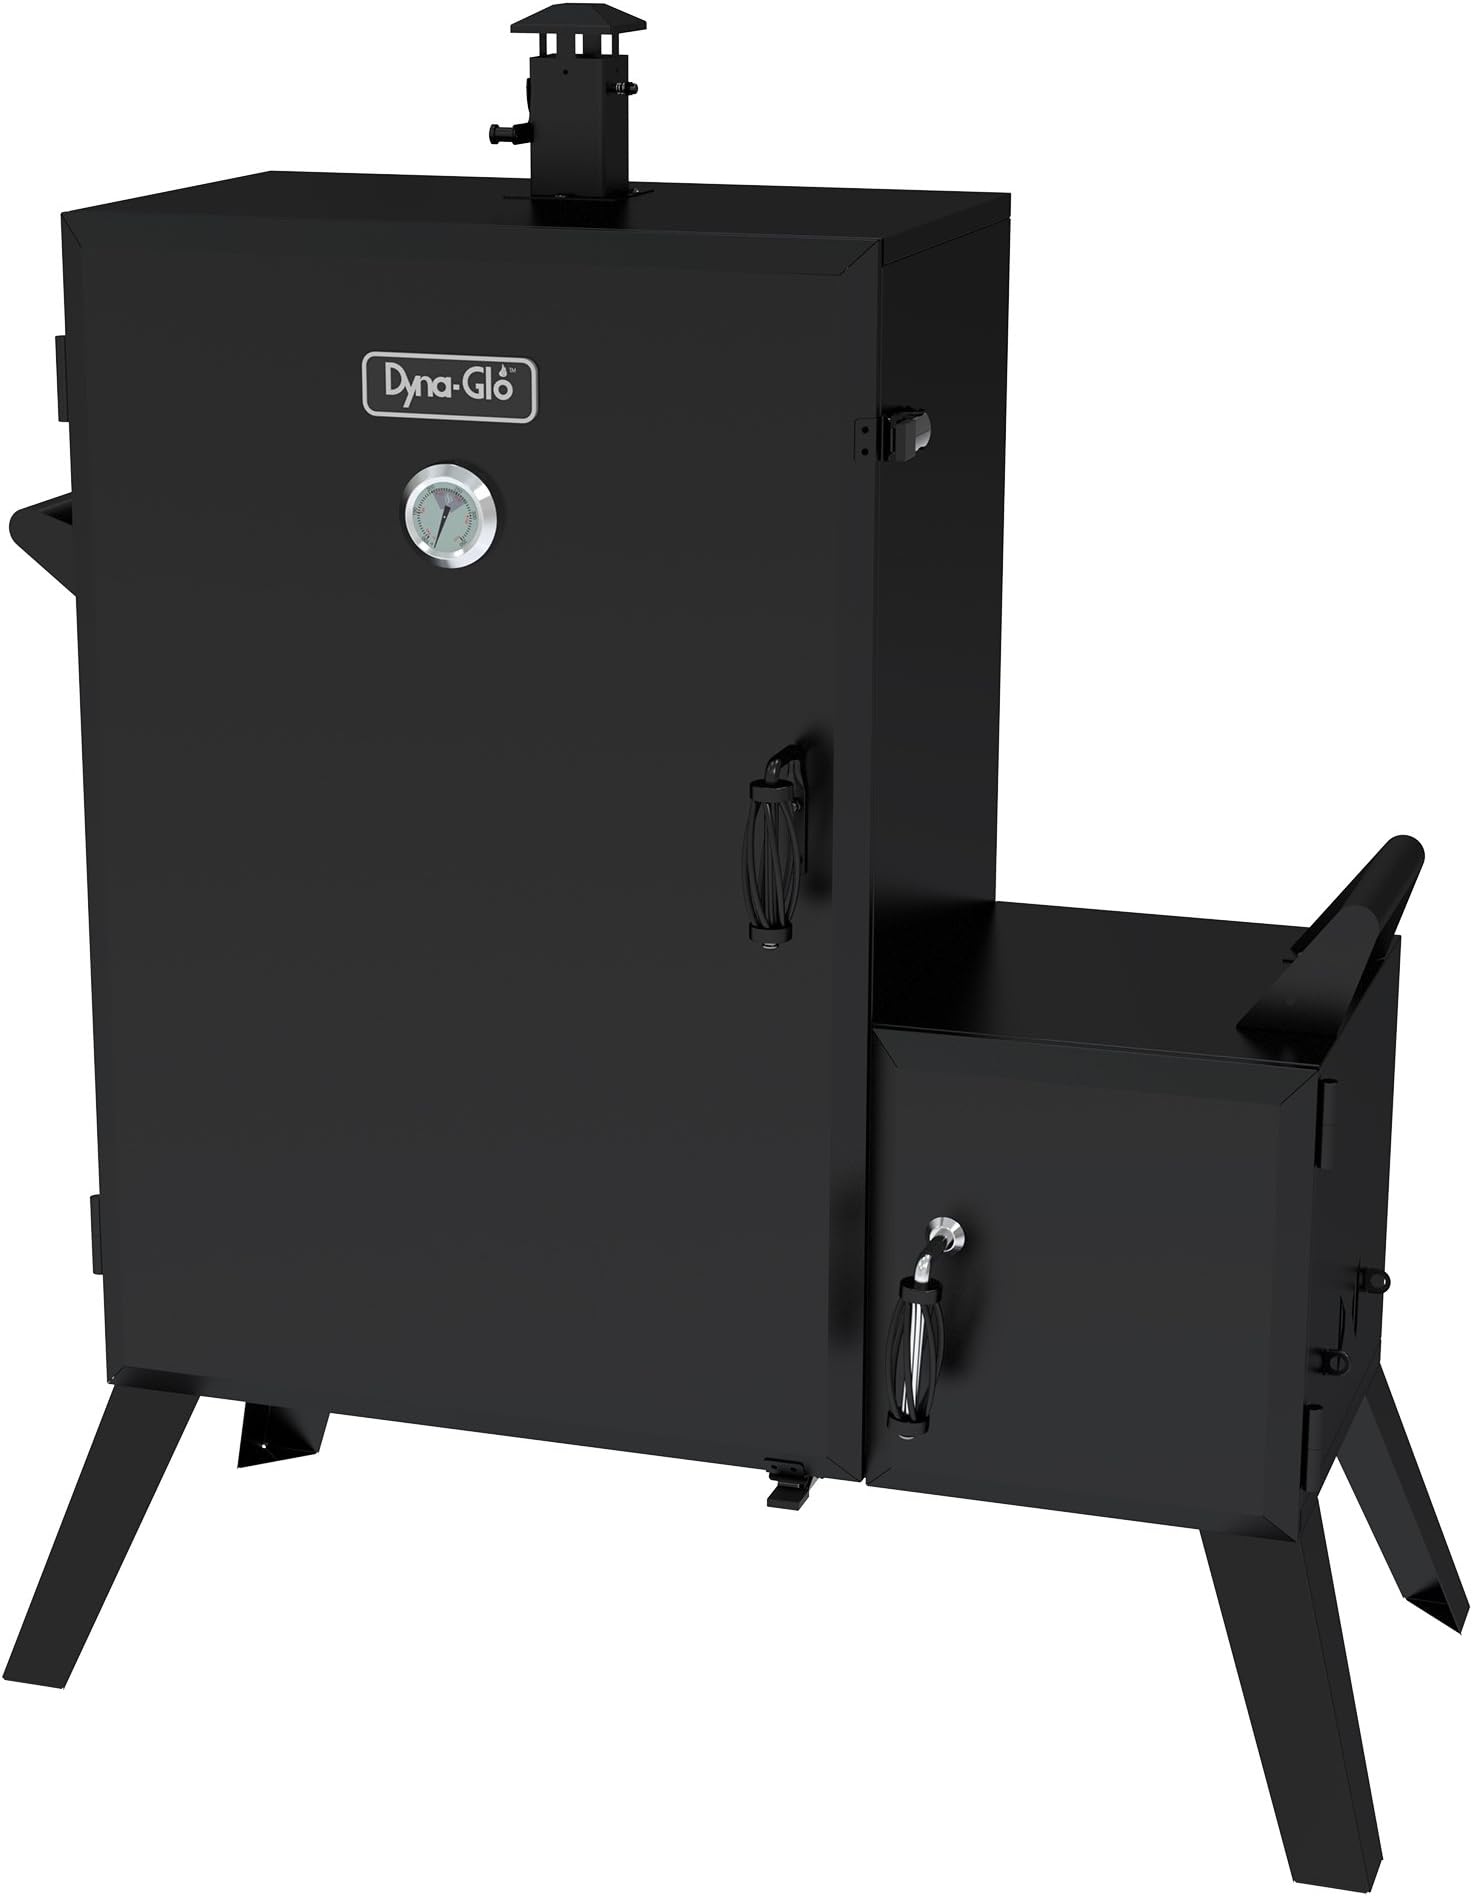
The DGO1890BDC-D Wide Body Vertical Offset Charcoal Smoker offers 1890 square inches of cooking space across six adjustable grates, each supporting up to 25 pounds. Its porcelain-enameled steel charcoal chamber optimizes burn efficiency, while a removable ash pan enables hours of maintenance-free cooking. The vertical offset design enhances heat circulation and smoke flavor, complemented by an adjustable flue and built-in stainless steel thermometer for precise temperature control.


| ASIN | B010759GGQ |
| Best Sellers Rank | #56,523 in Patio, Lawn & Garden ( See Top 100 in Patio, Lawn & Garden ) #68 in Outdoor Smokers |
| Brand | Dyna-Glo |
| Brand Name | Dyna-Glo |
| Color | Black |
| Customer Reviews | 4.5 out of 5 stars 5,357 Reviews |
| Fuel Type | Charcoal |
| Global Trade Identification Number | 00043924494456, 00872076029854 |
| Inner Material | stainless_steel |
| Item Dimensions D x W x H | 21"D x 43.3"W x 50.2"H |
| Item Weight | 83 pounds |
| Manufacturer | GHP Group Inc. |
| Model Name | Dyna-Glo DGO1890BDC-D |
| Model Number | DGO1890BDC-D |
| Number of Items | 1 |
| Outer Material | Stainless Steel, Steel |
| Part Number | DGO1890BDC-D |
| Power Source | Charcoal |
| UPC | 872076029854 043924494456 |
D**N
Add hi-temp silicone sealant and door gaskets for perfection
Been absolutely LOVING this thing for a few months now. I've smoked pork butts, chicken breasts, and pork ribs in this several times with AWESOME results. Assembly wasn't bad at all, putting it together myself. I'm pretty mechanically inclined, though. Used a two-wheel dolly to support one end of the thing as I put the legs on one side and then the other - not because it was heavy at all, but rather simply because it just would've been awkward otherwise. I used Permatex hi-temp RTV silicone on all the seams/connections during assembly (more on that later) - the red might look ugly to some, but hey, it's a functional item, not a display piece, so who cares. Previously, I was using a cheap offset barrel-type smoker setup. It was SUPER inefficient because of heat loss and poor design. For example, for a 7-pound pork butt on that thing, it took me almost 12 hours to get it up to 200 degrees; with a 6-pound pork butt in THIS smoker, however, it only took me about 7 hours, AND it literally used half as much fuel. I can get about 90 minutes at a time per load with fuel. I load a charcoal chimney full of either Kingsford briquettes or Royal Oak/El Diablo chunk charcoal as a starter, dump it in there, and top it with a single split of whatever flavor wood I'm using (mesquite, hickory, applewood, etc.), and after 30 minutes, I'm good for at least an hour; after that, I give the tray a shake every 30 minutes to shake down the ashes to keep the fire from smothering itself. Each load gets me about 90 minutes at a time - full load of charcoal and one wood good-sized wood split or a few wood chunks for smoke flavoring. I keep the intake vents wide-open during smoking and use the top vent to control temps; initially, I run it wide-open, but once it's up to temp (between 225 and 250), I close it down one or two notches and it holds pretty steady. The top vent doesn't close 100% completely unless you modify it by grinding off the tabs, but it works fine as-is. IT IS ABSOLUTELY IMPERATIVE THAT YOU SEAL THIS UNIT COMPLETELY BEFORE USING IT. By that I mean, use some hi-temp RTV silicone sealant (the red stuff) on ALL of the exterior seams AND between the side box and main smoker chamber DURING INITIAL ASSEMBLY. Just apply RTV to all the seams wherever you see connecting lines and anywhere you can see daylight from within the smoker box. DO NOT wait until after it's assembled to try to seal it up, because taking it apart to seal it is a giant hassle. Also, get some hi-temp sealant felt (BBQ gasket tape) to put around the inside of the charcoal side box door. Without it, the door is clunky and has a HUGE gap that will absolutely leak heat/smoke; when properly sealed, it will make a HUGE difference in temp control and smoke retention, it costs very little, and it's super easy to apply. Extra tip: ADD AN ANGLED HEAT DEFLECTOR to the bottom of the smoker between the side firebox and the main smoker chamber. Basically, anything that sorta spreads the heat out more evenly from the bottom so you don't wind up with everything on the right side of the smoker getting ALL of the heat and everything on the left hardly getting any heat at all. I used some perforated aluminum material I folded over double and then covered with aluminum foil (which I replace as it gets grease grips upon it) to help deflect the direct heat and spread it more evenly. I now get pretty even heating temps at around the midway point of the smoking chamber from right to left. The firebox has an extra layer of metal within that sorta-kinda insulates the part above it to retain heat and prevent the finish from burning off like it does in cheap barrel-type offset smokers. Also, the latches at the top and bottom, while not ideal in ease of use, are at least secure and snug, and the rope gasket around the main smoker chamber door, while not perfect and not 100% leak-free, is good material and does well enough. Pretty good design overall, especially for the money. The factory temp gauge is SOMEWHAT accurate, but it is SUUUUUUUPER slow to change its temperature reading. Like, temp changes that take just a couple of minutes with my cheap digital thermometer probes take over 15 minutes to show up on the factory temp gauge. Of course, using your own digital temp probes will yield the most accurate results, and the factory temp gauge CAN be replaced with a better aftermarket one if you want, but as it is, at least it gives you a somewhat accurate ballpark temp reading at a glance without any additional investment. Lastly, there is a TON of space inside this smoker - more than I'll likely ever need or fully utilize. I fed 15 people with huge chicken breasts and a pork loin from this thing (in one load) for a party and I STILL had plenty of room to spare. I'm still playing with this thing at least once a week to learn its capabilities, and I have yet to utilize the sausage hangers or other features. I've only AT MOST used three racks at a time and still managed to produce enough meat to feed a small army of people. Pulled pork and ribs out of this smoker have been beyond AMAZING with nothing more than good seasoning, foil wrapping, and proper wood selection (I tend to favor hickory for pork smoking), and while it's not a set-it-and-forget-it affair like a digital pellet smoker, it's about as close as you can really get with a charcoal setup. No worries about running too hot and cracking ceramic plates or overheating and taking forever to cool down, or sudden drops in temp, or anything like that. It almost makes charcoal smoking too easy. Choose the right fuel and wood for the right meat(s), check your temp and fuel level every 30 minutes, and you'll have pretty easy and consistent results. Great for beginner to intermediate smokers. Heck, maybe even good for advanced smokers who want something that doesn't require a lot of effort or tinkering. Only problem I have now is my family is probably going to get burnt-out on smoked meats eventually because I want to use this thing darn near every week. Well, that and the fact that charcoal is kinda hard to get for the winter half of the year. I researched A LOT before buying this, and I have ZERO regrets. ABSOLUTELY 100% RECOMMENDED for any beginner, intermediate, casual, or even a low-end competition smoker. Haven't had a chance yet to smoke up some meats for my squad at work to get their official opinion, but after the easy and awesome results I've had thus far, I have full confidence in being able to produce some super duper OM NOM NOM quality BBQ for my people for the holidays!
B**O
DO NOT BUY WIDE! Standard size will handle any size meat!
For $5 you can make a few mods that will accomadate any size protein. I did a 15b brisket. You need a stainless steel u-bolt, washers, nuts and an S hook to hang your meat string netting. I looked into the netting and I ended up buying (The Sausage Maker TSM Meat Netting Roll, Size 28) This will handle medium and large pieces of meat. You will have to drill 2 holes and install U-bolt furthest away from the fire holes. (after using it Christmas eve I intend to install another U-bolt for 2 racks of ribs). You will also need (LavaLock RTV 650 F BBQ Grill Smoker Sealer Hi Temp Silicon Adhesive 3 oz) and (LavaLock 12 GREY High Performance BBQ gasket smoker seal SELF STICK) to seal any openings that will leak heat and smoke. When using the sealant be sure to seal every thing except the handle hole. That will be the only place that you will have smoke leakage after you are finished. I even had smoke coming out of the thermometer hole above the nut, so be sure to seal around there also. There is plenty of sealant so I sealed all exterior parts even the chimney and nuts. I don't think they were areas of leakage but the smoker will be outside and I don't want water to accumulate between the parts and smoker and rust anything out. I know there are people complaining about the RED sealant but quit crying and buy a can of high temp spray. You can see in the photos that it works really well. I have 3 smokers now and none have covers. Out of sight, out of mind. You will use them more often if you SEE them. My neighbors have covers and they hardly ever use them. I use mine every weekend in the summer. Getting the meat in the tight netting is tricky. Season your meat heavily before putting it in netting. Measure a piece of netting that the meat will fit in. Better to have more than enough, you can trim the excess off. Tie a knot in the netting FIRST before you cut the section off. Cut a plastic grocery bag and place the meat in it and wrap it ONCE tight. It should not have any exposed meat showing. Pull the section of netting that you cut off the roll around the plastic bag and when it is completely in, pull the bag out and then tie the second knot in the netting and hang it on the S hook. Sorry, I couldn't take photos of that because I was wearing latex gloves and couldn't handle a phone. The reason I say Standard is better is because I didn't have to turn my meat at any time and it looks really cool with the markings on it. So save your self some money and space on your deck and just modify it. Hope this helps some of you out there. Enjoy! There is a another comment posted on the 25th That the downfall is the offset firebox???? The best part of a smoker is the offset! That the grate doesn't fit in the 2 holes in the ash pan?? THE GRATE DOESN'T GO THERE! It has brackets on TOP of the ash pan that it slides into. Also, the grate can't tilt into the ash pan because it doesn't even touch it! People really need to read directions (if you have any common sense, you can do this without instructions) and PLEASE learn basic bbq (youtube) before attempting to smoke meat. It took 8 lbs of charcoal ash to fill that tray and lighting it was even easier. I used (MEECO’S RED DEVIL Firelighting Squares, 144 pieces) and I used 2 squares at the bottom of the GRATE and then placed charcoal on top of the squares. I think it would have worked with one square. Slide the ash tray completely out of the firebox, slide the grate halfway out and light the squares from underneath the grate. Once you see that the squares are on fire, slide the grate back in and then slide the ash tray in until it is directly underneath the grate. Leave the firebox door open until you see that some of the charcoal is lit, it takes about 15 minutes. To refill the charcoal holder, open smoker door and rattle the grate so excess ash will fall off charcoal, pull out grate halfway and pour charcoal right out of the bag onto the holder. Shut firebox door and you're done. The only thing dangerous about this smoker are the inexperienced that are attempting to use it. If you look at my photos you will see a large piece of flashing I purchased at the lumber yard for $15. I took measurements and they happened to have something that fit. That part was not in the instructions, I just thought it would make good sense to use underneath. (just common sense folks) Also, this smoker would not be easy to disassemble if the person would have assembled it properly with SEALANT! I will say that after using it once, the smoker is hotter than the thermostat shows. Calibrate yourself by setting a thermometer inside or holding it on top of chimney and checking what it really is. Don't buy a new one thermometer. I am just going to make sure to keep it below 200 degrees from now on. Hope this helps everyone that is serious about smoking. This is my first Dynaglo and there is nothing wrong with this unit! You are not going to get a smoker like this for under $200. I sold my $4000 smoker/trailer 4 years ago and this smokes meat just as good as that one, but just not as much. UPDATE>>>After experimenting....If you wrap foil around a rack and set it on the bottom (see turkey photo), it will keep the temperature at 200 degrees F. I was able to put a 25lb turkey on a sling made from the netting and smoked it for 4 hours and then removed it and put it in an oven roasting bag (breast down) for 3 hours in the OVEN to tenderize it and the breast fell off the bone. Someone sent me a question about smoking cheese....YES YOU CAN!!!...I smoke almonds, chicken feet, and Himalayan salt also. Go to Goodwill and buy couple of plates that will fit your smoker and pour it right in, place on racks and start smoking! Go to YouTube and search "smoking cheese" and get several results. Watch a few videos, steal some ideas, put them all together and do it YOUR WAY. Try to keep your smoking at 160 or below if you do jerky, chicken feet (for dog treats), almonds and other recipes. Chicken feet are great for arthritis, and 450 mgs of glucosamine each. If your smoker hits 200 degrees, dehydration becomes baking.. You want to cold smoke these smaller bits. Watch videos on whatever you want to smoke, dehydrate or cook.
R**K
Great smoker once you figure out your particular quirks
I chose this smoker because I wanted to be able to do full racks of ribs. I've been happy to say that I've succeeded in that. I've also done full pork loins, split chicken breasts, leg quarters, and drumsticks, as well as a brisket and a turkey. Here's my experience. Assembly ========= This was pretty easy, but a few pieces didn't fit together quite as tightly as I would have liked - notably, where the firebox joins with the smoker body. This turned out to not be a big deal. Many other people have recommended sealing the gaps with heat-resistant silicone or the firebox door with gasket and I tried this; I found no significant difference before and after. I did manage to break the temperature gauge while tightening it - the connector is much less sturdy than it appears and it was easy to over-tighten. I replaced it with a different gauge and haven't had any trouble. They recommend two people to construct it, but I was able to put it together myself carefully. It is heavy, so be careful. The handles make it convenient to relocate if needed, but I haven't needed to do so. Temperature Control ================== It is very easy to get started and charcoal does a great job. Use lots more than you think you may need - don't skimp. I've tried with hardwood chunks as well as wet wood chips in aluminum and both worked well. The hardwood makes it a little hotter (it burns nicely) but I think the chips made better smoke. The down side is that while you can initially get it up to temperature around 225°F-250°F, it quickly drops down to 175°F and stays there. I tried multiple vent settings, adding more charcoal, leaving the doors closed longer, and so on, but I couldn't break that barrier until I learned the secret. THE SECRET: Air flow. Keep the upper damper open. Use the lower damper on the firebox for controlling the temperature. But even with that, YOU NEED GOOD AIR FLOW. In my back yard, I didn't have enough air going in the lower dampers, so the fire got too cool. I fixed this with a small portable fan a couple of feet away, and just blow the air in the dampers. This way, I was easily able to get my temperature steady at 225°F for several hours, adding fresh charcoal and hardwood along the way. I use the lower damper to control the temperature. The Cooking ================== I have had great success with bone-in split chicken breast. The meat is thick enough to keep the juice well and the smoke penetrates wonderfully. Use a dry seasoning with some flavor to it. 2.5 to 3 hours works well. A whole pork loin also works out very well. The meat is thicker and can really hold up to the smoke. Again, the dry rub seasoning is great. Be careful of getting too much salt into the meat. 2.5 to 3.5 hours seems to be about right. Chicken legs and leg quarters also work well, but because they are smaller you need to pay closer attention and cook for a shorter time - maybe 2 to 2.5 hours. The turkey worked nicely but I had to remove a couple of shelves to make it fit. It was a 14lb bird but could easily accommodate more. Be sure to thaw it fully first. I did not do any tenting. It cooked in about 4 hours. Pork ribs have come out wonderfully. I've done them standing in the rib rack as well as flat on the grills and both ways are great. 3 hours is fine. I've done with a dry rub several times, and the last time I added BBQ sauce with a brush about an hour before finishing, which added a great caramelized layer. The meat will literally fall off the bones when you get it right. Brisket worked, but I had less success. I need more experimentation here; I'm sure it's a problem with the chef and not with the smoker itself. I easily fit a 10lb brisket on once shelf but had to remove the one above it to make room. The smoker will hold enough for a small army or decent-sized family reunion. Easily 6-8 breasts per shelf, 10-12 leg quarters, 2 pork loins, or a rack of ribs flat. If you go for something larger, you'll need to shift a couple of the shelves. BIG WARNING: The right side of the smoker body gets significantly hotter than the left side. You will want to check and rotate your meat regularly. I strongly recommend a good multi-probe thermometer so you can check temps in different spots. COOKING TIP: Take the food off 30 minutes BEFORE you think it's done. Because it probably is. Remember the resting time is needed afterward and the food will continue cooking after that time. This is probably my biggest error and results in slightly drier food, but overall no one has complained. Use that meat thermometer and give yourself a 5°-10° head start. CARVING TIP: For ribs and brisket, as well as turkey, invest in a good HEAVY knife. I ended up cutting through bone when slicing ribs into pieces the last time. Watch your fingers!!! After packing the food into the refrigerator, you'll smell that great smoke every time you open the door. Accessories ========= Get a good pair of heavy-duty heat-resistant silicone gloves. You'll need them to put things in and out of the smoker or to add more charcoal to the firebox. I burned my fingers through a pair of light welding gloves. Use a vice-grip to move the fire grate around because prolonged contact will go through almost anything. Get yourself a good instant-read thermometer, or a multi-probe wireless one is even better. You'll want to use it to determine food done-ness instead of eyeballing. Get that carving knife I mentioned, and a meat fork too. Have a heat-resistant table handy near the smoker - it'll make it easier to take things off the shelves because you can just pull them out and quickly close the smoker door again. Get some BIG cutting boards so you can slice the meat and display it. It'll be worth it!
B**.
Great smoker for the money
Update: Almost 3 years later, smoker is still going great! I just took the firebox off and sanded off the surface rust and resprayed with some bbq spray paint. I have no doubts the smoker will last many more years. I did quite a bit of research before buying this smoker, most of the recommendations I found on the internet were either to get a cheap Brinkmann for ~$75 or spend $300 on a Weber Smokey Mountain, with the later being the "gold standard" for introductory smokers. I really did not want to buy a WSM and deal with taking off the barrel every time I needed to check the meat/water pan/charcoal - I'm sure that works fine for many but I much prefer the vertical box configuration, especially with the offset fire box. I found the Dyna-Glo on Amazon and it seemed like a good mid-point between the two, and that is exactly what I got! After using this smoker a few times, I would highly recommend it. It certainly has better build quality than the Brinkmann and is half the price of the WSM with much better usability in my opinion. Assembly was really straightforward and everything was packed nicely. One word of caution, don't stand the smoker on the bottom before putting the legs on - there are small metal rails for the grease tray that I bent doing this, although they were easy enough to bend back. Usability is great, the charcoal box is sturdy and makes tending to the charcoal a breeze. The multi-rack configuration allows you to customize the racks to fit large hunks o meat while still maximizing your smoking capacity. My one complaint is that it was tough to get the screws on the vent set to the right tightness to allow the vent to be adjusted. Prior to smoking, there is no problem, however once the smoker heats up, the metal expands and the vent won't move - this was an easy fix to just loosen the screws, however I wish the screws were a bit longer with a locking nut on them. It's very possible that these were set correctly from the factory (the screws were pre-installed) and I just tightened them during assembly in error. Does the smoker seal up air tight around the doors? No, some smoke leaks out at the top, however given the price point, its well within my expectations. If you want a smoker that is completely sealed up, you're going to have to spend twice as much, or just get some gasket to seal it up (which I plan on doing). The handles and vertical design make this smoker very easy to move around - doable by myself but much easier with two people, specifically due to the bulkiness - its a little unwieldy to get a grip on both handles, but honestly I'm not going to be lugging this thing long distances so I don't really care. Finally, I will say that their (GHP Group) customer service is FANTASTIC! Honestly, I didn't expect much, not knowing the company, but after emailing about a missing screw (found it on the floor, must have fallen out during unpacking), the representative responded within 24 hours, proactively registered my warranty and was just super helpful and nice. She was easily on par or better than Amazon's typical customer service. Overall, 5/5 stars, I highly recommend this smoker.
J**I
Dyna-Glo Wide Body Vertical Smoker (DGO1890BDC-D)
The smoker arrived and was undamaged. I reviewed the advice for mods and also ordered some silicone sealant and a gasket. I used the silicone during assembly of the firebox to the cooking chamber, but I did not need the gasket. Assembly was straight forward, the parts fit together, no issues. After an overnight dry for the silicone, I fired up the smoker to season it. We used lump charcoal and this was started with a chimney starter. The chimney held about the same volume as the firebox basket. With the vents open and the doors closed, the temp peaked at about 310°. The day was 72°, partially sunny, slight breeze, and the smoker was in the open. I used a remote reading thermometer, with the probe in the center of the cooker chamber. The reading was very close to the unit mounted thermometer. First Cook We did two full racks of ribs. These were trimmed and you could probably fit two of them, with some overlap onto one rack, but I did one rib rack on one grill rack each. I also used a grill rack on the lowest height, with a pan of water. During the cook, I added more fuel, but you need to be careful as to not smother the fire by dumping fuel on top of the fire. You can do this two ways: 1. Start a small amount of charcoal in your chimney, then add the burning fuel to the fire, or... 2. Carefully move the burning charcoal in the firebox to the front of the box, then add your new fuel in the back. I found that the smoker was very tight and that the temperature maintained very well. I did not have to fiddle with the vents very much, I cooked at around 280° for 5 hours. The remote read thermometer had a second probe for food. So when the rib probe registered around 180°, the vents were shut on the firebox. This is where the unit could have been more airtight, as the fire did not damp down as much as I would like. I've used a Weber for decades and this is one of the Weber's key features, is to be able to close down the fire with the vents. I did take the ribs out and wrap then in foil, then back in the smoker for about two hours. The First Cook Result The rib were delicious! I know that they are supposed to have a “bite” and not fall off the bone, these were falling of the bone and I like them like that. They were really, really, good, I was impressed with the results of the first cook. Comments For the amount of money I paid for this smoker, it’s a tremendous value. Yes, the metal is thin and the build quality is what you expect from an imported unit like this (which is to say good, not great). I would have liked the unit firebox vent to be more airtight. The grill racks are well made and very large. You could cook a ton of meat with this smoker. The unit is heavy and I would not drag it, as the legs don’t look like they would take much abuse. The other thing are the door latches, the side one is fine, but the bottom one is very difficult to operate. This would be hard to latch in low light situations, plus you have to bend over and underneath to get to it. All that said about the latch, I’m glad they have one there, as once the door is secured, the box is very tight and retains an even, constant internal temp. I have a propane vertical smoker which I like. You just set it and forget it. But I see myself using this new smoker all the time. I would recommend this unit to everyone looking for a charcoal/wood powered smoker.
E**C
I was on the fence about purchasing this for a long time
I'm absolutely glad that I did though. There are a lot of reviews saying that it leaks and has trouble holding consistent temperature. This wasn't the case for me. There are some small gaps between the firebox and body of the smoker, but they don't seem to negatively affect performance. It comes up to temperature quickly and will hold for hours. I run the chimney fully open and adjust the damper on the firebox to hit my desired temp. Your experience may vary depending on climate, but in the hot, dry central valley of California this thing performs amazing. In really cold areas I could see this needing some extra insulation since it is made of really thin sheet metal. Or you could use it for low temp smoking during the winter months. I have been using it every weekend since I received it for everything from brisket to poultry to pork to cured meats like bacon. The real trick is learning to manage the firebox to hit the temps you want. It isn't as simple as a pellet grill, but it's half the price of a cheaper pellet grill with way more cooking space and once you get fire management figured out the results are so much better. To be honest, it beats out my WSM that I have been using for years. Not only does it have way more cooking space and hold temps more reliably, but it is an actual offset. So by it's very nature, it cooks with indirect heat. Now for the cons. The metal is thin, so if you're cooking in windy or cold conditions it might not hold temps as well. The fire box opens directly into the cooking chamber, which can lead to higher temps on the side next to the firebox. This is easily remidied by adding a disposable aluminum pan to the lowest rack which can also act as a water pan, do not really a big deal. The fire will also have to be tended to every few hours. Like I said, this isn't a set it and forget it machine like a pellet grill. Also, if you want to hit a lower smoking temp like the 150°-180° range, it will take more tending. You're pretty much limited to 20-30 briquettes and 1-2 small chunks of wood at a time, so they will need to be replenished more often. Overall I really like this smoker. It's a good compromise between the WSM and much more expensive offsets as long as you learn to work within its limitations.
R**L
Overall this is a good Cheap Offset Smoker
Overall this is a good Cheap Offset Smoker (COS) for the price of $150. Dyna-Glo could do much better with just a little more quality control. In order to get the correct air-tight door seals, you must buy separately a roll of 1 x ¼ x 15’ Nomex fire seal and a tube of hi temp RTV sealant. Maybe $20 worth of materials that could be included with the grill purchase. The fire box did not mate up flush with the grill body and requires either Nomex fire seal and/or Hi Temp RTV sealant to be reasonably air tight. I question the location of the mounting studs that secure the fire box to the grill body. They are not located near enough to the corners to bring the pieces together tightly before the thin metal walls flex. The last problem I noted, and I see as a gross negligence of quality control, is the grill grate supports. They are constructed of cheap formed wire that is chrome plated after a very, very poor weld. Four of the supports were broken upon delivery. The remaining supports are so poorly welded that a simple grasp of the two welded pieces will result in breaking them apart easily. So twenty four minutes on hold and 4 minutes of customer service and they are sending a new set of supports. One week later and new grill grate supports received. Workable but still question the durability of such a poor weld. The sheet metal construction of the smoker and fire box seems thick enough for the application, but in great north temps, extra thermal mass would be good. So yesterday it was 34 F in northern WI. With the heat wave I fired up the smoker for the first time. I smoked ½ brisket for 8 hours no crutching. It was perfectly smoked. Despite low outdoor temps, I was able to maintain a constant 225 – 250 F with adding chimney-lite lump charcoal. All the additional prep of adding the fire seal and RTV worked and no whispering traces of smoke were escaping other than out the chimney. I found the chimney butterfly type dampener control to work fine. I left the bottom vent open ¾ wide most of the time and regulated flow and temperature by the top chimney control 225-250 F. I am happy with this grill for the price. If you like to tinker and tend a fire, and play with the vent for the duration of the smoking with natural wood, go for it. Otherwise a simple electric idiot proof smoker may be your thing.
F**D
Great for a budget smoker but needs some help
Made in China. That should sum it up. Listen, if you are looking for a budget smoker, this one is great. It has its flaws but most can be corrected with cheap modifications such as high heat silicone and gaskets. Both of which were easy to apply. But it does have its downfalls... Pros: 1. Large smoke box - can fit maybe 3 or 4 17lb-ish briskets in the smoker 2. Easy to assemble- instructions were not great but assembly remained easy. My unit came with a nut missing that held the vent in place. Vent still works but it is loose. One screw for the firebox was difficult to attach but possible. Will need two people when attaching the firebox or a sturdy set up that allows the firebox support while attaching it. The rest of the unit was a breeze to assemble. 3. Inexpensive - its a great smoker for the price. Not top of the line as far as smokers go, but if you are looking to remain in a tiny budget this works well with some modifications and lots of attention 4. Separate ash tray - the addition of an ash tray under the charcoal box is a welcomed addition. Wish both the ash tray and charcoal box had a system that allowed you to pull them out far enough without appearing as if they will tip over Cons: 1. Fire box is too small - for the size of the smoke box, the fire box seems inadequate. Same with the ash tray, it fills up quickly if you burn through your fire load fast. 2. Thin metal - the box is made of very then metal which would be an issue in colder temperatures. If this is your case, look into investing in a heat resistant blanket, such as one that a welder would use 3. Vent - the air vent is too loose. Fully closed still allows air flow. This makes maintaining temp control difficult. 4. Customer Service - the latch which helps seal the bottom of the smoke box broke off my unit the first day of use. It is held together with two small pins, which popped off and disappeared into the yard (my latch was tight). I contacted customer service same day with no acknowledgement or reply. I also mentioned the missing screw on the air vent. I will have to look for a modification to hold said latch in place. 5. A lot of leaks - there are a lot of areas for smoke and heat to leak. This is easily fixed with high heat silicone but is a testament to the build quality.
I**O
Excelente compra
Nos encanto , pues era para mi esposo y quedó muy contento , es pequeño pero cumple con lo que promete . Y llego en muy buen estado. E visto que a algunos en sus comentarios no les cerraba bien la puerta pero solo es cuestión de hacer presión para que quede bien sellada y no se escape el humo. Excelente para quien va iniciando en el arte del ahumado .
T**K
Not Impressed with the shipping care
Nice product but came with a few small dents and a crack in the top back corner
M**K
The Best Thing I've Ever Purchased
I have never before had food like what I can make in this thing. Better than restaurant quality ribs, burgers, sausages, salmon, pork chops, whole turkeys, chickens, legs of lamb, duck, potatoes. I've smoked butternut squash to use for soup. Smoked apples for pie (and then smoke-baked the pie) and smoked apples for applesauce. I plan to smoke pumpkins for pumpkin pie next fall, and there are likely so many more things that I can smoke that this will keep me going for years. Assembly is not so easy without a 2nd pair of hands. Screw holes don't necessarily line up perfectly and things were a tad crooked and bent. One of the screws that holds the firebox damper in place was missing out of the box. By checking the reviews and watching Youtube videos about this unit I knew I would need to seal it up a little better, so this also required a roll of heat-resistant gasket. I was finally able to assemble the beast, and all in all it's not perfect. The chimney is a little askew. Not all the screws were able to go in the whole way. Even with the gasket, there are spots where smoke escapes. Despite all that, the airflow is more than good enough to get the job done, temperatures stay quite stable. It's not easy to maintain low-n-slow temperatures with the firebox completely full, though, as there's just too much airflow even with the damper closed. So fill the box to 3/4 at most, and with everything closed it sits at 250 for about 1.5 hours before the fuel starts to run low. Knowing what I know now, the only thing I would do different is buy the wide box version instead. This one can't handle a full length rack of ribs, so you need to cut each rack in half and then a whole rack fits on each grate.
J**N
Awesome for the price.
No need for all the modifications people talk about. It holds temp and burns clean blue smoke very well right out if the box. I love the size, love the price, love the classic offset vertical box setup. Nothing but great results with hardwood lump charcoal and a few chunks of wood for flavor. Make sure to buy the cover for it to avoid rust.
R**N
Perfect size for all
Easy to assemble, 10 minutes. Plenty of room for small to big dinner. Simple, no expensive and worth it for the price. NOTE : Hard to control inside temperature but depends what you use it for. I wouldn’t recommend it for specific Temperature controlled cooking but for regular smoking and cooking meat it’s perfect and we even made Baked Apples in it . So delicious
Trustpilot
1 day ago
2 months ago