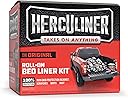
Desertcart purchases this item on your behalf and handles shipping, customs, and support to Argentina.
🛻 Elevate your truck bed game—DIY like a pro, protect like a legend!
The HERCULINER HCL1B8 Roll-on Bed Liner Kit delivers a tough, skid-resistant polyurethane coating that fully cures in 24 hours. Designed for DIY enthusiasts, it bonds to a wide range of surfaces including metal, wood, concrete, and plastics. The kit includes everything needed for professional-grade application, providing durable protection against rust, chemicals, and wear while maintaining a sleek, textured finish.


| ASIN | B0002TDUW4 |
| Best Sellers Rank | #4,264 in Automotive ( See Top 100 in Automotive ) #3 in Truck Bed & Tailgate Bed Liners #229 in Sheet & Pillowcase Sets |
| Brand | J-B Weld |
| Brand Name | J-B Weld |
| Color | Black |
| Color Code | #000000 |
| Customer Reviews | 4.5 out of 5 stars 4,697 Reviews |
| Dry Time In Hours | 24 |
| Finish Type | Brushed |
| Full Cure Time | 24 hours |
| Included Components | Truck Bed Liner |
| Indoor Outdoor Usage | Outdoor |
| Is Waterproof | True |
| Item Form | Liquid |
| Item Type Name | Herculiner Truck Bed Liner - Black Gallon Kit |
| Item Volume | 3785 ml |
| Item Weight | 4.5 kg |
| Manufacturer | J-B Weld |
| Model Name | HCL1B8 |
| Model Number | HCL1B8 |
| Paint Type | Specialty |
| Part Number | HCL1B8 |
| Size | 1 Count (Pack of 1) |
| Special Feature | Skid Resistant, Rust Resistant |
| Special Features | Skid Resistant, Rust Resistant |
| Specific Uses For Product | Exterior |
| Surface Recommendation | Metal, Concrete, Wood, Fiberglass, Rubber, Plastic, PVC |
| Unit Count | 1 Count |
M**H
Excellent Results – Looks Professional!
Excellent Results – Looks Professional!I used the Herculiner HCL1B8 Roll-On Bed Liner Kit (1 Gallon) on the 5.5-foot bed of my 2023 Ford F-150, and I was honestly surprised by how great it turned out. I sanded the entire bed, washed it thoroughly, and cleaned everything with acetone before applying the coating. I applied the first coat, waited about 2 hours for it to dry, and then applied the second coat. The final result looks like it was done by a professional. The finish is even, durable, and has a great texture. I also had about 5% of the product left over after completing the entire bed. This is definitely a lot of work if you're doing it yourself, but if you take your time and follow the preparation steps, it's absolutely worth it. You can save a lot of money and end up with an excellent-looking bed liner. I would definitely recommend this product!
G**N
Excellent product with professional results
Easy to apply! Looks like a pro spayed in bed liner when completed for a fraction of the price. Leaves a heavy protective covering over your truck bed.
J**N
4 months later holding up nice! Looks professionally done
This worked great and saved a ton of money. Not sure what paying a company to spray your bed goes for but i know at least $1,000 like 10 years ago. Probably double that today. Block out an entire day, wake up early, have lots of rubber gloves, knee pads, sanding gloves (harder tip protection), acetone bottle and some extra rollers, paint trays and brushes cant hurt. I used what came with the can, the sand paper, rollers and brushes and it turned out great but the paint brush and rollers hardened after the first coat. Was able to get 2 coats with one can and had a little left over. They make a spray on bed liner than you can use for touch ups over the years or to get spots you may have missed or better straight lines. My only issues were caused by my impatience, not taping off properly and not anticipating the drips. Even though it is thick, its runny when you first opem the can. If i could go back and do it again, i would have used a wooden spoon or cheap long instrument to scoop the thick grit from the bottom of the can and mixed it in the tray with the rest that i poured out. On my last coating it thickened up substantially with a lot more grit than it initially had. First layer was more clear and runny black like water color paint in some spots but as it dried i went back over it, prior to doing the 2nd coat. I lathered this stuff on THICK as well. However, i have a 2024 Colorado with a 5ft x 5ft bed. Use that info to help you plan better for your ride, maybe youll need a spray can to help you finish out or buy another can. All in all, great product. Cheap and reliable so far. No chipping or cracking and it looks great (when its cleaned😂) i’ve been camping several times, turned the back into a pool on the 4th of July and hauled a ton of furniture, wood and a few dump runs and just took the photos after all that. It looks pristine when its cleaned. Everyone has said it looks professionally done
T**N
Just AWESOME, and no need to spray
I've always wanted to do this for my F150, but never had a chance. I've been looking at Rhino as well as Line-X for years, but I wouldn't hand over my truck for a day, since I'm using it all day long, besides, those products are not DIY, nor are they cheap. I just picked up a 95 Jeep Wrangler and it was the perfect opportunity to do this bed-liner. Once it is done, I can use the Jeep and strip down the F150, so this was my test-bed. I'm a heavy DIY guy and I love doing things myself, mostly because I don't trust shops to actually do the job right, well, or up to my standards. I am also a "spray" guy and love to spray everything because from experience, spraying produces much more even layering as well as the added benefit of hitting those really hard to hit areas. Well, first of all, the package was actually very well thought out. The kit comes with a gallon of liner, a scuff pad, a paint brush, a 4" roller handle, and two texture rollers. Granted, I found little use for the paint brush, except to slather off the liner from my stir stick. It does little good for the actual paint-job. The scuff pad - well, most reviewers who give this product a positive review say that this one scuff pad (about 6" square) is enough and all you need. I actually would disagree, but my philosophy is, this liner kit costs roughly $100, will probably take about 1/2 day to do (once you've emptied, stripped and cleaned your vehicle (which would be another 1/2 day to a day, if you had nothing better to do), you should do the job right and do it well. I do lots of powder-coating in my shop and that stuff if HARD to remove. So, if you were to screw this bed-liner up, it will be even HARDER to remove and do again, so spend the extra time to do it right. If Amazon will allow me to upload pictures, I'll upload what I did. In total, it probably took me about 4 hours to remove everything; seats, carpet, roll cage, hooks, screws... you name it. Then it took me 4 nights to not just scrub but strip the paint off to bare steel, with little paint left in the tight corners that my 4" grinder, 6" DA sander and 2" abrasive surfacer couldn't reach. I would say, the interior was about 99.5% stripped to the metal. A 6" square scuff pad wouldn't be able to do that. I went through about 10 6" 40-grit sanding pads, and about 10 2 inch abrasive pads. Once that was all done, I had to mop the interior - twice. Then with the towels. Once I was fairly satisfied, I went over with alcohol. I should have went with acetone, but I didn't have any handy. On to the liner. I still wanted to spray the liner, since I also purchased, the Astro undercoat gun, but never used it. I'll probably use it when I'm ready to coat the underbelly of the Jeep, but that's another day. I tried rolling the tail gate and it came out NICE! Of course, you have to stir the liner in the can to mix up the rubber bits that are all sitting at the bottom. The first coat seems to go on really thin, and I was a bit worried that I had made a mistake, not with rolling but with the Herculiner product. It did look nice though, but you could see some bare metal in some spots, especially tight corners. This was done early Friday evening, so I was able to get the first coat down before the wife called for dinner. After dinner, I went back to the shop to apply the second coat. This was about 1-1/2 hours later and the paint was still tacky in some areas. It still looked nice. I COULD have walked away and called it good, but like I said, it felt a little thin and you could see metal in some tight corners, so I started to apply the second coat. This is why they supply two rollers, since the first would probably dry up and become unusable after you come back for the second coat. The second coat goes on quite thick, maybe 3-4 times thicker than the first coat. I actually like the texture of the first coat better than the second, but the "more texture" look from the second coat is growing on me. It is now Sunday and I've mounted the driver's seat, sat in the chair, dusted up the liner, my 4 year old has been climbing in and jumping out the back, dusting up the rest of the Jeep and it seems to be taking a beating. So far, so good. With the stripping and prepping job that I did on the box, if this liner starts to peel, I'll either say I did it wrong and you need the paint under-coat, or the product is no good. But I've got this stuff all over the shop floor (Jeep floor has drainage holes and I didn't realize it was going to drip through), I'm not sure how I'm going to get that stuff off. I've also got some one my hands, fingers and arms and it's just starting to come off... so don't get any on ya. I wore nitrile gloves, and this liner gets everywhere because you really need to spin the roller to get the liquid all over it, so you will get it on your gloves/fingers, which in turn will get all over YOU. Now, I can't give it a 5-star because I was expecting this to be 'softer', like Rhino. I was led to believe it would be softer because the texture bits are pieces of ground up rubber tires so you would think it's softer and has some give. I think this is some sort of 1-part urethane resin or something, which cures HARD, regardless of the rubber bits within. So, although this stuff is tough, it will rough you up if you fall into it. Oh, I only used about 3/4 of the product so I will probably save it to do under the hood or inside of the fenders. It also looks so good that... get this... even my wife and 16yo daughter love the look of it. So, this stuff is awesome, looks awesome and REALLY easy to do... even without spraying! ------------------------------- -- UPDATE -- ------------------------------- It's now 9/23/2013, obviously it's still holding up but I wanted to mention that I had 3/4 gallon left and I wanted to do the underbelly and/or fenders and/or the roof of the hood. So I removed the hood off the Jeep and I went to town on it with the 6" DA. I didn't go down to the metal like I did the cabin, so we'll see how this holds up, especially with the addition of engine heat. I just applied the first coat so this is fresh in my mind. I'm still planning on doing two coats for the hood and we'll see how the second coat goes. What I wanted to mention is this, if you still have some of the Herculiner left, go buy some texture rollers right away, because when you're ready to coat something else, you won't have the correct rollers and like me, I had some (12") wall texture rollers laying around that I didn't want to go to waste so I cut them in half and started to paint. First of all, the fabric shredded in a weird way that makes it awkward to roll, but that's not the point. These are the fuzzy texture rollers and they leave splotches of rubber bits where you first touch down. Then you start spreading the resin around... mostly without the rubber bits so it's completely uneven. I'm not going to bother getting new texture rollers since I'm hoping this stuff will help deaden some engine noise, nothing more. This doesn't affect my rating on the product at all, just a tip for all you guys planning on using this product.
D**M
Good product
Worked great on my jeep. Easy to apply and is holding up well. I put on two heavy coats and still had some leftover. I did the whole interior of my jeep.
D**S
2000 Tacoma
Painted my work truck with this because there was a bad paint job underneath. The roll on method is a bit patchy but you might have a steadier hand. I'm doing another coat using a foley spray gun to reduce the patchiness. I would recommend doing that from the start of you have access to a compressor. The Herculiner itself is perfect and exactly what you expect. Looks a bit glossy when first applied but then it fades to a clean matte looking finish after a few weeks. I plan to use this on my old motorcycle as well. Looks great if that's the look you're going for
D**T
Phenomenal Product - Some Installation Tips
I put off applying this to my truck, because as others have mentioned, I thought I must be mad to be scuffing my 40K truck to save a few hundred dollars. The truth is my truck originally came with a drop-in liner which I hated, and I really wanted to replace it with something that protected the truck as much as it protected the contents. So there is a video on Herculiner's website that talks about the three easy steps. Let me say that in my case, it wasn't three steps and it wasn't easy. I feel like to do a good job, this application really requires some elbow grease and time. As you can see in my photos, I am extremely happy with the results. Except for a couple of spots where the liner pooled or ran a little, I wouldn't change a thing with the results. However, the installation video and instructions do miss the point a few times. Let me address those: The video and the included scuff pad, insinuate that the scuffing part of the job is a quick, almost trivial step. It is not! It is probably the most important step. I knew that one little scuff pad wasn't going to be enough, and I wasn't brave enough to use an orbital sander or any kind of sandpaper. So I bought a box of 3M Scotch Brite Scuff Pads (https://www.amazon.com/gp/product/B00MBPTH56/), and promptly went through all of them and the included little one in the process. I didn't get down to the primer or anything like that, but I made sure that all surfaces, especially near the back edge, the tail-gate, and the wheel-wells were properly scuffed up. I didn't wash it with soap and water because I didn't have time to wait for it to completely dry. So I blew off all of the paint dust off with an air-hose, wiped it down with rubbing alcohol, and then cleaned it twice with acetone. With humidity in the 70% range and temperature in the 80s, the liner was still very tacky after 4-5 hours, so I let it sit overnight in the garage and applied the 2nd coat after about 14-16 hours. Here is where my installation tips become really important. WEAR A RESPIRATOR! I thought that because I was applying it outside on a breezy day, everything would be OK. Boy was I wrong! That is some strong stuff, and I did not hesitate to wear a proper respirator the next morning with the adequate Vapor Cartridge Filters (https://www.amazon.com/gp/product/B000XBKLLE/). The first coat went on in about 2 hours, and the second coat a little faster. But I definitely felt better after the second coat during which I wore the respirator. Don't make the same mistake I made. Other than the respirator, the other thing you'll probably need is a quality texture roller. I had no issues with the roller on the first coat, but when applying the second coat the plastic roller (the second one included in the kit) began to fall apart almost immediately. It was a pain and a mess having to stop and remove the little bits of plastic that were being left behind by the roller. MY guess is that the very nature of the liner, which is rough and textured, makes the roller disintegrate in the process, which is why the first coat had no issues. So, before you start and have to run to Lowe's or Home Depot mid-project, get yourself something like this roller (https://www.amazon.com/Linzer-RC-119-0900-Texture/dp/B000PSBIF8/), and cut to suit your sized applicator. I know others have mentioned it, but I had no problem with the brush. I discarded it after the first coat, and used another inexpensive one for the second coat. I did remove the tail-gate to make access easier, and honestly I don't think I would want to apply the liner with the tailgate on the truck. One last bit of advice, is to wear double gloves. I was using nitrile gloves but every time I had to change them it was a pain putting the new ones on because my hands were sweaty. On the second day, I started with two gloves on each hand. When I went to change gloves, I just peeled off the top pair, and replaced it with a new set without worrying about sticky hands. The extra work required to scuff the truck, the mandatory respirator, the disintegrating roller, and the additional cure times notwithstanding, I can wholeheartedly say that I love this product and I would use it again if needed.
C**R
Excellent Bed Liner!
I am really impressed with this bed liner kit. It is simple and easy to apply. Kit comes with the 1 gallon can of bed liner, two foam roller applicators, roller and handle, 2" paintbrush, and scouring pad to prep the bed surfaces. The only thing I did not like about the kit was the foam roller applicators. They worked great for game most part but they would start to wear out on the edges and little foam pieces would fall off and get stuck in the wet bed liner. A few tips for a professional job: make sure you prep thoroughly with the scour pad or 120-150 grit sandpaper (just enough to scuff the paint but not removing the primer base all the way to bare metal). I used 120 grit sandpaper for the entire job. Another important tip is masking and cover up. Make sure you use a quality masking tape for this stuff, it will save you a lot of time in the long run. Once you have masked off and applied the bed liner, take a rag with some acetone and wipe down the tape seam so that you don't have to run a razor down your swam later on, this makes pulling the tape up, exponentially easier! Gives you a better finished line too. A third tip would be to strive for evenness. This is some pretty thick stuff so you'll want to make sure it doesn't run or glob. Make sure to constantly stir the can while working too. The product has gritty stuff in it so you'll want to stir it up pretty good to keep it suspended in the medium. Also, when using the brush, rather than using a painting motion, just dab it aggressively to keep the textured feel that the rollers give. Cleanup is important to do right away with acetone and wearing old clothes and rubber gloves is a must! I got some of this stuff on my arm and it's still on me three days later. I would recommend this product to anyone looking for a superior bed liner for the price!
R**B
... you are going to apply this product i highly recommend watching some videos before you do so
If you are going to apply this product i highly recommend watching some videos before you do so!! there are many little things that are worth knowing before you apply product. bought this over a year ago and it sat in the garage.. decided to apply it finally. a couple videos said stir thoroughly, they were under exaggerating i think... you need to stir this stuff a lot. it takes a while by hand but it will mix. Cons: most videos said it takes between 1-4 hours to set or become "not tacky" for your second coat i found it took over 6 hours until it became not tacky. not the end of the world just manage your time accordingly. i was warned but in a video one man explains that this is a polyurethane based paint, which means it sticks to everything. I thought he just meant be careful what it touches... i think he meant to say if you get it on your hands its not coming off for a while... not the end of the world just wear some kind of gloves, just sucks i was to stupid to do so. once you dip your roller in the paint it is very saturated with the product and literally just throws it all over the place unless you very lightly just roll it on. yet again not the end of the world just need to get used to the best way to apply it. Pros: this stuff is awesome. goes on nice and thick after that second coat. really nice texture to it, literally has the texture of a spray in box liner. really durable, maybe not for anything over 5 years but its super easy to re-apply over old liner. everything i have seen says it takes 1 gal. to paint a 6' trucks bed (my gmc is 5'8") i did 3 coats and probably have just over half a can left. maybe i was being stingy but doubtful after doing 3 coats, you could most likely do a 8' box no problem with a 1 gal bucket. this stuff is pretty stupid proof, and will literally roll and stick on anything. i sanded and scuffed up all of my box except for one spot to see if it was any different at all, i cannot tell in the slightest. I am not saying do not prep the surface properly!!! but on the 12"x12" section of my box i left i did not notice any difference in application or finished product. All in this is and incredible product for what you pay. it cost seven or eight times more to take this in and get someone to spray a box liner in. i am super happy with this product and would gladly recommend this to anyone.
A**D
جيد
لم يكمل سنه وبدأ يتقشر ويذهب الطلاء.
D**E
Great Product! Highly recommended
I’m not a cheap guy, but I decided that I’d give this a shot before taking my truck for a spray in liner at Line X. I ordered the Herculiner kit and received it the next day. I also bought a nylon wheel attachment for my drill for the scuffing process. It took me approx an hour and thirty minutes to scuff the bed and tail gate. Another 15 mins to tape and about 30 minutes to prep and clean the surface. It took about 30 minutes to put the first coat down and it was a really easy process between the roller and brushes. I used a paint mix attachment for the drill and that made mixing super easy. It would have been tough doing it by hand. It took the better part of 6 hours to to get to the point where it didn’t feel tacky, but I wasn’t able to stand on it until approx 8 hours had passed. The second coat went on equally as easy and I let that coat dry overnight. It looks great and is much grittier than the Line X spray liner I had on my last truck. I’m 100% satisfied with this product and my only recommendation would be to find a second similar roller as the first one did begin to break down midway through the second coat. HIGHLY RECCOMEMD!!!
D**L
Good if you're trying to save money
Good if you don't have a compressor or don't want to deal with prepping an area for spraying. It works well and seems durable once it's had a few days to dry. But you will need at least two coats, it is messy to work with and has a strong smell when applying (the smell disappears once it's dried). Make sure to use gloves (the stuff is terrible to get off). Also, make sure you dap with the brush (it's not like painting a wall). It takes work and at the end I wondered if I shouldn't have paid to get it done professionally, but if you're looking to save money, it's definitely a good option.
A**R
Great product , watch some videos first
I read several reviews recommending watching application videos before hand and I totally agree with that. Product goes on really well and seems durable, but I’ll have to wait and see. I also recommend wearing gloves and clothes you’re OK with disposing with afterwards. This stuff really doesn’t come off skin or clothing easily. Overall, satisfied with the results and would recommend.
Trustpilot
2 weeks ago
5 days ago