Desertcart purchases this item on your behalf and handles shipping, customs, and support to Argentina.
🎬 Elevate your space—because your content deserves the spotlight.
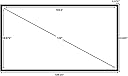
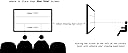
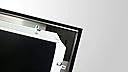
The Silver Ticket STR Series 120" diagonal fixed frame projection screen features a 1.1 gain white surface with a 160° viewing angle, housed in a heavy-duty aluminum frame wrapped in black velvet for optimal image clarity and durability. Wall-mounted with adjustable brackets and a quick tensioning system, it supports native 16:9 resolution projectors including long, short, and ultra-short throw models, delivering a premium cinematic experience in FULL HD, 4K, and 8K formats.


| ASIN | B00CYLOTPK |
| Best Sellers Rank | #27 in Projection Screens |
| Brand | Silver Ticket Products |
| Color | White Material |
| Customer Reviews | 4.8 out of 5 stars 5,007 Reviews |
| Display Dimensions | 120 inches |
| Enclosure Material | Aluminum |
| Global Trade Identification Number | 06956100400735 |
| Item Dimensions W x H | 109.25"W x 63.63"H |
| Manufacturer | Silver Ticket Products |
| Material | Aluminum |
| Mfr Part Number | STR-169120 |
| Model Number | STR-169120 |
| Mounting Type | Wall Mount |
| Number of Packs | 1 |
| Operation Mode | Manual |
| Product Dimensions | 109.25"W x 63.63"H |
| Screen Dimensions | 120 inches |
| Screen Finish | 160 Degrees |
| Screen Size | 120 inches |
| Screen Surface Description | 160 Degrees |
| Unit Count | 1 Count |
| Viewing Angle | 160 degrees |
Z**G
Highly recommended! Great value and super experience!
Replaced an older silver screen made by one of the best in the business (and costing hundreds and hundreds more) with this screen. I couldn't be more happy with the results. Old screen was excellent for my dim projector 12 years ago, but couldn't handle the lumens of the Sony 55ES I purchased last Fall. I started looking for a replacement and found Silver Ticket. After reading so many positive reviews here and on home theater sites, I decided to give Silver Ticket a try. Everything about the experience just worked. Packaging was well executed, printed instructions and web-based instructions/videos were extremely useful and all I needed to get the screen together and installed - correctly - the first time. Build quality was excellent and everything went together as it should. Took some time to get the shipping wrinkles out (hair dryer), but once done, it was crisp and smooth as a snare drum head. A couple of questions I had before and after buying were answered in only a few business hours - responsiveness and clarity of answers were both excellent. One piece of advice - don't try to install a screen this large yourself. Have a helper. With my 16 year old son helping, it was a breeze. One installation tip: Use blue painter's tape on the wall across the whole width where you want to put in your mounting screws. Once you find and mark your studs (on the tape), start on one side and with the longest level you have, mark the "level" line with a sharpie. Check it and re-do it if you need to. Double-check it by measuring the distance from the ceiling to your drill spots, but trust the level line (ceilings and walls are not always 100% plumb). For the lower holes, repeat the process with a level line down the stud to the correct distance for mounting. Drop in your screws, peel off the tape and its all over but the hanging. Easy-peasey. HIGHLY Recommended - insane value for the money. Oh, and my new projector looks incredible on this screen. Bravo, Silver Ticket! I'd buy this again in a heartbeat if something happened to the screen.
S**E
Pleasantly surprised
Overall: This is my first projection screen so I have had no other screens to compare this one to. Having said that, I was pleasantly surprised with the quality of the materials, and with how nice the screen looked once I finished assembling it. No matter if I am projecting a movie, normal television, or a video game, the picture quality has been excellent so far. Assembly: It took me the better part of an hour to assemble the 100" frame by myself. I did read the instructions a couple of times before starting, and also watched a couple of videos on YouTube (highly recommended). Overall, I was able to assemble the screen without issue, though I did feel that it would have been much easier had I had a second person helping me. Stretching the screen over the plastic tab went much easier than I was expecting based upon other reviews I have read. I found it much easier to install the center support brace by simply sticking one end in its slot on one frame edge, and then bracing the screen while I pulled the opposite frame edge towards me. Streching the frame in this way allowed me to simply place the support brace in this opposite edge without having to try to slide it from the side. I want to highlight one item mentioned in the instruction. Make sure the area you are assembling the screen in is clean before starting. The front of the frame is black velvet and will pick up lint and pet hair if it is there. I vacuumed my carpet twice before starting to assemble the frame as I have cats and I knew there would be fur in the carpet. Spending the time doing this meant that my frame looked perfect after assembly was complete. Installation: Installation was not to bad, and it did require a second person to help. I installed just the top two screws at first to make sure that it was where I wanted it, before installing the botton two screws. This ended up being a good idea, as I initially made sure the screen was level using an actual level. As my house is old, this ended up not really working out as I found that not only are the walls not perfectly level anymore, neither are the ceiling and floors. I ended up making adjustments so that the screen was "level" with the room instead of just relying on using a level and this worked out better for me. I do want to mention that even though the instructions state that you can slide the screen left and right after mounting, this really was not possible for me. The mounting brackets did slide fine before mouting the screen, but after mounting, I could not slide the screen in either direction even when having a second person help.
I**S
Blown away by value, excellent build quality and EXCEPTIONAL Customer Service
Came across this Brand/Screen while making my upgrade to a projector and reading reviews on various AV forums. Simply put - the product is fantastic and I'm thoroughly impressed with their customer service. I do not use those terms loosely! Screen was packaged well, followed directions to a T and everything came together beautifully. Inserting the center brace at the end can be difficult and you should really have someone help you out, but it can be done solo (as I did). Tip: Once you're at this point I would take a little break and give the screen time to "warm up" in your house, out of the packaging and stretch out a bit before attempting, it helps. The product once assembled is awesome to look at for a first time projector screen owner such as myself. My wife was taken back when she saw it on the wall for the first time in our "tv room" it was replacing a 55" HDTV so yeah, it monstrous in comparison despite having the proper wall space. Funny thing happened after watching our first movie on it - it grew on her and now she thinks it gives a bit of an upscale look due to how clean the lines are and how well done the fabric on the trim looks - now it's our "movie room". Anyway, my first screen had a slight defect to it, light wasn't reflecting properly off 2 spots on the screen and there were slight abrasions on it. Crazy thing was you couldn't see it in plain daylight yet projected light exposed it. Knowing I took the utmost care of it during installation, I was worried I would have to compile a song and dance routine to get a new screen. Sent them an email @ 9PM EST describing the issue, hoping I wouldn't have to undo all the work and repackage everything with some lengthy claim form. Received a reply in less than 10 mins saying "Sorry for this problem, please provide pics if you can and shipping address". I hurried to take pics and send them back, hoping I could get another reply that same night, and sure enough, 10 mins after I sent the pics (approx. 9:45PM EST) I got a reply back stating we're sending you a new screen that will be inspected before it ships, no returns necessary...um..Wow! Screen arrived 2 days later priority shipping and again - I was impressed it was handled and shipped so fast. The new screen was flawless and easy to replace thanks to their unique tab/rod system. Actual screen and frame build quality is excellent, all parts and screen come together easily and fit snugly, you can tell there was good quality control in the manufacturing of this frame. Its all-Aluminum construction is perfect for this application, strong and light, the screen can easily be mounted and moved by myself (approx. 30lbs.). The hanging tabs are part of an integrated slider channel so centering the screen is easy, no need to center the screws perfectly, a well thought out design. Projecting on this screen is a 100% improvement over shooting on a matte white wall which I did while shopping for screens (a product of the screen's Gain). Blends pixels and colors beautifully, blacks are deep and screen is brilliant with excellent viewing angles. I really can't say enough good things about this company and product, it's one of those few things that come along every now and then that just flat out impress you. High build quality gives this exceptional value and once you see it all together you're really impressed, they save you a lot of work with their well through out design. It does it's job perfectly, looks high-end on the wall and most importantly, has one of the best customer service departments I've ever encountered in my entire life!
J**S
A fixed screen is a MUST for a good indoor projector setup, and this one doesn't disappoint!
After researching a handful of brands I bought a 110" white (non acoustic) Silver Ticket screen on Amazon. I have it coupled with an Optoma HD143X ceiling mounted projector. This is the first time I've set up an indoor fixed screen and projector. I have an outdoor setup as well, which is my only frame of reference. Overall I'm very happy with the screen. It was fairly easy setup, step by step, and took about 2 hours to completely set up and mount to the wall. I worked somewhat methodically, and was able to do everything from start to finish by myself, including mounting it to the wall. That said, I'm pretty tall with a large arm span so this probably isn't feasible for most people. Some things to note: 1) I mounted my projector before even purchasing the screen to be able to figure out exact sizing. I had intended to go with the 120" screen, but after mounting and testing determined that 110" would be a better fit. 2) Once I had the frame complete, I turned on the projector and mounted the frame to the wall (NO screen attached yet). This allowed me to get exact placement more easily, and not run as much risk of damaging the screen while figuring this out. Once I had that figured out, I installed the mounting screws to the wall and took the screen down to do the final install of the screen. 3) Getting the screen back up for final install proved to be the most painful part. The mounting "sliders," once attached to the top two screws in the wall, did not want to slide horizontally. The weight of the screen and friction created made it quite difficult, so I detached one at a time and slid them into place then remounted, working back and forth, until it was right. I combined this with slight adjustments to the projector mount as well, though the sensitivity of those slight adjustments proved to be tedious as well. In any event, it was a bit of back and forth between the projector mount and the sliders for the screen, but it ultimately lined up perfectly. The screen looks fantastic and is perfectly tensioned (no wrinkles). The black edges absorb the bit of light from the projector, so the image runs top to bottom and left to right without any gap around the edge, ultimately looking perfect once everything was fine tuned. Additionally, the Optoma HD143X has a light band around the entire picture it puts out (something innate to the DLP chip they used which is not a flaw according to the company, but rather just how that chip is...I learned this after purchasing). The screen takes care of that issue so, while I can make out that light outside the screen edges, it's really hardly noticeable. Overall the most important part is these fixed screens (whether this one or another brand) are far cleaner looking than drop down screens (which I use in an office environment). If you're going to go to the trouble of setting up an indoor projector, the final setup is only as good as the weakest link. I'd definitely recommend a fixed screen HANDS DOWN if you care at all about final picture quality.
A**F
Excellent product that was packed adequately and shipped quickly
Excellent product that was packed adequately and shipped quickly. All the parts were included with a few extras of the small items. I'm very impressed with how well engineered this product is. The frame is extruded aluminum wrapped in a nice quality velvet felour that acts as a light absorber so that you don't have to prefectly place your projector. No, this doesn't mean you can move it amy more than a few inches beyond the lens limits, but it gives you needed flexibility for those with ceiling mounts for example. The screen itself is a nice quality stretchy vinyl that also acts to tension itself against the frame, thus removing any wrinkles from being rolled for shipment. Assembly was straightforward. If found the instructions well done and illustrations appropriate for each step. Just be sure to follow each step in order. Take your time and know what you need to do and why. Don't try to be smarter than the instructions to save time. I don't think you can improve on them in any way. Many here have had trouble with the center tensioning/support bar. Just place the bar in the slots on the top and bottom with one side of the bar centered in the joint opposite of where you are working. I then loosene a ffew of the tabs that hold the screen to the edges of the frame. Then I used a rubber mallet to tap the support bar along the groove nearest you while making sure the opposite end of the bar stays in place. Once the bar is in place just pull the screen over the tabs again. Voila. you are done. For me the one thing I did do is after assembly of the frame but before installing the screen. I place the frame only against the wall supported by a couple chairs. Without the screen in the way, it's much easier to see where to place the screws into the wall. I then hung the frame (without the screen installed yet), to make sure it was where I wanted. the slotted design allows the sreen to be moved to the left or right (but not up or down), for final adjustments. I then took the frame down, installed the screen and placed the compleeted screen on the wall over the already installed screws. The final assembled product looks great and my projector an Epson HC3700, came to life. I've never owned a permanent screen before, so I can't speak to other brands, but I'm very much impressed with the ease of assembly and overall quality of this product. One final thing, the whole process took almost 2 hours. That includes a couple of breaks for a soda, and taking my time to ensure no mistakes. Before starting I read through the instructions till I had a firm picture of the process in my head and as I went along I reread the instuctions for the next step. I still missed one step, but I caught it right away and lost no time. I like the way it looks o the wall and I liked it even better with Dances With Wolves playing on screen.
D**Y
Best screen at this price level
I recently moved to an apartment, and decided to convert an unused bedroom into a temporary home theater for an year till we find a regular house to move into. I was looking for a budget 100-inch screen (my regular screen which is bigger & cost $$$$ is back in its original packaging, in storage). After some research on review sites and Amazon, I shortlisted 2 options - Elite Screen and this STR. I chose the STR screen because a) it looked better, and b) seemed to be a better design, with the screen stretched very tightly across the frame to avoid any wrinkles or curls, even if the assembly was more work, and c) it has better reviews. It turned out to be a good choice - it does look really good on the wall, much better than pull-down or hanging type screens. Assembly was straightforward, took about 90min working alone except for the final mounting on the wall. Instructions need to be better, but an online video filled in the gaps (can't give you the link here, Amazon doesn't allow us to share external links in reviews). Image looks quite good for the price. Pros: - good quality material, including the velvet upholstery, the aluminium frame, the nuts bolts & plastic pegs - good structural design, avoids common problems seen with other screen designs - good screen quality - looks neat & elegant on the wall Cons: - instructions booklet has a couple of gaps - Velvet upholstery got a little discolored in a couple of places where it was tightly cinched in the packaging - mounting pegs are hard to move once installed, instructions should have asked us to grease them a little before usage
A**R
A Great Value & Very Good Screen.
I purchased the White Material 92" ST Thin Line Screen for my small theater room where I had only 81" between my in wall speakers. This is a very good screen for a great price with a great field of view and color accuracy. You can sit 70 degrees of center and still have a great picture with little drop off in brightness. The ST white material screen has a slight grey tint with a matte finish compared to the sample I had of the Elite Aeon CineWhite. As a result the ST screen enhances the blacks just a little bit over the Elite. All the positive reviews here on Amazon, on the AVS Forum and the Wirecutter review against other screens convinced to try it. . The ST screen enhances the blacks just a little bit over the Elite. In a "dark theater" room, using LOW LAMP mode, the image, screen colors and brightness is very well balanced with the projector's putting 20ftL on the screen. In a low ambient light room, the STANDAND LAMP mode put about 25ftL on the screen and the image not as strong but is still very good with good color saturation. This probably is not the screen material for a moderate or higher ambient light room unless you have a light cannon for a projector. Screen assembly is easy. The positive of this screen is the sleek look of the Thin Line border but that thin border results in tight tolerances to avoid image bleed off the screen. There is no issue installing the center support bracket with this screen as it is installed before stretching the screen. Couple of other assembly hints: A) rollout the screen material to validate how many of the plastic pegs go on each side of the frame; B) the small angle irons go in the same track where you insert the plastic pegs; C) stretch out the screen fully on the floor and take the time to insure the frame is perfectly centered on the loose screen to avoid potential damage by stretching it over the metal frame outer corners. The ST install video shows attaching/stretching the screen to the frame by starting at a corner and working all the way around the screen. I attached the middle on all four sides and worked progressively out to all four corners. My screen did not come with a stretching hook so I used a small straight blade screw driver as a lever to lift the tension rod over the plastic tabs. It worked fine. Screen was perfectly flat. Regarding mounting the screen, the four provided mounting brackets are great quality and firmly secure the screen. They lift the screen frame about an inch out from the wall and as a result the front screen surface is about 3 inches from the wall. To use provided screen mounting hardware you need to attach the Thin Line border frame, as the bottom brackets attach to a lip on it. If you go frameless you can use the top brackets and make two resting blocks for the bottom of the frame to sit on. Otherwise the top of the frame will be an inch off the wall and the bottom flat against the wall. Bottom line - this is a very good screen. You can get a better "reference" level screen but you will spend significantly more for a marginal level if image improvement.
J**R
Unbeatable for the price
You can not beat this screen for the price. I am very glad I made the decision to purchase this one over the one I was going to buy that was a few hundred dollars more. The picture quality projected on this screen is excellent. I have it paired with a BenQ HT1075 projector and it really is incredible. My only slight (very slight) gripe about this screen is in the corners it isn't perfectly flush against the frame. You don't notice it while watching movies, but I noticed it when I finished assembly and mounted it to the wall. It would be nice if it had some sort of extra anchor for the screen material to attach to the frame in the four corners. But it is very slight, and nobody you show this screen to will ever notice. Assembly was about as simple as you can expect something like this to be. The frame is 6 pieces - the two sides are each one complete piece, and the top and bottom are separated in to two pieces each for shipping. They go together fairly simply - a metal bracket joins each of the top and bottom pieces together to make them one solid piece - when together, you can't see the seams at all. The metal is wrapped in felt which gives a great finished look and hides the seams very well. There are "L" brackets for the four corners so once you have it square, the brackets lock it in place. The screen unrolls and you insert long rods through the loops on the sides. This was probably the most difficult part - they did not slide easily through the loops. I actually struggled a bit to get them through on the top and bottom. But once through, they were easy to loop on to the plastic pins you slide in to the tracks on the metal frame. There are arrows indicating where you put the plastic pins and you just stretch the material over and loop it on to each plastic piece and when complete, it is stretched nice and tight - no slack whatsoever. The final step is assembling the center support rod - a bit tight, as it should be, which makes it a bit difficult to get in to place, but not bad. You mount it with 4 screws in to brackets you installed in the same metal tracks on the frame that you put the plastic pins in to stretch the screen on. Find the studs, put the screws in, and line up the brackets (they slide left and right to make it easy to line up with the screws) and you are done! It looks great on the wall and the picture quality is incredible. I am very happy and would absolutely recommend this screen to anyone looking to buy.
D**S
Sharp image, great contrast and beautiful colors. Amazing value for the price.
I was honestly surprised by how good the Silver Ticket Products STR Series STR-169110 4K/8K screen performs. The image is razor sharp, with excellent contrast and rich, vibrant colors. Paired with my Sony VPL-XW7000ES in a dedicated batcave setup, it delivers a truly cinematic experience. For the price, this screen exceeded my expectations and feels like a very solid choice for high-end home theater enthusiasts.
M**M
Excelente pantalla
Excelente calidad de pantalla y de imagen, fácil armado e instalación aunque se necesita de ayuda para colgar, al menos en mi caso que es de 120 pulgadas y dificil de manipular para uno solo, la uso con un proyector Optoma modelo UHD35X 4k y de 3600 lúmenes instalado en el techo a una distancia de la pantalla de 4.5 metros con un sistema wifi denon 7.1 y set de bocinas atlantic technologies, reproductor Izzi 4k y un xiaomi mi box 4k, no puedo pedir más con estos equipos excepcionales y esta gran pantalla.
A**R
Amazing
When we decided to renovate our basement we struggled with a large flat screen or a projector. We eventually decided on a projector. The next question was what to prroject it on to. We are not in anyway knowledgable on these things so relied on the reviews to help. We looked at all the cheap options which there are a lot of. We then came across this option. We decided to invest in a decent quality so we could get the most from the space. What an amazing product. It arrived exactly when they said it would. Solid frame which is very simple to put together and hang. What a great purchase. The picture quality is better than anything we have experienced before. Again I'm no expert and relied on the reviews. Worth the extra money and very very happy with whar we purchased.
F**N
Easy to install - High Quality Screen
Customer Service was outstanding as they continued to track my product through to delivery. Packaging was solid, all parts were very secure and tightly packed. Assembling the 110” screen took approximately 45 min as I took my time to ensure measurements of the brackets were aligned. The instructions were extremely easy to understand and follow, don’t skip any steps that is the critical point! Quality of the screen was amazing relative to my previously owned 1080p, ever detail was so crisp. I highly recommend this screen if you are looking to upgrade or setting up your first one.
G**G
EXCELENTE PANTALLA
La verdad mejor de lo que esperaba, cumplió demás mi expectativa, el armado fue rápido con el tutorial que encontré, ya montada se ve increíble en mi sala de TV, anteriormente proyectaba en la pared y el cambio fue increíble, los colores mejoraron mucho así como la calidad e imagen, tengo un LG HU810PW 4k laser y creo que esta pantalla fue la compra perfecta.
Trustpilot
1 month ago
2 months ago