


Buy anything from 5,000+ international stores. One checkout price. No surprise fees. Join 2M+ shoppers on Desertcart.
Desertcart purchases this item on your behalf and handles shipping, customs, and support to Argentina.
🍶 Elevate your gut game—homemade yogurt, perfected with ease!
The Euro Cuisine YM80 Electric Yogurt Maker empowers health-conscious millennials to effortlessly craft up to 42 ounces of fresh, probiotic-rich yogurt at home. Featuring a built-in timer, clear on/off switch, and seven BPA-free glass jars, it offers customizable yogurt-making with minimal cleanup. Compact and user-friendly, this machine transforms your kitchen into a wellness hub, delivering creamy, preservative-free yogurt tailored to your lifestyle.


| ASIN | B000EX16RY |
| Best Sellers Rank | #18,024 in Kitchen & Dining ( See Top 100 in Kitchen & Dining ) #5 in Yogurt Makers |
| Brand | Euro Cuisine |
| Brand Name | Euro Cuisine |
| Capacity | 2 Pounds |
| Color | White |
| Customer Reviews | 4.4 out of 5 stars 5,622 Reviews |
| Global Trade Identification Number | 00737770462263, 00885289208503 |
| Included Components | 7 -6Oz Glass Containers, Euro Cuisine Ym80 Yogurt Maker |
| Item Dimensions L x W x H | 9.5"L x 9.5"W x 6"H |
| Item Type Name | Yogurt Maker |
| Item Weight | 4 Pounds |
| Manufacturer | Euro-Cuisine, Inc |
| Material | Glass |
| Model Name | Yogurt Maker |
| Model Number | YM80 |
| Operation Mode | Automatic |
| Other Special Features of the Product | Built-In Timer |
| Part Number | YMX750 |
| Product Care Instructions | Dishwasher Safe |
| Recommended Uses For Product | Residential |
| Special Feature | Built-In Timer |
| UPC | 885289208503 885388247953 778295071189 737770462263 885550515231 787461497814 885255414976 885468280672 885191692124 885468025105 885681368775 |
| Unit Count | 7.0 Count |
A**T
This is the most simple and wonderful yogurt maker I have ever owned
This is the most simple and wonderful yogurt maker I have ever owned. I got the top tier extender and use one cup canning / jelly jars in the bottom and the jars that came with the machine in the top. I wrap a bath mat over the machine so there is uniform heat in top and bottom and don't have to switch tiers as some recommend. If you are considering buying this product I encourage you to do so without any hesitation. AND there is no need for the timer (or even the "hour marker" that comes on the machine). Buy the "cheaper" "stripped" model without the timer. One other thing I found handy is I put a wet washcloth on the bottom before I put the jelly jars in and it seems to disperse the heat more evenly. I lay it across the round of the bottom and the four corners stick out a bit. PLEASE NOTE: the extender will NOT sit exactly sealed when you use the jelly jars on the bottom as they are a bit too tall. But using the bath mat makes a wonderful "blanket" and the slight gap makes NO difference in the yogurt. A further note - I wanted to make greek yogurt and read about all the "straining" and other effort necessary and was so discouraged. But I simply use greek yogurt culture for my starter and it makes VERY THICK yogurt without the fuss. My EASY recipe is - I do NOT heat the milk etc. I take room temp milk (from our cow), put 1/2 cup yogurt from the store or yogurt from one of the 6 oz jars that comes with the machine - in the bottom of a glass pyrex one quart pouring measuring pitcher, whisk in a little milk to disperse the yogurt, then add three cups of milk and whisk again. I then pour it into jars and place them into the machine and repeat until I've filled as many jars as I want to. I would give this gift to ANYONE who has a cow (or goat). I cannot say how it works with store bought milk as I have never used it. I do know friends who add a little dry milk powder to their milk to make it thicker - but the greek culture works great instead for me. Many people also make milk from almonds and coconuts and have success with yogurt that way - so maybe the storebought almond milk and coconut milk in the milk cartons would be great for yogurt too as an alternative to dairy. I hope this review encourages people to try this product and EAT LOTS OF YOGURT with full control of what goes into their bodies. This is a LOVELY, SIMPLE and well made machine. And the price is absolutely WONDERFUL. Another bonus - it has a TINY footprint and all the parts nest (upside down etc) very nicely so it fits easily in my cabinet and doesn't take up much space on my counter when in use. While it is bigger than my toaster, it fits where a toaster fits on a small counter. Another tip - I put the cardboard case that the jelly jars came in in my cabinet and as they are emptied they get put in there until refilled. I make sure that I eat the yogurt jars that came with the machine last as they are 6 oz vs the 8 oz jelly jars and save enough to make the number of jars I want. I only buy culture about once every three months - a quart of plain greek. I buy new when the culture gets a bit runny. I absolutely LOVE this little machine.
B**M
Easy to make with consistent results
I have been using this yogurt maker for two years and find it simple and easy to make fresh yogurt several times a week. We started this when my husband was taking powerful antibiotics and his doctor told him to eat lots of yogurt. I have never used the jars that came with it...I have the 7-cup Pyrex bowl that fits perfectly. I put a round potholder in the bottom of the unit which ended the too hot problem some have mentioned, and I flip the switch on to preheat the unit when I begin the making process. Generally I make it in the evening and take it out when I get up in the morning, approximately 12 hours, which gives it a nice consistency. Here is what has worked for me. I microwave a combination of roughly 2/3 fat-free milk and 1/3 fat-free half and half in a 4-cup glass pitcher, usually filling it higher than the 4-cup mark. Heat to at least 180 degrees (approximately 8-10 minutes in my microwave)....you need a digital thermometer....and allow to cool to 110-115 although I have successfully made it with cooler milk. I have used an ice bath a few times when I was in a hurry but generally allow it to sit, lightly covered, on the counter until it is the proper temperature. I use about 1/3 cup of plain yogurt from the store, usually Fage or similar, as a starter, at room temperature, and gradually stir in the warm milk until it is blended. Pop it into the warmer and you're done for 8-12 hours. Sometimes I will shake the condensation off the cover but not always. When done, I pour off visible whey and put it in the refrigerator. We either stir in the whey that accumulates or pour it off as we use it. It is creamy and mild as is, or we stir in a spoon of jam, maple syrup, honey, or use it over fresh fruit to vary the taste. It is softer than Greek yogurt but I don't take the time to strain it, and we love it as it is. The work of yogurt making is in the heating and cooling of the milk before it is put into the yogurt maker. This unit keeps the culture at an even temperature and I get a perfect batch every time...except for the one time I failed to add the starter yogurt! This is an easy process and much better and less expensive than store alternatives.
T**6
Love this yogurt maker. Works BETTER than it should!
⭐⭐⭐⭐⭐ Excellent Yogurt Maker – Simple, Reliable, and Worth Every Penny I couldn’t be happier with this yogurt maker. From the very first batch, it delivered rich, creamy, delicious yogurt that easily beats anything I’ve bought at the store—and without preservatives, fillers, or artificial ingredients. The machine is refreshingly simple to use. No complicated controls, just an on/off switch and a clear indicator light. It quietly does its job, and the transparent lid lets you peek in without disturbing the process. Yogurt-making really doesn’t get any easier than this. I especially love the seven 6-oz glass jars. They’re the perfect size for individual servings, and the BPA-free lids seal tightly so the yogurt stays fresh in the refrigerator. Cleanup is effortless—everything EXCEPT THE BASE goes right into the dishwasher. What really makes this yogurt maker shine is the flexibility. I can use different types of milk, control the tanginess, and flavor the yogurt exactly how I like it after fermentation. Straining it for Greek-style yogurt works beautifully too. It’s incredibly satisfying to know exactly what’s in my food, and my digestion has definitely noticed the difference. Between the quality build, ease of use, consistent results, and generous 3-year warranty, this yogurt maker is a fantastic value. If you’re thinking about making your own yogurt at home, don’t hesitate—this machine delivers. one more thing, there is NO TIMER... only a dial to set as a reminder of how long you want it to culture. Highly recommended!
P**R
It's very cute works fine
This makes a great yogurt. I love the individual cups very easy to use. Each cup holds about 6 oz of liquid for yogurt. The containers are small but easy to clean they're about the size of a Yoplait glass yogurt container. I can't speak to the temperature or durability. I actually ended up returning this because I found my mother's old yogurt maker which was actually a thermos that she used for soup and it worked very well. I'm trying to save money.
L**S
I love the Euro-Cuisine YM80 yogurt maker - I use it every week
I bought the Euro Cuisine YM80 yogurt maker about 9 months ago. I wanted to really try it out before leaving a review. Disclaimer – I never made yogurt before owning this yogurt maker so I can not compare it to other yogurt makers or making it in a oven or crock pot. I love this yogurt maker and have been using it once to twice a week since I got it. I find that whether or not homemade yogurt is cheaper than store bought depends on your ingredients that you are using ie: organic milk vs. regular store brand milk. I was eating brand name and store name yogurt daily and it was getting costly. This really cuts down on the cost and tastes a lot better. (Partly tastes better since I am not using skim milk – I use either whole milk or 2% and it is wonderful.) The instructions with the yogurt maker are not necessary perfectly clear for a beginner. The area I found to be a little confusing is how long to incubate the yogurt. Example - Softer yogurt without boiling times: 8 hours for whole milk, 10 hours for 2%, and up to 12 hours for skim milk. Then under instructions it states: set time for yogurt – 8 hours for whole milk, etc. They do not give any time difference for using boiled milk or non-boiled. So that being said, I decided to boil my milk and use the times listed: 8 hours whole, 10 hours 2% and 12 hours for skim. (Haven’t bothered making the skim so I can’t say if that is accurate.) The yogurt maker has a hours reminder on the device. It does not turn off the yogurt maker and I am not sure if it was supposed to move during the incubating process but mine never did anything. I don’t bother with it. I just put a little sticky note in front of the device of my shut off time and set an alarm on my phone. I have been making yogurt with a 6 oz container of plain yogurt from the store. Then I make the next batch with a jar of my plain yogurt. I tried using a probiotic capsule that was a disaster and I ended up throwing out that batch. I have not tried using the freeze dried yogurt starter yet. I just priced it out and bought some that would equal $0.70 a batch and I would be able to reuse my yogurt at least once and maybe twice. I will update my review later after using it. Now after having this for awhile I have noticed I could not find any recipes for Coconut Yogurt which was my favorite. I came up with a recipe that has consistently delivered great results Coconut yogurt • 1 13.5 ounce can of Coconut Milk (I have used Goya) • Whole milk or 2% milk ( 4 cup measuring cup filled with contents of coconut milk – add the milk so that it comes up to the 4 cup point) • 1 scoop (1/3 cup) of dried instant non-fat milk (I have used Carnation milk) • 6 oz container of plain yogurt or yogurt starter • ½ teaspoon of coconut extract • 8 packets of Stevia in the Raw (or sugar) Add coconut milk, regular milk and dried milk to the saucepan and heat till the milk starts boiling and climbing up the pot. I place the pot in the sink with an ice bath to cool down faster. Cool to 95 degrees F (stir a few times to reduce hotspots – use a thermometer to check the temp). Then pour some of the liquid in the 4 cup measuring cup and add your starter. Blend til smooth and add back to the pot. I then add the coconut extract and sweetner. I put in the Eurocuisine containers and place in the yogurt maker. Incubation times depend on milk used – Whole milk is 8 hours and 2% is 9 hours. (The fat content in the coconut milk is similar to whole milk so I used that as a judge when deciding the times.) Please let me know if my review was helpful or if you enjoyed my recipe. Click the button below if this helped you at all. Thanks
V**S
EDITED AFTER TWO YEARS---IT DIED
********MAJOR EDIT AS OF DECEMBER, 2015!! I used this almost weekly for nearly two years. I loved it. Suddenly, it didn't work anymore. I wasted at least two batches of organic milk on it and contacted the company because it wasn't working (it has a three year warranty). They had me run some tests and determined it was defective. After many weeks they sent me a new base. I used it two nights ago with the same results. I then tried it again and it didn't work. I tested it (using the test method they requested) and it's defective. The temperatures of the individual jars varied wildly, with only one jar attaining the proper temp. VERY disappointed. I have an email in to the company (again) and will see if/how they respond. By the way, I've been making yogurt since 1970. I know exactly how to make it. This is the first time I've ever encountered an issue with a fairly new maker. My other ones lasted many years. --------------------------------------- My original review: I've only made two batches of yogurt, but it's very easy and works well. This is a very reasonably priced unit and has everything you want. It's fairly compact and does the job. The jars fit inside the unit nicely and I will probably order more of them. I know someone said they could get the jars cheaper by using generic jars, but the shipping was too high. I think the extra "brand name" jars are worth the money because I know they fit. Some people were upset that the lids weren't leakproof, but maybe they aren't designed to be. Perhaps the yogurt needs some breathing room. I'm pleased with them and would say just to keep them upright, if possible. The directions are easy and it's simple to do. HINT: Use a dry erase marker and write the date of your yogurt on the top of the lid. It will wash off later, but it's good to know when you made it. My recipe: I use skim milk plus a little dry powdered milk to give it more protein and make it thicker. I heat the milk just to boiling/foaming (stirring constantly with a metal spatula to prevent burning). Then I cool to lukewarm--put a little on your wrist and if you can't feel it either hot or cold, it's the right temp). I add the starter or some leftover yogurt from a previous batch, and then put it in the jars. I let mine cook for 10+ hours because we like it tart. Put them in the fridge and they'll be ready within a few hours.
T**A
First batch turned out GREAT!!!
I eat a lot of yogurt - I have been buying Fage at Costco and I can polish off a 1kg container (that's 35oz) in about 2-3 days. Even though I reuse the containers and recycle them when I can't use them anymore, I still worry about whether all the plastic I put in my recycle bin actually gets recycled. I have heard that a lot of it just goes to landfills anyway. So I wanted to make my own yogurt. I bought this particular yogurt maker because of the number of good reviews, and the price. It doesn't have a timer, and, like another reviewer, I like to have more control over the process. Having said that, I just opened up the lid of my first batch of yogurt and it is outstanding! I have tried making yogurt before: in the oven on low with the door open, with different fat-content milks, in my food dehydrator (it has a pretty precise temp control), and in a pan of warm water inside an ice chest. Nothing gave me yogurt - all I had was milk that tasted like it had a spoonful of yogurt in it. This batch is so good! I had intended to leave it for 12 hours, but I couldn't wait and just ate some after 8 hours and it's delicious. I'll leave the rest in for another few hours and see if it gets a little more tangy. Here's what I did: I poured 7 jars' worth of fat-free milk from a local dairy (not organic) into a large saucepan, added 1/2 cup (120ml) of dry, non-fat milk powder (I used Bob's Red Mill, a local company in Portland, Oregon) and heated this mixture to 185F degrees (85C). I let this mixture cool to about 95F degrees (32C) and added one jar's worth of Nancy's (another local company) non-fat yogurt. I mixed it well and poured it into the jars. I turned the maker on and tried not to hover over it! I did put the probe of my digital thermometer inside the compartment, next to the jars of yogurt and the temp was about 105-110F (40-43C) I thought the volume might be too much and the jars would overflow, but it all went into the jars and, like magic, I have yogurt! I read a blog last night about using some of your last batch of yogurt as a starter for the next batch and the blogger said (and I am paraphrasing here) he found that freezing a little of the previous batch to use as starter keeps the bacteria fresher and they work indefinitely. In microbiology terms, this makes sense - you just keep propagating the bacteria in the yogurt, but they can get "tired" if they have been in the fridge too long, and they can't do their buggy thing and reproduce like crazy. I probably eat enough yogurt, that mine will be ready for the Ironbacteria competition, but I will try the freezing thing if my yogurt comes out too runny. As with all my reviews, I will post an update after several months of use and let you know how the product is holding up. Update 5/20/2012: I am still making yogurt at least once a week from the same batch I started with and it still tastes good and is definitely not runny; the last batch was made from a jar that sat in the fridge for over a week before I had time to make another batch and the yogurt still turned out fine. I haven't had to try the freezing method. I am so happy with this purchase, I can't recommend it highly enough.
W**E
There is a better way than this.
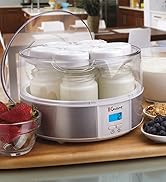
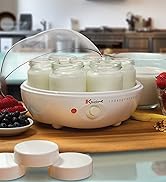
I purchased this unit, and have made 2 batches of yogurt with it. It works, and I have had no problems with it. I recommend that you DO NOT purchase one. Read why... I used to have an old Salton unit that I used every day, and I wanted to start making fresh yogurt, again, so I purchased this one. It was highly recommended. This unit makes almost 1 quart, split into 7 cups. The cups are small. They are not smooth inside, so are difficult to clean - they require a bottle brush and a lot of work to get clean. They are like baby food jars, with an indention around the bottom and an overhanging rim. Hard to explain, and hard to clean. leaves too much waste in the jar. It takes about 12 hours to make a batch. That's a long time. You have 2 good choices for making the yogurt.... 1 way is to use hot water (100degrees F), dry milk powder (1 1/4 the amount to make regular milk), and some plain yogurt from a previous batch (a couple of tablespoons will do.) Stir and or shake. pour into the cups, and put into the turned on machine. I like to have the lids on the jars (loosely), but they don't fit very well. Another review says to put a cloth under the cups and plastic wrap over the jars, then the top on the machine. Then wait 12 hours. Chill, add fruit when it's chilled. The other way is to heat milk to 180 - 200 degrees F, cool (put pan in cold water in the sink and stir works quickly), add plain yogurt to start (a couple of tablespoons is plenty, from a previous batch or fresh from store - both work fine.) Then pour into cups .... blah, blah, blah ... wait 12 hours, cool, presto - more yogurt. Oh, yeah, a meat thermometer works great to know the temperatures.. This is the easier, and in my opinion, THE WAY BETTER WAY -> -> -> Now, it turns out, (Thank you interweb searcher :) - that you can do either of these processes, and make larger quantities, for about the same energy cost. I like the second process - heat the milk (to 180-200F), cool (to 118F), add a bit of yogurt to start, pour into QUART Wide mouth Mason Jars (how many do you want? 2, 3, 4? 10? , put the tops on loosely, put them into the oven that you preheated to 200F then turned off while you were warming the milk. Put a full jar of HOT water into the oven with them (To keep them company? not really, to give more thermal mass so they stay warm). To have the yogurt come out super thick, I stir each jar at about 2 hours, and turn on the oven (at 200 degree setting), to warm it up a bit (for a minute or two only) I replace the HOT water in the water Jar, make sure the oven is really turned off, and wait another 2 hours. After a total of 4 hours (from when you first added the started yogurt), put the mason jars of yogurt into the fridge. When they are chilled, spoon out some of the best yogurt you have ever had. No fuss, no muss, no unhealthy additives, just pure yummy. Enjoy. Oh, sure, there are other ways, and the machines work, but this is my review, and this is MY opinion, and this WORKS GREAT, for me.
S**O
Yogurtera
El producto es muy bueno, solo me gustaría saber dónde puedo conseguir más frascos cuando se rompe uno.
M**K
good design
Product arrived in excellent condition. The only thing I didn't realise, was that it won't work on the UK electrics. If it had worked with our electrical system it would have been just what I wanted.
A**.
Doesn't work in Singapore
This product doesn't work in Singapore voltage and it shouldn't even be listed here. Questions & Answers was misleading stating it would work, but it was a total failure when it came as it is designed for 110V. I tried to contact the seller with no success.
A**R
NOT SUITABLE FOR AUSTRALIA
I purchased this yoghurt maker only to find it will not work in AUSTRALIA. I contacted the seller who agreed for me to return the item. I printed out the sellers return label and went to the Post Office. At the Post office i was informed that it would cost more to return the item than I paid for it. Contacted the seller asking would they refund the postage charges. NO REPLY FROM SELLER, THEIR YOGHURT MAKER NO CONSIGNED TO GARBAGE BIN. BE AWARE.
S**R
So perfect!!
I received my Euro Cuisine yogurt maker two days ago. I bought the milk and a greek yogurt with no additives to use as a starter. So yesterday I made my first bath. I was super easy. The user guide explains how to do it. So my batch finished last night and I put in the fridge overnight. This morning, it was like pudding. It was soooo delicious and creamy. I did not add anything to it to eat it. I ate right out of the jar provided. 10 out of 10 for sure. Do not hesitate if you want to make your own yogurt. I need to start make my own, sugar-free, no additives yogurt to try to heal an autoimmune disease I have. This makes it so easy.
Trustpilot
1 week ago
1 month ago