🛋️ Elevate Your Upholstery Game with Heavy-Duty Precision!
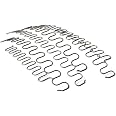
This 10-foot roll of 9 gauge oil-tempered sinuous springs is engineered for professional furniture and auto upholstery restoration. Made in the USA from high-carbon, high-tensile wire, it offers superior strength and durability, especially suited for seat cushions. Requires specialized tools and expertise for cutting and installation.
| Item Weight | 1 pounds |
| Product Dimensions | 8 x 2 x 8 inches |
| Country of Origin | USA |
| Item model number | COMIN18JU028424 |
| Is Discontinued By Manufacturer | No |
C**L
Great fix for an old Lazy Boy recliner!
I love my old Lazy Boy swivel recliner. I've replaced a few parts over the years (handle, spring spacer, etc.) but the chair is so comfortable I just can't part with it. Recently I heard a "sproink" sound after I sat on it (and felt an immediate seat sag). After flipping it over (and with the aid of a flashlight) I saw that a zig-zag spring had broken. After inspection I was "pretty sure" what length spring I needed and "definitely" knew I needed 9 gauge (based on some internet research). I decided to go with this spring (a 10 foot roll) so I'd have leftover spring material if I ever break more of them in my chair. Installation is a little complicated. For my chair (an older Lazy Boy swivel recliner with foot rest) I did the following: Remove the chair back. Flip the chair foward and remove the chair base. From there I was able to remove half of the broken zig-zag spring (the part at the rear). With the chair flipped foward I also was able to pry off the clamps that hold the zig-zag spring to the wire spacers. Then I flipped the chair back onto to its bottom and extended the foot rest. Then I leaned the chair onto its back (with a little support by placing the back cushion underneath to keep it in this position). Underneath the extended foot rest is a single piece of wood (covered by chair fabric) where all four of the zig-zag springs are attached. The brackets holding them are underneath the fabric (however). With a small flat head screwdriver I was able to pry up the staples holding the fabric and expose the bracket. This let me remove the other half of the broken zig-zag spring. As for installing the new spring...I flipped the chair foward (foot rest withdrawn) and fed it over the front spacer wire. Then I flipped the chair onto its back (foot rest extended), reattached the bracket and tacked it down (with a hammer) to the piece of wood underneath the foot rest. I stapled the cloth back down during the process. Then I flipped the chair foward (again with the foot rest withdrawn) and wiggled the zig-zag spring over the rear spacer wire and (with the help of a pair of pliers) managed to stretch it (and hook it) onto the rear spring holder. I reattached the spacer clamps and the wooden base (as well as the chair back) and the Lazy Boy is back to its old self. Very happy with the result. Regarding cutting the spring....you will need a pair of bolt cutters, a hack saw or an angle grinder (which is what I used). I just laid the two pieces of my broken spring onto the new spring to find the correct length. I recommend filing the ends of the spring after you cut it (to avoid cutting yourself). Also...I was able to bend each end of the spring inward (giving it a bit of a "hooked in" look) by using two "vise grip type" locking pliers. Hope this helps. Cheers.P.S. regarding the springs...they matched exactly with the ones on my old recliner and shipped fast.EDIT 01/05/2022: A second spring broke on my recliner. Glad I bought the 10 foot roll. I made the second repair (just like the first). All is well. Good stuff. Cheers.
K**S
Not easy to cut but worth the effort
I ended up using a grinder with a metal disc to cut the length I needed. You need some heavy duty metal cutting tools to get through this...product overall is awesome. Was a bit smaller in width than what was on the couch. I actually placed these supports between the original supports. For some reason our middle couch cushion was sagging a great deal..out of one roll I was able to install two seperate supports on a regular size couch. There was still over 12 inches left so even if you have a large couch this should get you two supports..dont forget to buy the clips.I used some nuts and bolts to secure the clips. Bolts I used were hillman #8-32×3 IN with nuts...(491327). I ended up drilling out the clips where the nail holes are just a bit to get the bolts on. I also drilled through the wood where the clips would be attached. I used a vise grip to pull on the zig zag spring in order to get it in. Just remember that you don't want the zig zag spring going straight across. It should have an arc to it...not staight across..The clips I used were new dimension upholstery EK spring clips. A 100 to the bag so a huge waiste that that don't sell just 10 or twenty. The product number on the bag is X001D2X5RFThe reason for the nuts and bolts is because you may not be able to hammer in nails in the area you need to secure the clip so it's easier just using bolts..but you will see this when you remove the fabric under the couch...
G**T
Better be ready to put in the work!
Material is nearly impossible to work with. You will need bolt cutters, a propane torch, and a hammer, to cut and curl the ends. The material comes curled and WOW is it HARD TO WORK WITH. The thing has so little give that it is dangerous. I used them to fix my chair but wow you need some serious hardware and elbow grease to make this work. These are also so thick I don't know why anyone would need springs these durable for furniture. Go for a smaller gauge.
M**C
Worked great! My 1st attempt at couch repair
A little lighter gauge than the original lower springs in my couch. Here are some tips:- 2 people made straightening the roll out to cut it much easier. The zig-zag pattern of the replacement was smaller than the original, so for the 1st spring we measured existing spring, Measured from the roll and cut it. For subsequent springs we simply counted the number of loops on the 1st one we cut and counted the loops to determine where to cut - Easier than measuring.- We used the existing end clips without removing them. I thought that the spring would need to be fed into a hole or clamp on the side of the clips but they simply need to have the spring slid over the clip and pulled back toward the clip - super easy if your clips are like mine.- We used the existing clamps that clamp the spring to the paper covered wire that goes from end to end. It was easy to pry them open with a flat head screw driver to remove and then re clamp them back on with channel lock pliers.- The paper covered wire that goes from end to end is important to help the springs work in unison. We had some broken spots. I used several wraps of 12 gauge (i think it was 12 ga - about 1/2 as thick as old school clothes hangers) galvanized steel wire to tie the springs together where necessary.- I used a bolt cutter to cut the springs. Freshly cut springs can be super sharp - Use light gloves or band aids - your call.
Trustpilot
Hace 3 semanas
Hace 3 días