🚗 Empower Your Drive with KONNWEI KW681!
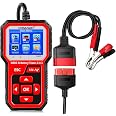
The KONNWEI KW681 OBD2 Scanner is a versatile 2-in-1 tool that combines a car diagnostic scanner with a battery tester. It reads live data, checks engine codes, and analyzes battery health for both 6V and 12V systems, making it an essential device for any car owner looking to maintain their vehicle's performance.


| Manufacturer | KONNWEI |
| Brand | Tontanic |
| Item Weight | 1.21 pounds |
| Product Dimensions | 1.18 x 0.39 x 0.79 inches |
| Item model number | KW681 |
| Manufacturer Part Number | KW681 |
D**D
Perfect battery tester and ODB diagnostic scanner
Great little tool. Check batteries and codes. Making diagnostic easy. Test batteries and see if they need charged or replaced in a matter of seconds. ODB scanner awesome on Chevy products!
P**P
Good all-round diagnostics
I use it primarily for checking batteries and charging systems on my motorcycles, mowers and tractors, but all the auto functions work great when checking my truck. It's easy to use and worth the price to stay on top of things.
J**
Works as described.
Arrived on time.
K**R
This is a nice little 2-N-1 OBDII Code Reader & Full Battery and Alternator Tester
This KONNWei KW681 Car & Motorcycle Battery Tester and OBDII Diagnostic Scanner is a nice package with a few ambiguities that I'll cover in this review. First though, the battery tester alone has already saved me from prematurely replacing the battery in my 2013 Hyundai Sonata that has had several discharges to below starting capacity due to sitting in my driveway for too many weeks in-between drives while the active systems in the car slowly drained the battery. (These modern vehicles really need to be driven every couple weeks, ideally, perhaps at least once a month, primarily to recharge the battery. Using a float charger to automatically keep the battery topped-off is another solution.) A typical lead acid battery can only handle about six full discharges before it's time to replace it, though one possibility to revive it, yet again, is to trickle charge it for 36 hours. (Most of the recharges I performed were at the 2 Amp trickle charge level, but not for 36 hours.) Knowing the battery had been discharged a few times, I finally got fooled by some 20 below zero weather that really put the battery to the test and it was only giving one start without a good recharge via highway driving. If I happened to start it a couple times in the driveway with only a short idle, I'd be pulling out the battery charger, yet again. Of course, this was in 20 below zero weather and way too much time in between drives. I should have incorporated a float charger, or simply taken the car for a drive. As it turns out the 27 month old 700 CCA battery still has 650 CCA and is at 93% of its new condition. Tester paid for! Keep in mind that most battery chargers have their own "tester" that tells you simply if the charging system is good, or not, but that's almost self-apparent if it takes a charge and they can often be misleading, not having put a load on the battery to find out the real story. I do happen to also have a regular load tester, which does tell you what you need to know, but it also consumes some of the life of the battery every time you use it. This KW681 battery tester works in milliamps so you can test as often as you like without shortening the life of your battery. An important detail when comparing battery testers like this KW681 is that many of them say they will "test" your battery, but if they only plug-in to the OBDII port what they mean is that they will tell you if your battery is still good. They won't tell you what your Cold Cranking Amps, Resistance and percentage of your battery life are, which are important details when you are preparing for an upcoming winter. By knowing those details I'm now confident that I won't have to buy another battery for at least 10 months, and maybe not even then. Anyway, to really test your battery you need to clip onto the actual battery, so look to see if the battery post clips are included with a tester, if the item description is too ambiguous. Also, one last point on this aspect is that some of the testers that do clip to your battery require you to use a completely separate cable that requires you to screw and unscrew two retainer screws each time which is a pain compared to what the KW681 requires. All you do is add the extra cable with the battery clips to your existing cable via a female connector exactly like the OBDII port in your car, which btw, adds nearly two more feet of length to your cable. Nice! I was actually able to do all of my battery tests while sitting in the driver's seat of the car, which is a big plus, since you need to be in the car to start it for the Cranking Test and have your foot on the pedal to raise your RPM for the Charging Test. I'll be discussing that more, coming up.First let me give you some specs that I alluded to a moment earlier, that I'm sure many want to know, though the pics I've included already answered them, as far as that goes.~ The cable permanently mounted to the KW681 is 57" long.~ The cable extension with the battery clips is 21'' long (to the tips of the clips).~ Combined they are 78" long (a bonus spec for the mathematically challenged).~ The USB cable for hooking to your computer for uploads and memory printing is 32" long.~ The carrying case is a nylon drawstring pouch.Okay, now, let's talk about ambiguities, starting with the promise I made to come back to the topic of raising the RPM for the Charging Test. The manual has a number of spelling errors, typos and even mislabeled headings (hopefully, the design technicians didn't do the editing for the manual) so there is room left for befuddlement. Both the instructions on the KW681 device and the manual tell you to "Increase RPM to 2500 r/min and keep it for 10 seconds (what the device says) or 5 seconds (in the manual), Press ENTER to continue." Reading that in English, it sounds like you should rev it up and hold it there, after 5 or 10 seconds press ENTER and keep holding your RPM at 2500 throughout the test. They were pretty good about detailing each step with other tests, so it doesn't seem likely that they would have forgotten to tell you to return to idling and then press ENTER. Simple enough, right? Well, that's until you watch a few videos of so-called "Expert Technicians" doing the test with devices like this one, and watch them run from the battery to the driver's seat to rev the engine to 2500 RPM for a few seconds, then letting it drop back to idling, and return to press ENTER on the device. I did the test both ways and got different results but both were good. Since then I've done some research and I do believe the test is supposed to be done at 2500 RPM throughout the duration. (Good luck holding the RPM very steady, btw.)One more important heads-up for you. When it comes to doing a software update, or printing a report of your vehicle's status, it will be a breeze, but only after you've made it out of the maze required to install the driver and software on your computer. No doubt, many have tried and given-up on the idea, with no plans to print reports and thinking a firmware update might be of little value anyway, unless you have a 2023 model vehicle. Then again, who knows how many updates there have been in the firmware since the unit was first programmed. I did peruse the Settings and found the firmware version on the unit right out of the box was v1. something and the update was v4.0, so it's probably a good idea to do the update. I'll save you a lot of hassle with that, coming up (if you were patient, or curious enough to read this far).Speaking of perusing the Settings, another detail missing from the manual is how to switch between the two screens that comprise the Main Menu, so that you can even find the Settings. The trick is to press and hold either the right or left arrow buttons until the other screen pops-up. It will toggle between the two Main Menu screens until you release the button on the one you want.Both the manual and the update tool can be found on the konnwie.com website. (I highly recommend downloading the manual for easy perusing.) You can click on the "SUPPORT" tab, or scroll to the bottom of the home page to find the links to each. When you click on the "User Manual" link you'll find the KW681 link as the second from last on the list, at the bottom of the page. When you click on "Download Update Tool" be sure to follow the instructions and you'll find the KW681 listed at the bottom of the list in the "UPLINK:" group (as opposed to the "BTLINK:" group). So, remember UPLINK is what you want. Now try clicking on the link they provide: http://www.itoscanner.com/download/ and if you have the experience I did, it will be dead, so copy and paste it in your address bar, or simply copy and right-click and then go to it. There you will actually find the download link. Don't worry about turning off your virus protection as is suggested, as Windows will ask you for permission to open the file when that time comes. (For your comfort, I did scan the RAR file for viruses before I downloaded it. You can even do the same if you are concerned. Just right-click on the link and you'll find the option in the menu.) Click on the top download button, at the right, for uplink.RAR (which is a type of zip file) and the file will download to your computer.Now that you have the RAR zip file downloaded, you may find that your computer won't open it. In that case, search the internet for a free RAR file extractor and install that, then you'll be able to extract it and go to the uplink.exe file. Click on that and install the driver and follow the instructions. After that, the device will find the appropriate firmware update and install that, all by itself, so you can now breathe easy. It'll tell you when it is done and you can then unplug from your PC and assume that you are ready for any vehicle from 1996 up through 2023.
E**T
Awesome 2 in 1 tool for checking battery condition AND OBD2 diagnostic codes
I've got a lot of tools, and I'm all about combining them to solve a problem, and have less to carry around. I work on a lot of cars for fun, so it's great to have some tools that work great on old and new cars. I've been working on an modern alternator conversion on my old 61 Falcon, and the battery testing functions work great on this to check the battery condition before testing the new charging system. 5 minutes later, I was able to plug it into my wifes car to pull an OBD2 code that indicated an evaporative emissions leak....turned out to be she left the gas cap loose.The unit is well made, the buttons engage positively. The screen is bright and easily readable even in bright sunlight. The battery test leads is a short jumper harness that plugs right into the OBD2 plug. The alligator clips for the battery terminals are a good size and hold well. The unit powers up immediately when connected to a battery or OBD2 port. It should be able to read standard OBD codes from most common vehicles, it covers all of the interfaces normally used.Highly recommended, another great tool from Konnwei! I'm a big fan of their electrical testing equipment, and can't wait to see what they come out with next.
B**N
Do not use with Mazda Vehicles
I tried it out for a few minutes and all seems to be well data/accuracy wise. However I did have 1 major problem, when plugged into my 2016 Mazda 3 Sport my gas gauge slowly dropped to empty within about 20 seconds and stayed there until the scanner was unplugged. I also noticed that the car complained that it could no longer find my key-fob until the engine was restarted. I also noticed a different smell coming from the exhaust as though it was running rich while the scanner was plugged in. Like I said everything returned to normal after unplugging and restarting the vehicle so I don't believe any lasting damage was done but still strange and doesn't give me great faith in the product so I will be returning it. Before anyone asks I did install the software from their website and attempted to update the device but as of writing 12/5/2021 at 9:12pm it already had the latest software 4.0 installed.
T**N
So far so good
have only had for about a week, but so far it has been as helpful as I needed it to be. I could read and clear my codes where O'Reilly's couldn't even read them for me. It also was able to check the charge of the battery for me. So far so good.
P**A
Great deal for the money
The battery tester works really well. Trust me I've tested it over a long period of time, I'm happy with that.The obd2 scanner is also good for basic engine diag. It gives you a lot of info for the simple diy guy that needs to clear engine and related codes only. There is no airbag, transmission or abs data from this tool. For that i have an Xtool A30M. I still use this tool all the time though.Update:It's now 2025 I've bought this thing is 2022. I only used it about 5 times per a year since then. The battery tester is now not giving accurate measurements. You get different readings that are way apart from each other. I still have to test if the code reader still works. Not worth the money if its gonna break just by being on standby.
Trustpilot
Hace 1 semana
Hace 1 mes