
🪟 Elevate your space with privacy and style—see the light, block the rest!
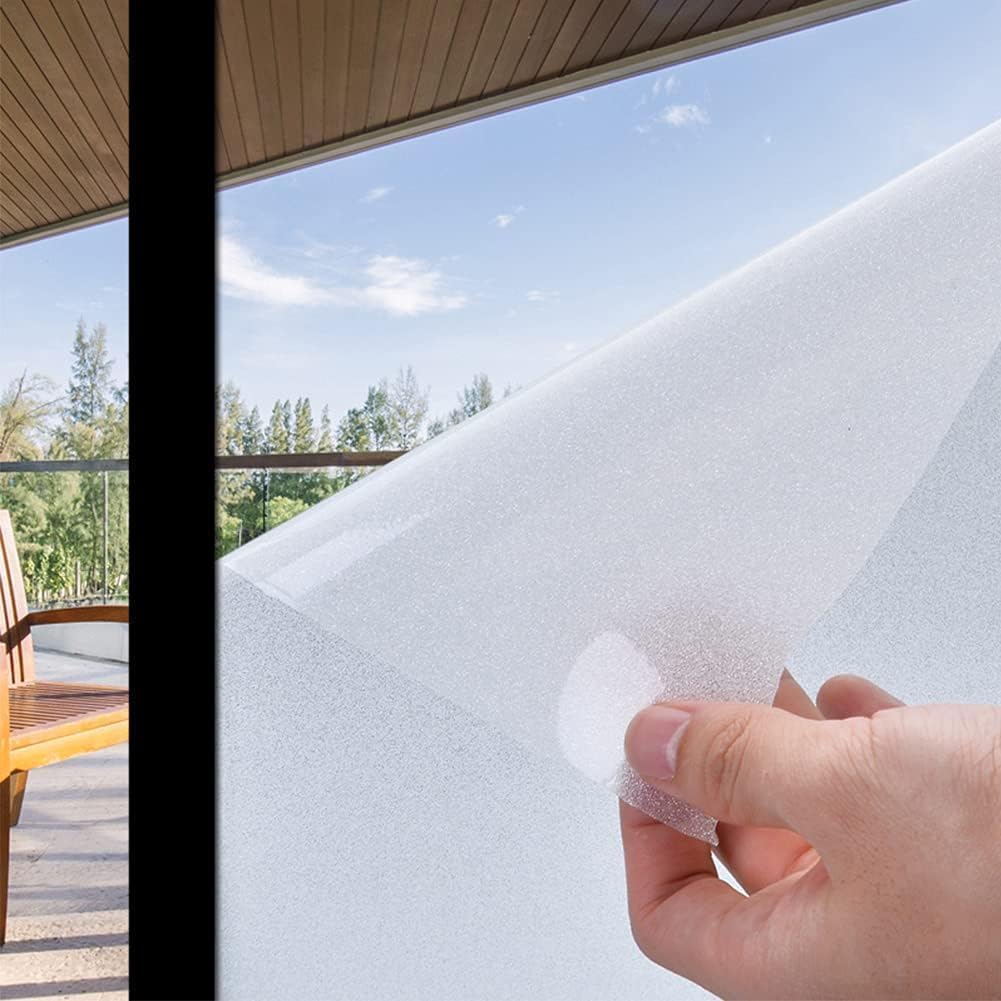
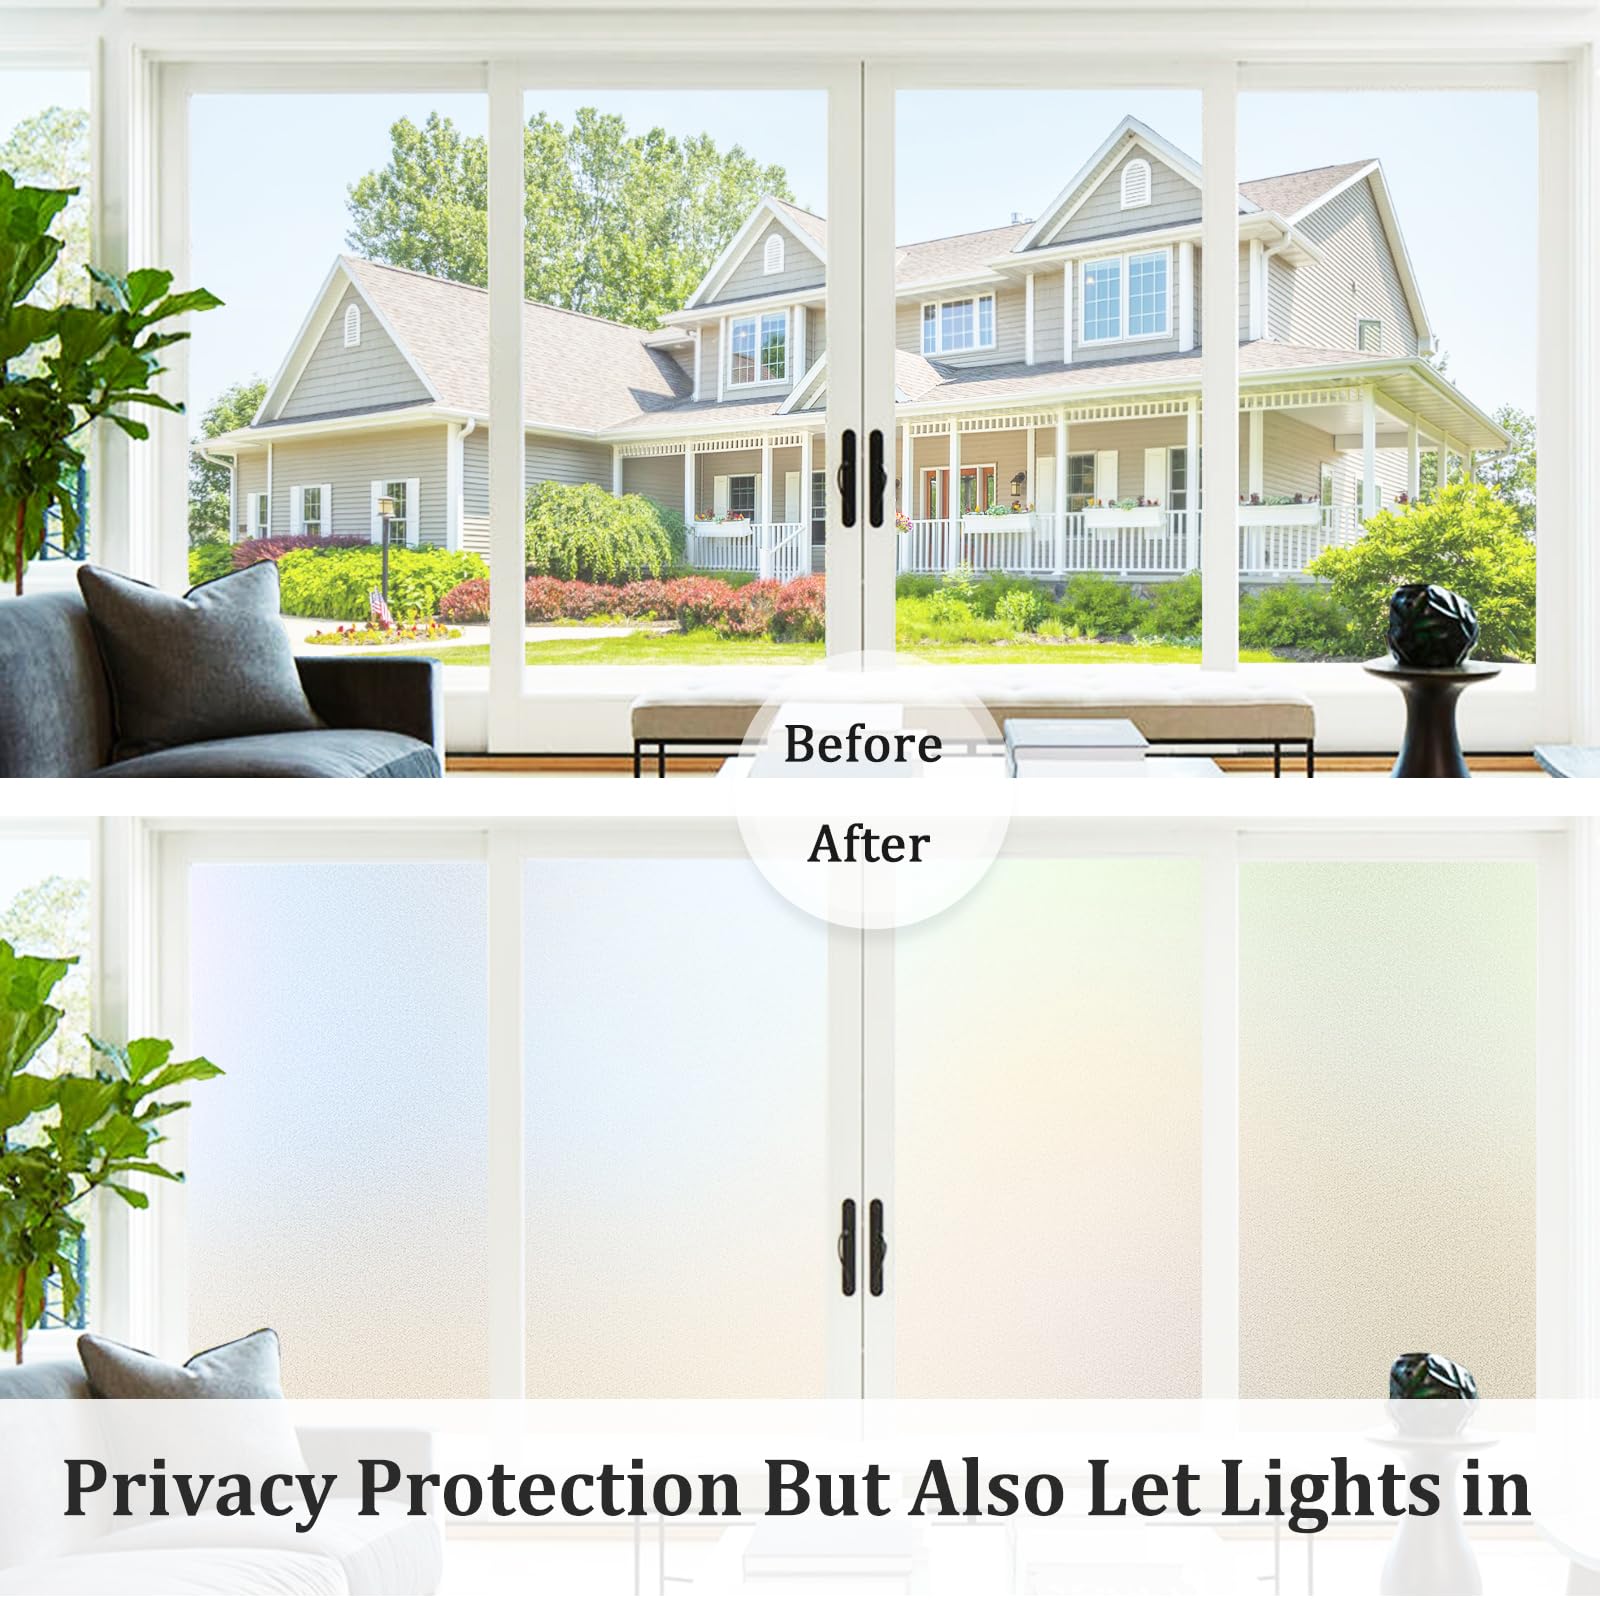
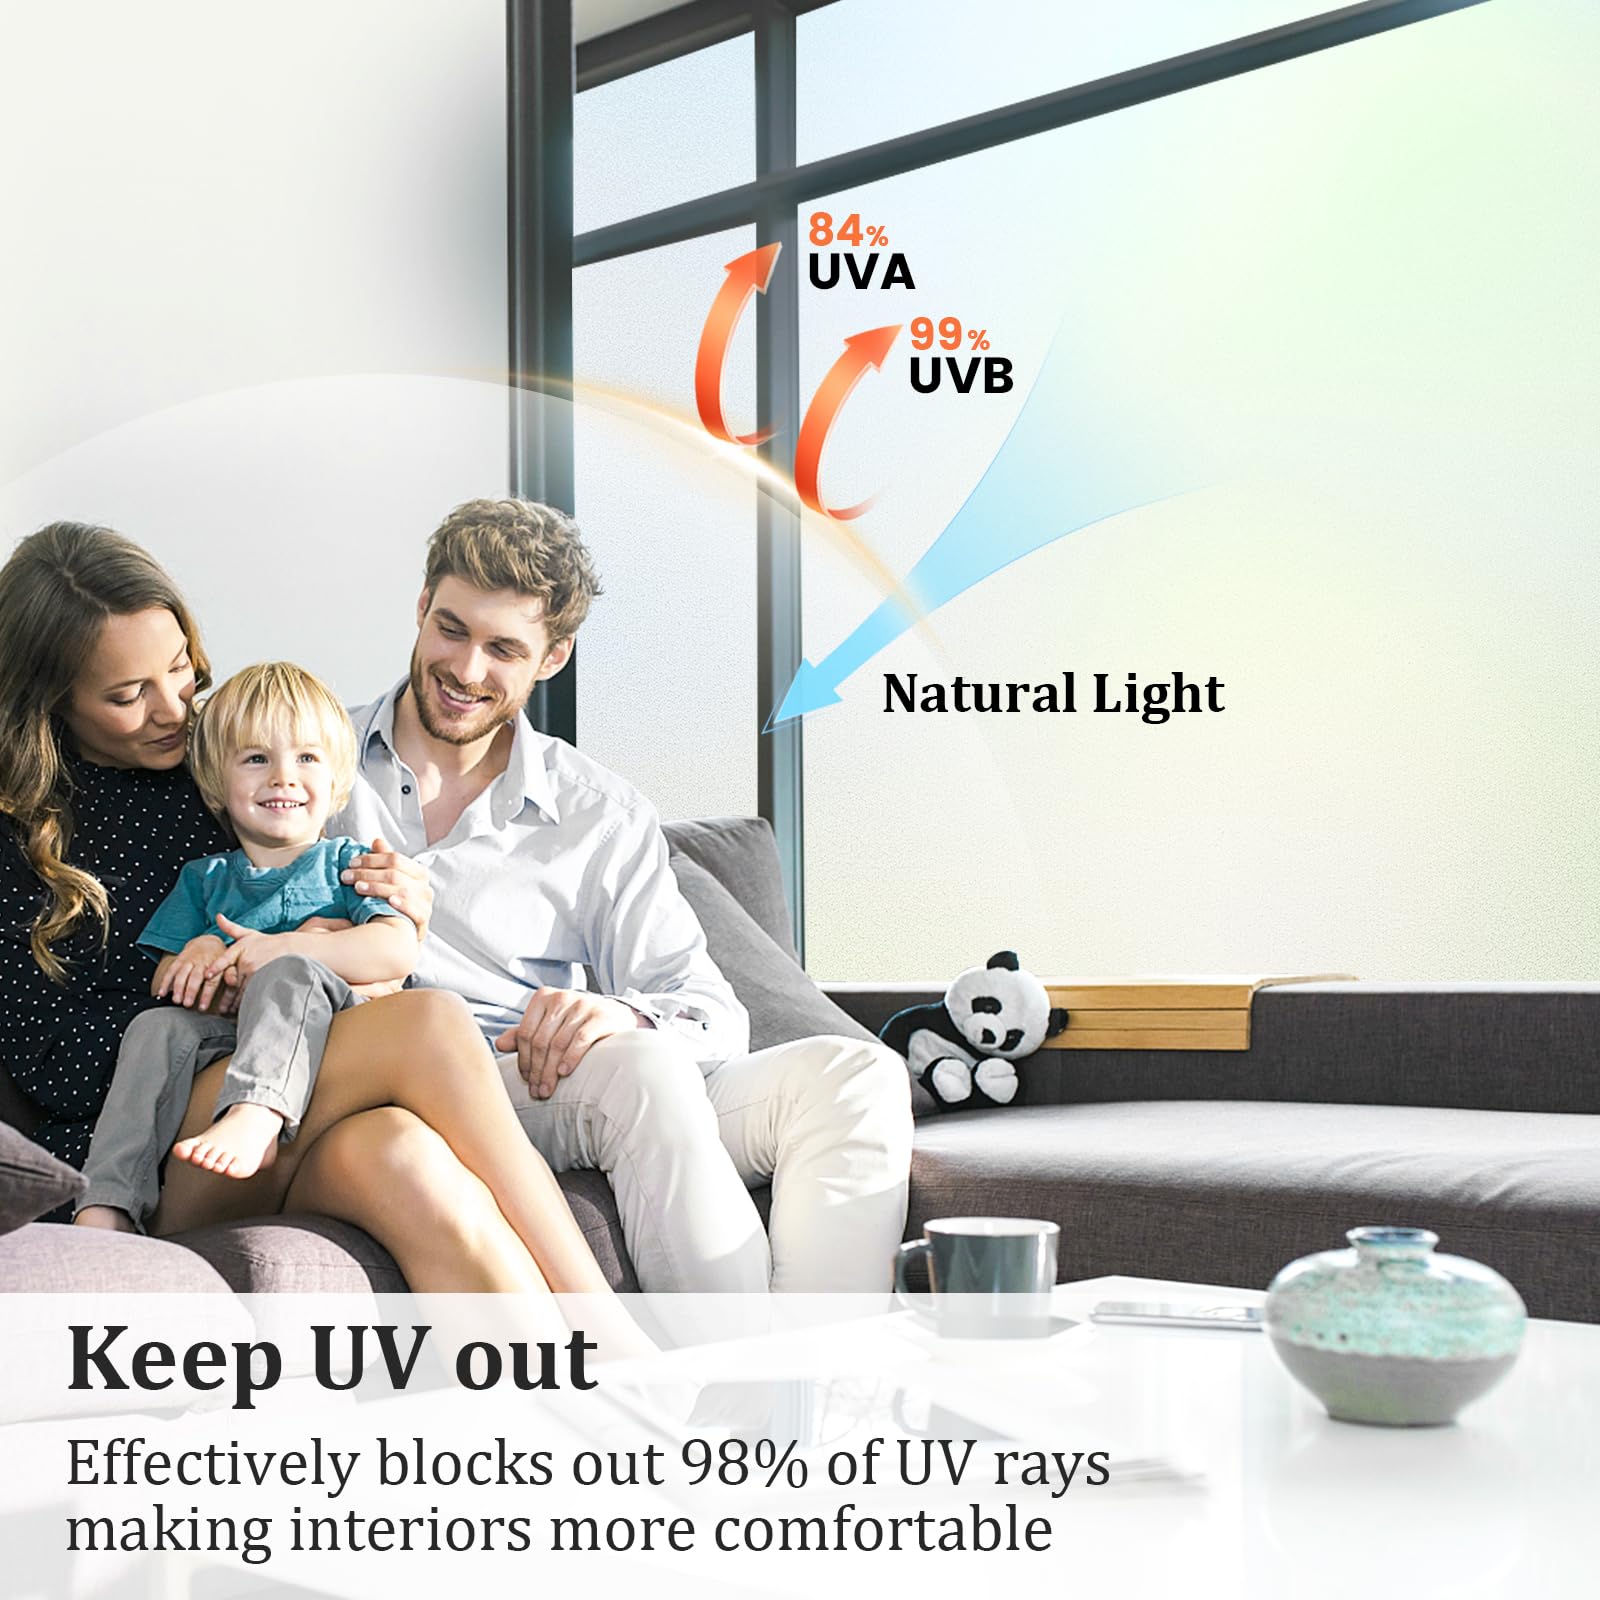
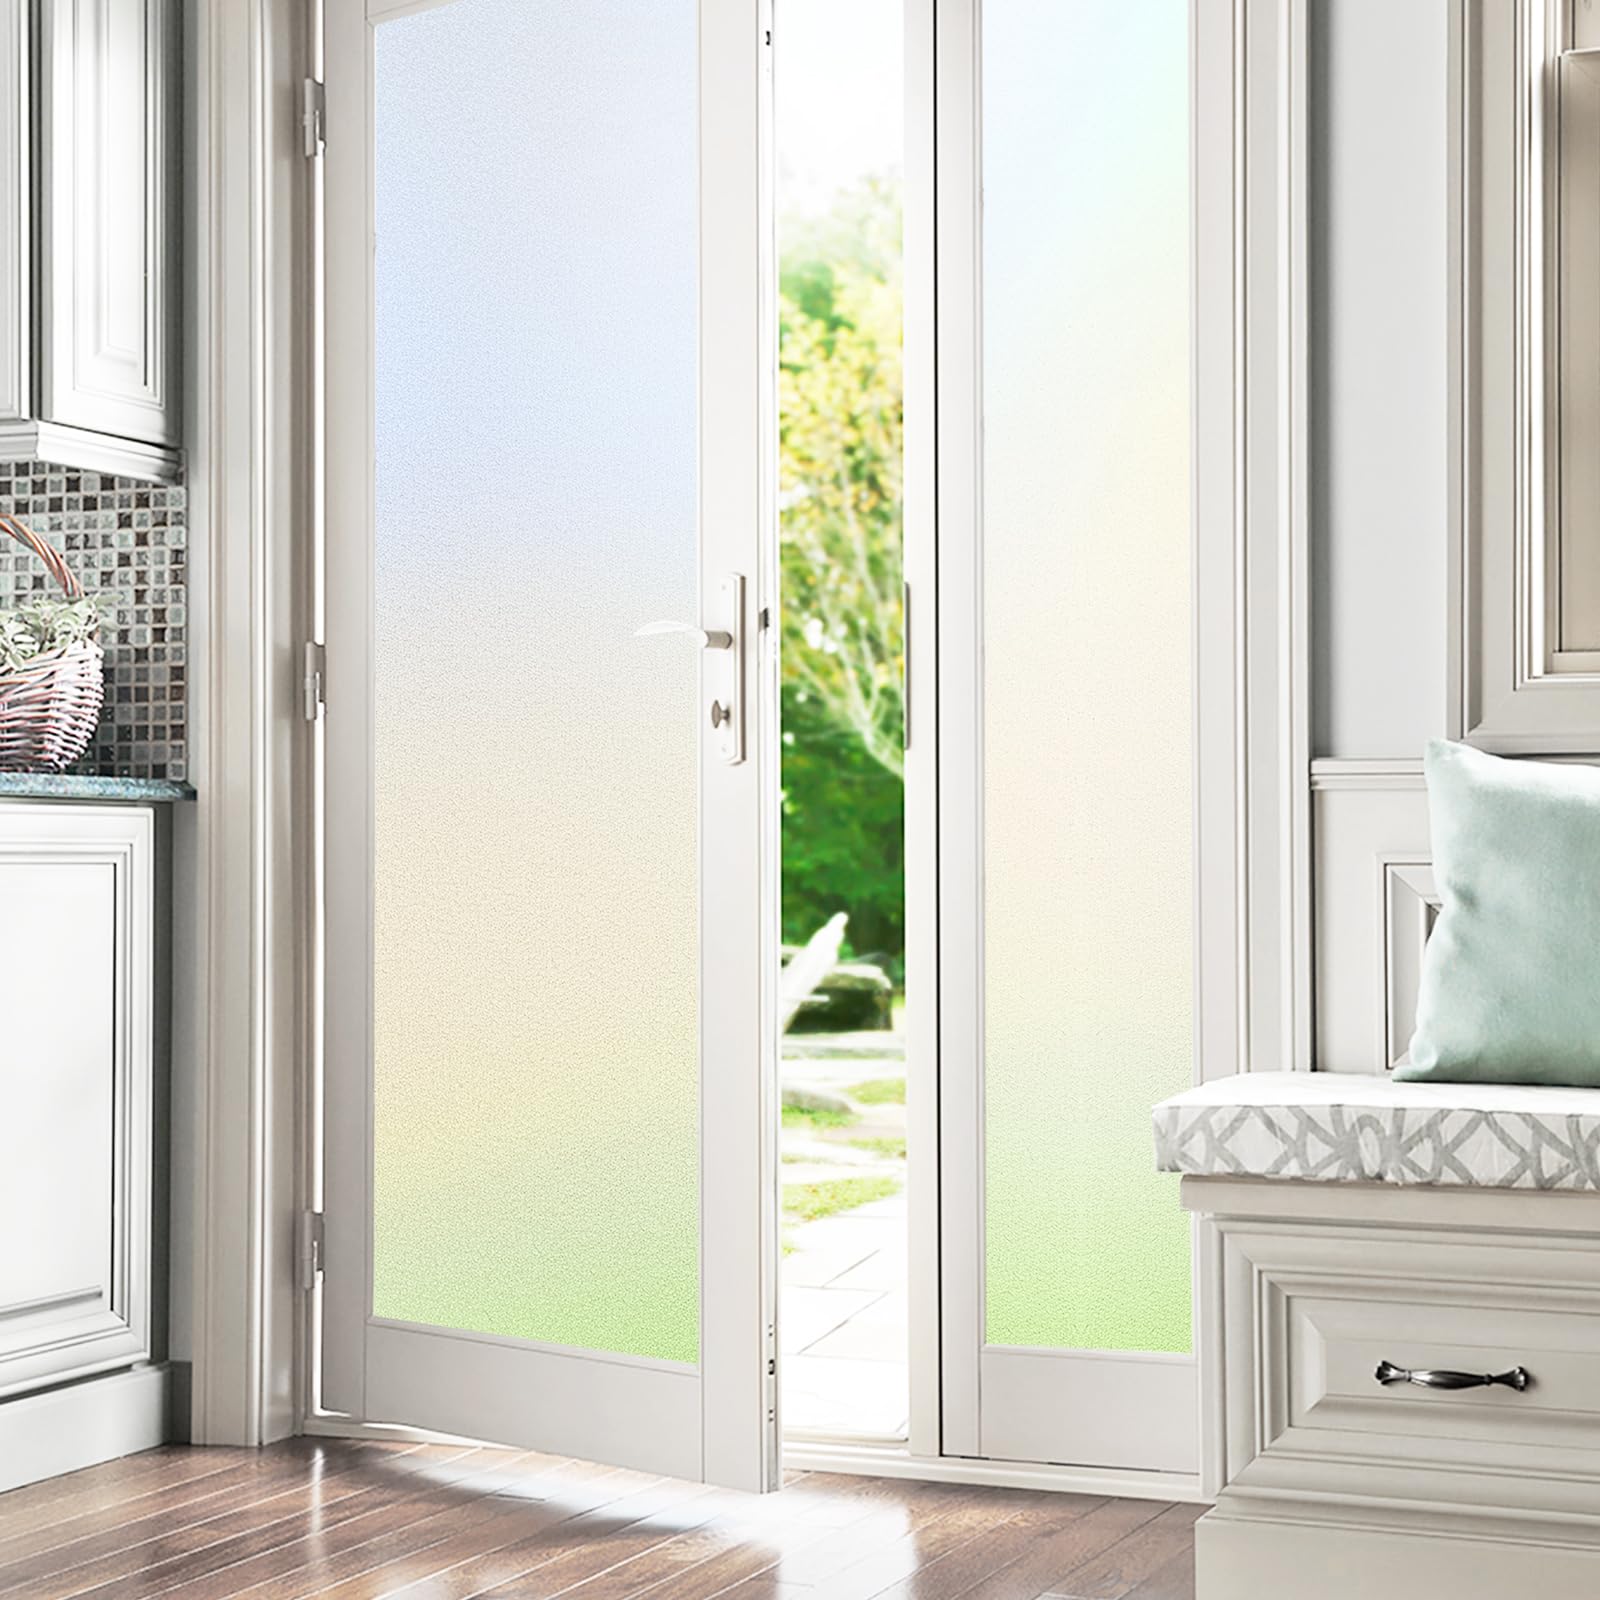
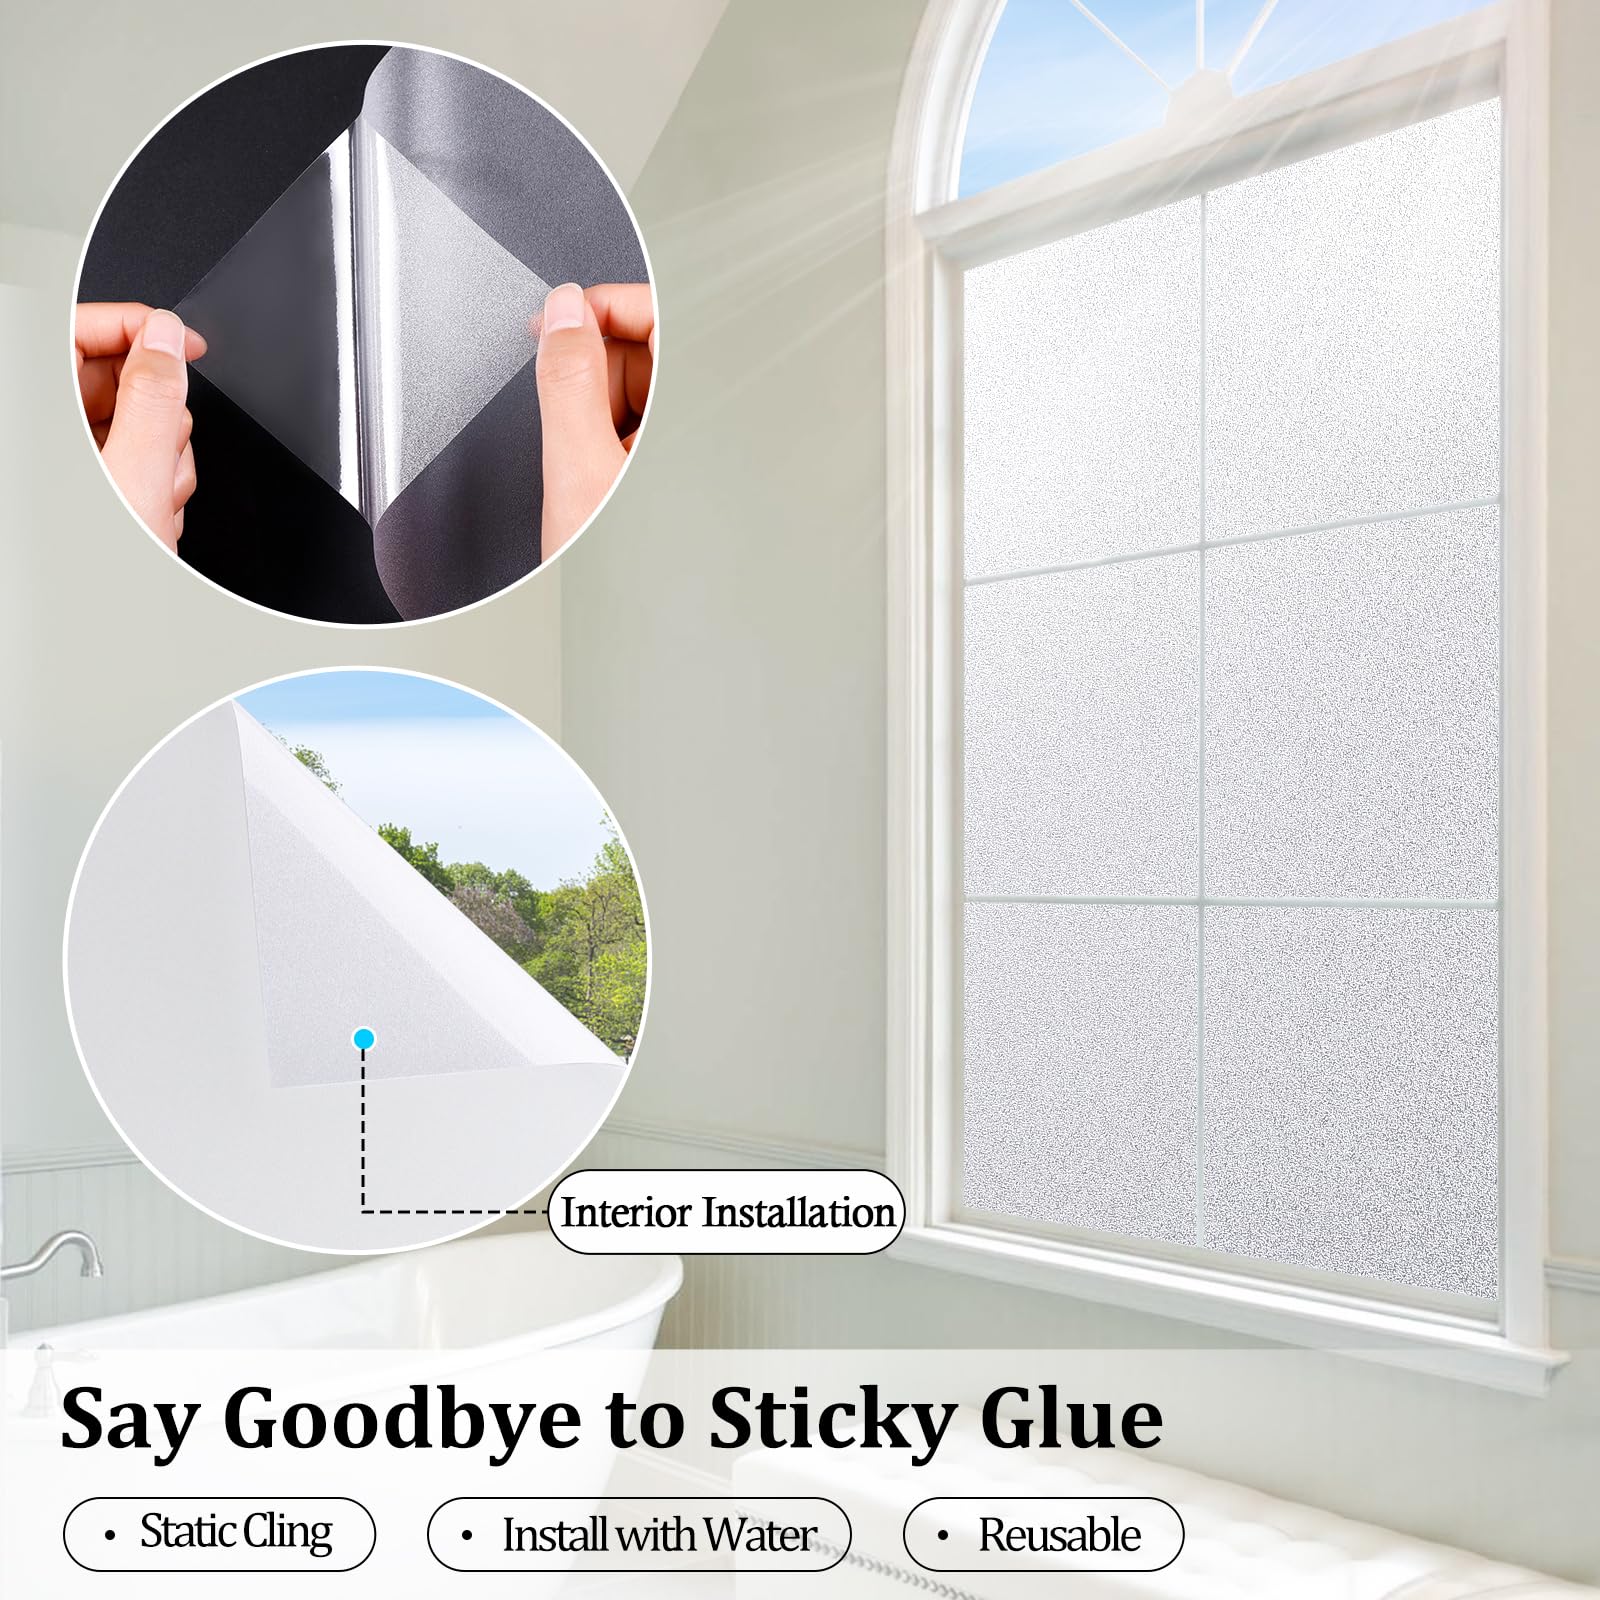
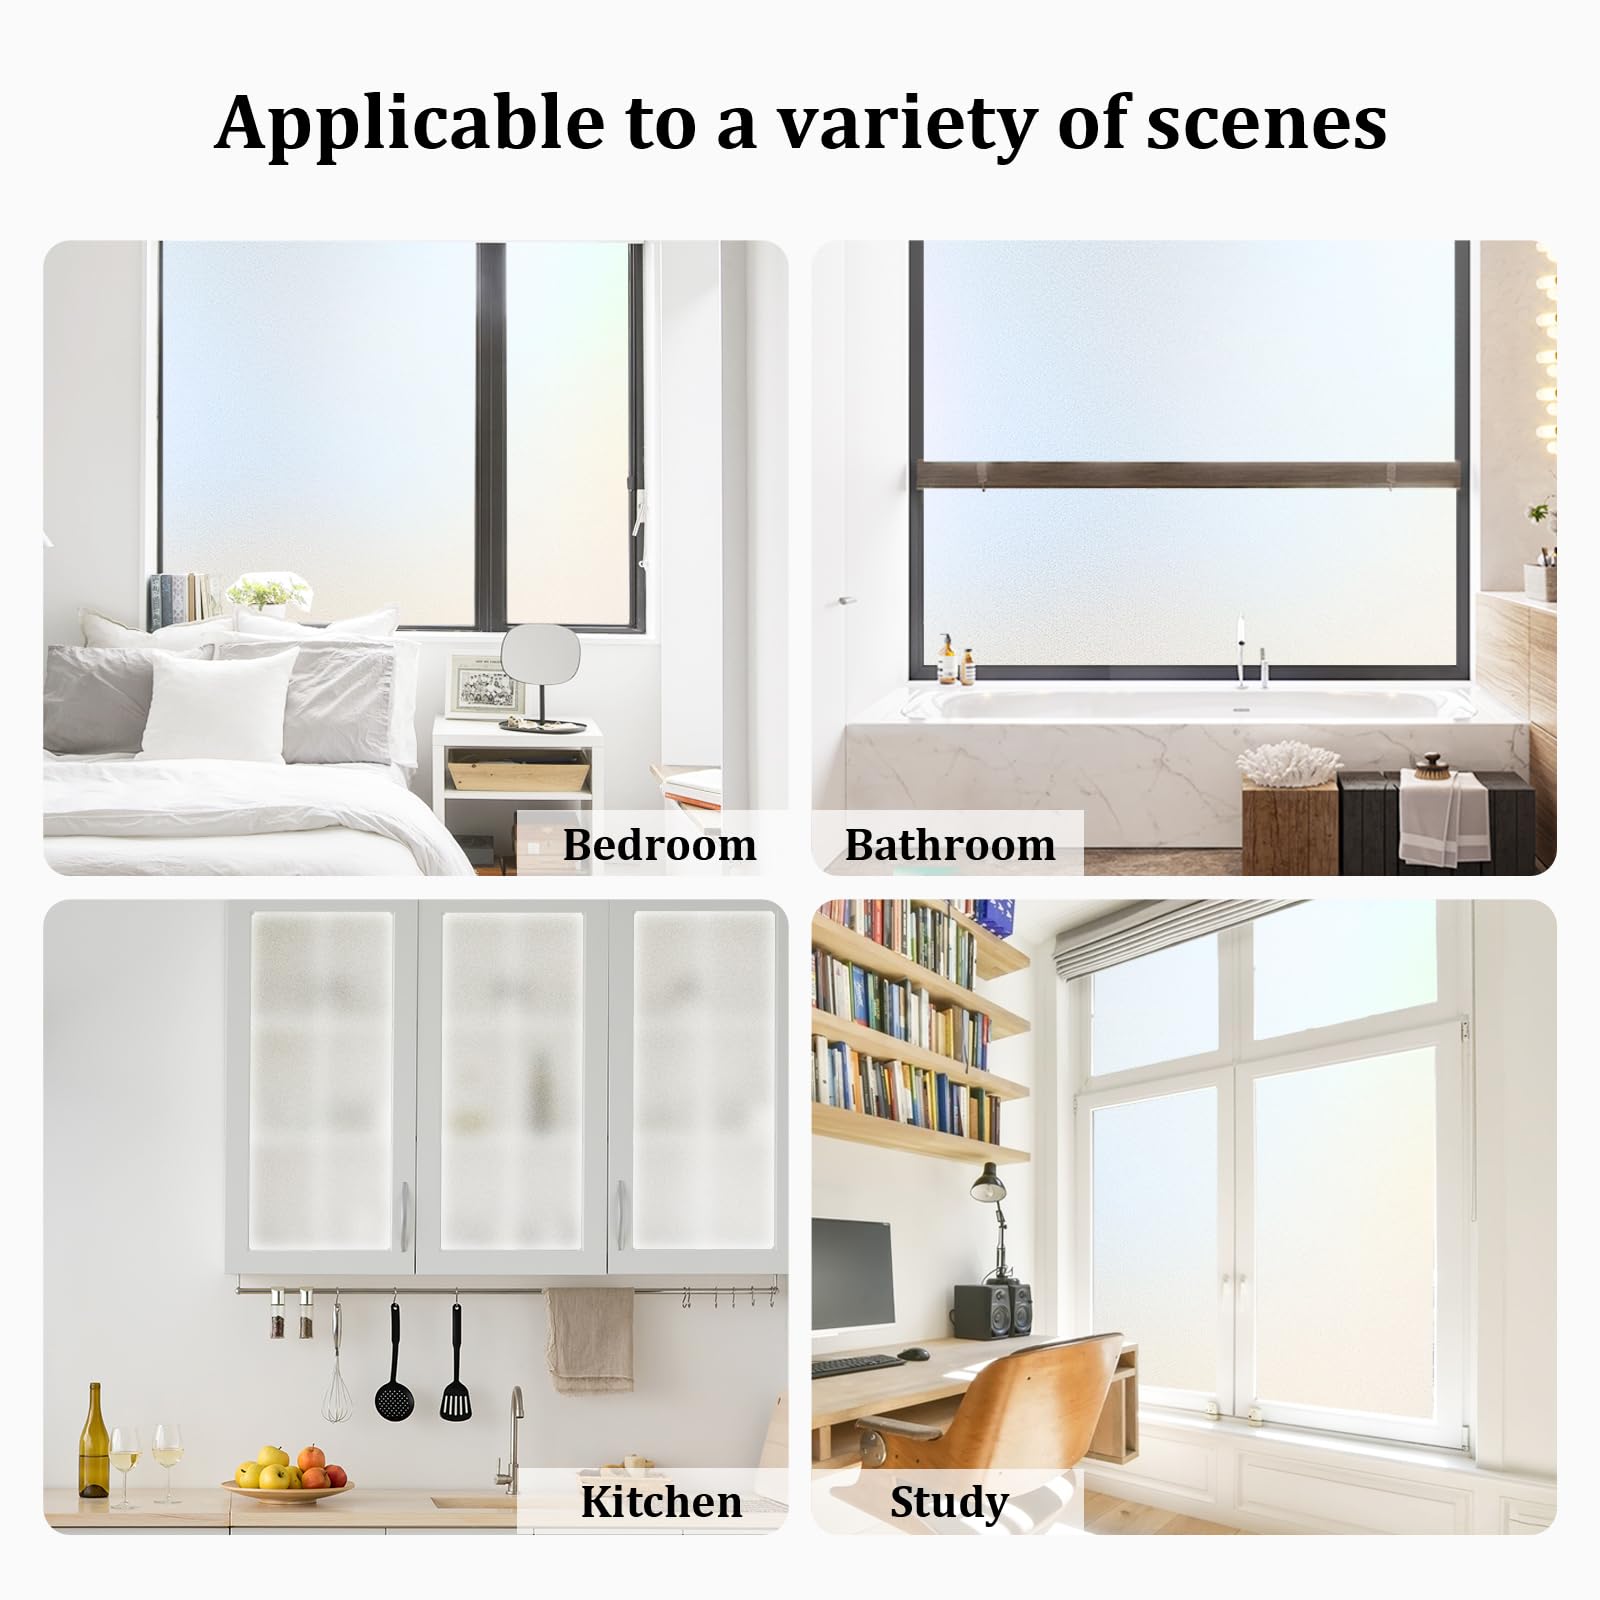
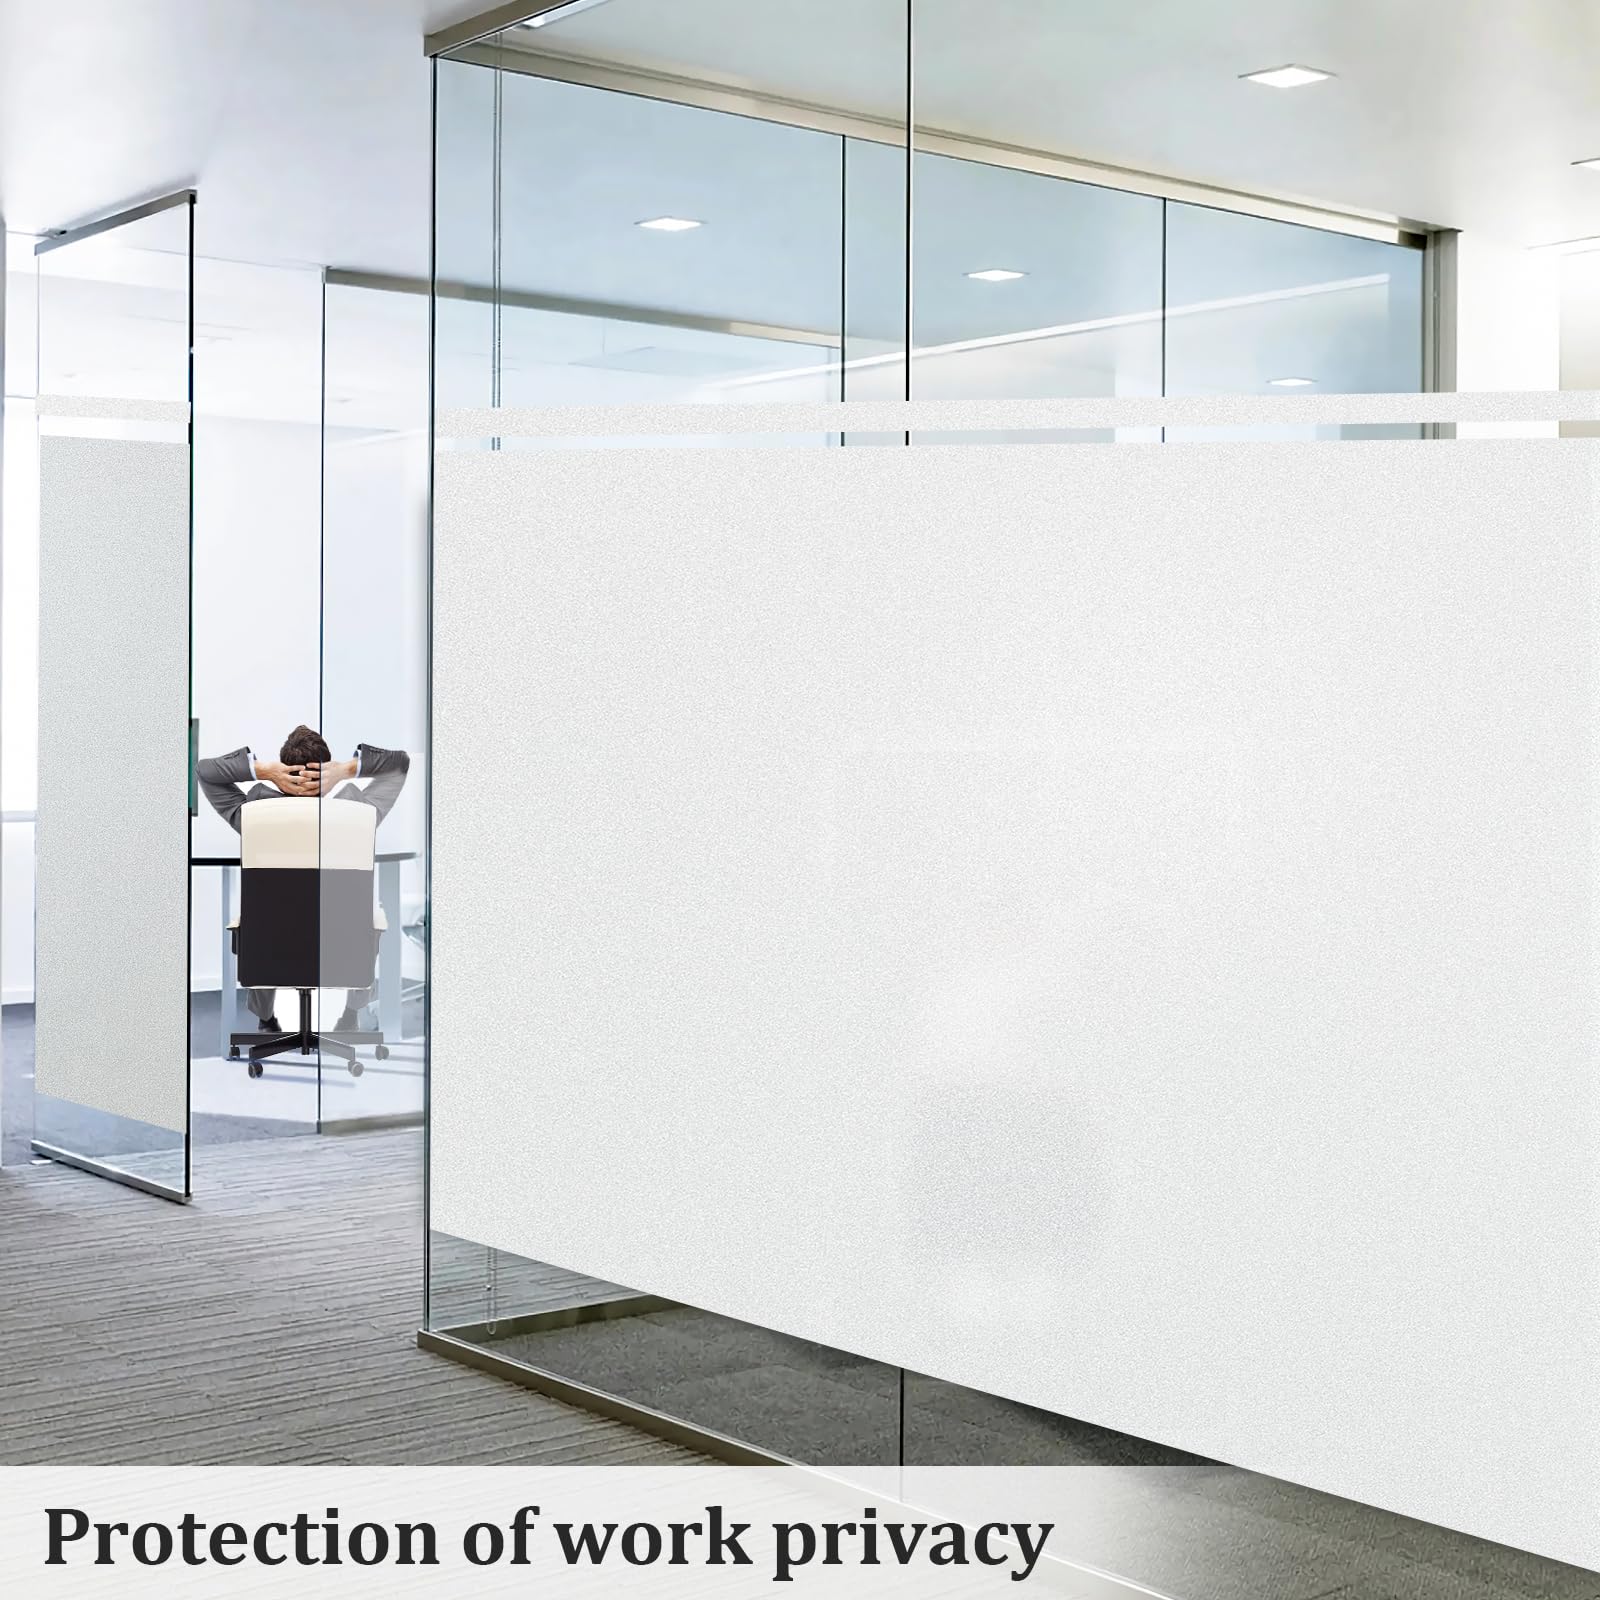
Coavas Window Privacy Film offers a sleek, non-adhesive vinyl solution that blocks 98% of UV rays and insulates against heat, providing 24/7 two-way privacy without sacrificing natural light. Measuring 17.5x78.7 inches, it’s easy to install, reusable, waterproof, and perfect for enhancing privacy and energy efficiency in homes and offices.


| Item Dimensions L x W | 78.7"L x 17.5"W |
| Size | 17.5 x 78.7 Inch |
| Installation Method | Static Cling, No Glue |
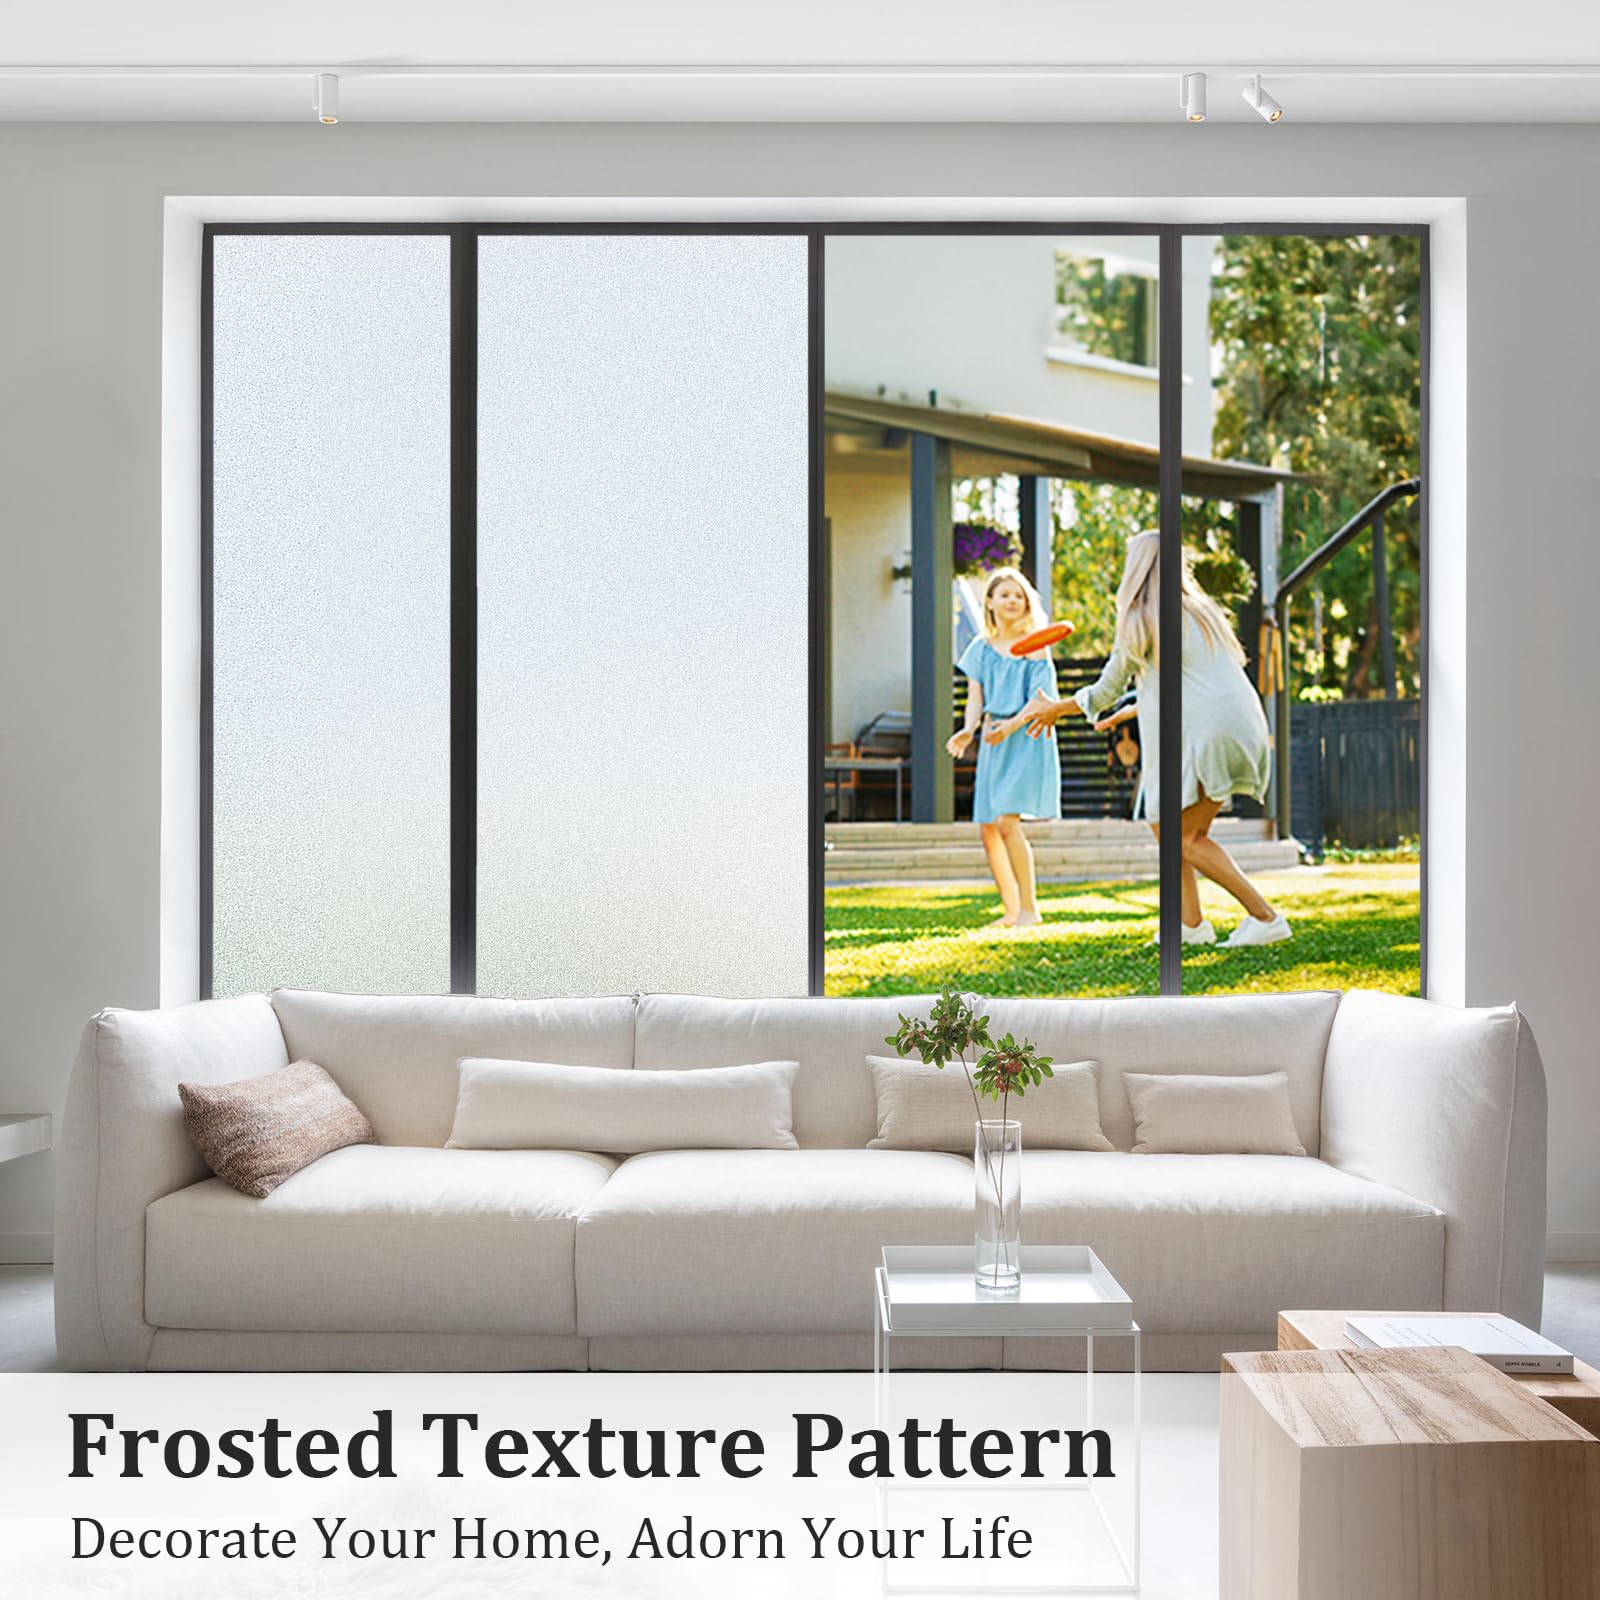
| Color | A-frosted |
| Ultraviolet Light Protection | 98% Anti UV |
| Material Type | Vinyl |
C**I
Installation Tips
I just installed my second of these. The first has been up for year(s) and looks like the day I put it up. It's not easy to get the film to fit right up against the frame (which is how I wanted it) but can be achieved with proper tools and some tricks. I suggest scissors, a utility knife, and a straight metal edge with a sharp corner like a putty trowel (or ruler). Here's what I've learned to do (but follow my example at your own risk):1. Make sure you use the "original" corner on the most obvious sides. For example, I put this on one of two sliding doors. The left edge was going to be very visible while the right edge was going to be partially obscured by the other sliding door. Obviously, eye height is also near the top of the door so I made sure to use the original edge/corner on the top and left and put my cuts on the bottom and right.2. Measure and cut the film with an inch or so extra. It's actually harder to cleanly cut away a small amount (e.g. 1/2 or 1/4").3. As they say, wet the door pretty heavily. This helps you avoid and remove air bubbles. I actually took the back film off a foot or so at a time. On the plus side, a little rolled back protector prevented it from trying to "grab" the entire door at once. On the downside, the backing tended to grab water off of the door so I got a worse finish at the bottom. Yon can probably get the best of both worlds by re-applying water as you peel away the backing.4. Start with the original corner. Get it positioned and slowly work your way across the short side of the window. For example, I start in the top left and make sure the top of the window is lined up. If the film isn't flush, push the air bubbles towards the edge; this will tend to "tug" a little film with it. If it's lined up nicely, you can work the other way (this will help you later). Especially on a full door, you may need help to prevent the film from sliding (too much water can actually contribute to this).5. Work down the second original edge. You're going to slowly work a large and larger "triangle". Actually start on the edge that's already finished and work your way diagonally towards the next few inches of the long edge. Pull the air bubbles and ridges away from the finished edge (in my case down), securing the finished edge with light pressure so you don't pull the film away. You need to get all of the bubbles and folds out so the material can stretch to the in-process edge. As you get close to the long edge, you can "pull" towards it if needed -- the film can be stretched a little bit. This can be hard at first (pulling away from the finished edge) so you may need help. If you're really close, push air bubbles (and film) towards the frame. If not, pull it back a couple inches and try again (pulling towards the edge a few inches below your working area). If you're having issues with a big gap, try working the bubbles "down" and towards the in-process edge to encourage film to go in that direction.6. Once you've finished both original edges, at least half of the window (that triangle you've created) should be securely attached. You've probably made some progress down the other side "naturally" (I was a foot or two ahead of the unfinished side. By the time you're at the bottom of the door, you've probably pushed air out of at least half of the opposite side.7. The hardest part of the process is cutting the two non-original edges flush. Even with a sharp utility knife, I had trouble getting a clean cut on my first attempt. The film will tend to tug and shift. I eventually realized that I needed to put pressure on the film while cutting. Ideally you want something metal like a ruler or (even better) a putty trowel. I managed to do a pretty good job the second time with a hard plastic edge, but did cut away/damage the piece of plastic. It also had a rounded corner which made for trouble cutting the last corner (below).You want to place the metal edge right up against the frame so you can cut a clean line without letting the film shift. I also found that it was better to work towards the existing cut. For example if I start at the top of the door, I actually had the most success cutting "upwards". If I cut down, it was more likely to catch and tug the plastic. So I cut the first say 6 inches. Move the tool down. Cut the next 6 inches. Each time I finish the cut, the extra plastic falls to show me that I've cut through. CAUTION: I certainly scored my frame in a couple of places, mostly working on the corner (below). If that's an issue, you may want/need some additional tooling (but I don't know what to suggest).The corners are the hardest and I never got it perfect. The first two corners are easier because you can cut "towards" the edge, the tool holding the film down helps ensure a clean finish, and the material releases once you've cut far enough (but take care not to score the frame). The last corner is the hardest. At least one of the directions, you're dealing with a lot of extra material. Consider cutting the corner off (i.e. a diagonal cut) so you have less excess material. Wait until the end so you cut the right amount. Hopefully your "ruler" has a pretty sharp corner to help. If I did it again, I might even use scissors to cut from the outside in, BUT the hardest thing to do is to remove a sliver of material so you have to be very precise. You could even cut the film a hair short and try to stretch it to the edge while removing air.Hope this helps and good luck!
S**X
This stuff is great!
I love this stuff and have used it on several windows over the years. It is a great inexpensive way to easily change up windows. This time I got the frosted version to help provide some privacy in a bathroom and on some garage windows.Product came in perfect condition and have seen other similar products where the the tubes are bent while shipping.As I mentioned I have put this type of film and several windows of the years and the frosted film works great for privacy. Plenty of light still comes through in the daytime. I tested it at night with all the lights on in the room. While standing outside looking in and one can only see rough heavily blurred shapes through the frosted film. So it works as expected and feel completely comfortable leaving the blinds open while taking a shower with this film on the window.I have had this film on other windows for over seven years and have yet to notice any discoloration, yellowing, or fading.Hanging is relatively easy but will provide some tips on what I have found as the best way to do it. First, two people are better than one. (Have hung this film on by myself before and it just takes longer and more of a hassle.)Second clean the side of the window where you are applying the film thorougly. I use Windex and then a wet towel to remove any remaining window cleaning chemicals in case they might react with the film and finally paper towels to dry it off. (I have only put the film on the inside of my windows and have not had an issue. Have no idea what happens if this film is placed on the outside of a window exposed to the elements.)Next and why two people make it easier than one is it is best to have one person hold the film up against the window and a second person cut a rough outline. As others have mentioned when cutting the film for the first time leave about an inch over and past the edge of the window pane and plan to trim it off later. (Never try to pre-measure and cut the film to fit the glass. I did my first two windows this way and each time miscut the film as windows can be slightly irregular or the line I cut was not straight and then you end up with gaping gaps along the edge of the film. It is always easier to cut away the excess with the film on the window.)After you have a rough cut outline add the soapy water and coat the glass completely. Any dry parts on the window are much harder to work with so soak the glass until until water is running down the pane. Also excess water will not damage the film in any way so you can’t hurt it with too much water.Then remove the backing and place the side where the backing had been up against the window. (Be careful that portions of the window, particularly at the top, don’t dry out while you are trying to get the backing off the film which can tricky. If they do just add more water to the window.) If the window is wet you can then move he film around slightly to get it in the right place.This next part is the hardest. Take a really sharp box cutter or exacto blade and cut along the edges of the window to remove the excess film. This takes some practice as the film can bunch up a bit as you pull the blade through it and make the cut irregular - a fresh sharp razor blade helps to prevent this. Also cut the film on the frame and not the glass. If the film is larger than the window glass and hanging over the edge onto the frame, the film tends to lift away from the glass at the edge and cutting directly onto the glass ends up with the film being about 1/8 inch too short and not flush up against the edge of the frame. Again this takes some practice and don’t expect your first window not to have some gaps between the film and the edge of the glass and the frame.Once the film is cut to the shape of the glass, then use a squeegee to push the bubbles and excess water to the edges. Be careful not to put too much pressure on the sharp corners of the squeegee as it can gouge the film.With two people, we did (10) rectangular 23 in x 66 in window panes in about two hours. I imagine if I had done it by myself it would have taken three or more hours.Again I love this product for frosted privacy glass. The finished product looks like regular frosted glass. Have not tried the more decorative films yet but will in the future.
Trustpilot
Hace 2 meses
Hace 5 días