We remain fully operational. Our teams are working around the clock to ensure your deliveries continue safely.

Descargar la aplicación


Servicios al cliente
Sobre nosotros
Copyright © 2025 Desertcart Holdings Limited
Descargar la aplicación


❄️🔥 Command your comfort with smart power and silent precision!
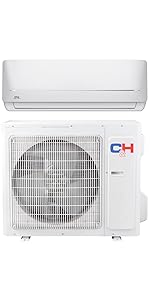
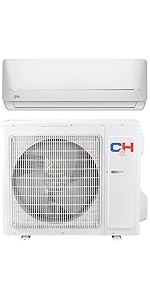
The Cooper & Hunter MIA Series 24,000 BTU ductless mini split system delivers powerful heating and cooling for spaces up to 600 sq ft. Featuring an energy-efficient 18 SEER2 inverter compressor, it ensures precise temperature control and reduced energy consumption. The system includes a Smart Kit for remote WiFi control, operates quietly at 35 dB, and comes with a professional-grade 16ft pre-charged installation kit. UL listed and AHRI certified, it’s designed for durability and year-round comfort in residential and commercial settings.


| ASIN | B0849LK2C6 |
| Batteries | 2 AAA batteries required. (included) |
| Batteries Included? | Yes |
| Batteries Required? | Yes |
| Battery Cell Type | Zinc Carbon |
| Best Sellers Rank | #141,752 in Home & Kitchen ( See Top 100 in Home & Kitchen ) #14 in Split-System Air Conditioners |
| Brand Name | Cooper & Hunter |
| Capacity | 2 Tons |
| Certification | AHRI, UL Listed |
| Color | White |
| Customer Reviews | 4.3 4.3 out of 5 stars (1,930) |
| Date First Available | January 28, 2020 |
| Efficiency | 18 SEER |
| Floor Area | 600 Square Feet |
| Form Factor | Mini-Split |
| Heating Elements | 1 |
| Included Components | Indoor Wall Mount, Outdoor Condenser, Installation Kit including 16ft Pre-Flared and Insulated Copper Line Set, 16ft Communication Wires, and 16ft Drainage Extension. |
| Installation Type | Split System |
| Item Weight | 165.1 pounds |
| Item model number | CH-NY24MIA-230VO/I |
| Material Type | Copper, Plastic |
| Model Info | CH-NY24MIA-230VO/I |
| Noise | 35 Decibels |
| Part Number | CH-NY24MIA-230VO/I |
| Product Dimensions | 48 x 40 x 40 inches |
| Special Features | Dehumidifier, Heating And Cooling Function, Inverter Compressor, Remote Controlled, WiFi Enabled |
| Voltage | 230 Volts |
F**N
Super happy with this mini split!
I purchased this .75 ton single zone system for my master bedroom which is always hotter than the rest of the house. So, this is providing supplemental cooling to a room. I was lucky to have an ideal situation of having space on an exterior wall in the room so the heat pump could be placed just on the other side, with an electrical subpanel within 10' of the unit. So, very straight forward install. I purchased a 2 3/4" hole saw to make a clean hole on my interior drywall, then used a small masonry bit to make a series of small holes in a circle on the outer stucco wall, being careful to create a slight downhill slope from inside to outside. Some comments about the instructions that come with the unit: - the description of wiring connections refers to colors that didn't exist with the kit that I purchased. In the end, colors don't matter a bit, just make sure the order is identical for connections 1,2,3 and ground on both sides of the control cable. - the manual mentions in bold letters to be sure to plug the drain in the drain tray using the supplied plug on the side opposite of where the drain hose is coming out, since it is designed to support either left or right side drains. I couldn't find any plug, so I called support. They said ignore, it's already installed at the factory, and since I didn't need to change it to the other side I was fine. - the manual mentions to test your drain by removing the filter screens and pouring water into the tray. This is not obvious where to pour the water. Tech support said to pour over the evap coils. My first try I poured a little too far back and water ran down my wall. Then I poured a little close to the front and water ran out the drain line like it should, with no leaks. - the very good news is that tech support is available. I probably waited about 5 mins on hold to talk to a tech, and they were very helpful. Once the physical installation of the indoor and outdoor units was complete and the circuit was run, I called my HVAC friend to come over and complete the install. He insisted that we cut the stock flares off the lines and reflare the ends, as the factory ends are usually flared with too much pressure resulting in very thin flares. Sure enough, his flares were much thicker than the ones he cut off. Also, we found a piece of loose copper in one of the 5/8" flare nuts which would have caused leaks for sure. He then made the connections and used nitrogen to test the lines to 700psi for 10 mins, then pulled a vacuum for 10 mins. Finally when he was satisfied that all air was purged from the lines he open the valves to charge the system, and it works perfectly. I had pondered doing that part of the job myself by buying a vacuum pump and gauges on Amazon but I think I'm glad that I ended up paying a pro to do it instead. There are some hazards that only someone with a lot of experience would know to look out for. As some other have mentioned these units are unbeleivably quiet. If it weren't for the fact that I can see the fan moving on the heat pump, I wouldn't know it was running at all. It is really that quiet. Hopefully this will provide many many years of comfort!
D**D
Nice unit, not so easy to install without tools and experience
I bought this to add to the bedroom. The instructions were very thorough with lots of installation hints which was nice since I had never installed one by myself before. A few minor issues such as the wall layout for my model was wrong so I had to figure out where to drill the hole myself. The through the wall hole size that was shown was also a good 3/4" too big, but that helped when installing it later since it did not quite line up right. All the components seem high quality and durable, made in china of course. Be sure to use the special refrigerant lubricant/sealer, RT201B Nylog Gasket/Thread Sealant available on Amazon, on the flange connections when installing the copper tubing, it really does help prevent leaks which are the biggest issue with these units. That is not mentioned in the instructions BTW. Once installed, the unit is super quiet both inside and outside, works fast and seems efficient. The heat function is great, can't wait to try it this winter. Be aware that unless an HVAC contractor installs it, there is no warranty. You will need some special tools such as a calibrated digital torque wrench to the tighten the connections properly, a vacuum pump to clear the lines and possibly some copper pipe flange tools if you need to change the length. Overall it is a somewhat challenging do-it-yourself project unless you have some hvac experience and tools handy. I would recommend buy the plastic covers for the lines as shown in the picture, gives a cleaner and more secure finish. Of course the next one would be easy.........
R**J
Quiet and efficient....
This mini split has been a great addition to our home. We installed it to take some of the load off our whole-house HVAC system, and it’s already helping balance comfort while saving on the electric bill. The unit itself runs smoothly and has been working exactly as expected. One important note: the disclaimer that this is not a DIY mini split is very true. I normally handle projects myself, but there are aspects of this install I would have really struggled with. Thankfully, I have family in the HVAC business who came out and did a professional installation, which made all the difference. The install turned out very nice, and the machine is running great so far. I will update this review if anything changes!
Trustpilot
Hace 2 meses
Hace 3 días