♻️ Turn kitchen chaos into clean convenience with Waste King!
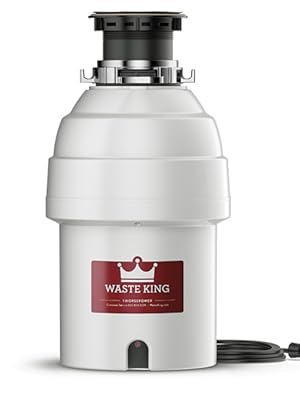
The Waste King L-8000 is a powerful 1 HP garbage disposal featuring a 2800 RPM permanent magnet motor designed for quiet, jam-resistant operation. Its EZ Mount system allows for fast, tool-free installation without electrical expertise. Constructed with durable stainless steel grinding components and backed by a 20-year limited warranty, this compact disposer offers continuous feed functionality and easy cleaning with a removable splashguard.


| Manufacturer | Waste King |
| Part Number | L-8000 |
| Item Weight | 11.94 pounds |
| Product Dimensions | 8.5 x 8.5 x 16 inches |
| Country of Origin | China |
| Item model number | L-8000 |
| Is Discontinued By Manufacturer | No |
| Size | 1 HP - Continuous Feed |
| Style | Disposal Only |
| Finish | stainless |
| Material | stainless steel | corrosion proof polymer |
| Pattern | 20 Year Warranty |
| Voltage | 115 Volts |
| Horsepower | 1 hp |
| Item Package Quantity | 1 |
| Special Features | Lightweight |
| Included Components | Splash guard, Reset button, Power cord, Mounting assembly, Disposal, Sink Flange, Drain stopper, Drain Elbow |
| Batteries Included? | No |
| Batteries Required? | No |
| Warranty Description | 20 Year Warranty |
C**S
excellent, easy installation
The seller was Amazon. I purchased it new for 127 bucks in October 2013.The Waste King L-8000 replaces a disposal that came with my home. The old disposal was a SinkGuard SE150 1/3 Horsepower. It lasted 7.5 years before it began to seize-up due to rust and bad bearings. The old unit had the 3-bolt connection, which I completely removed. The EZ mount system that came with the Waste King was all I needed.It took me about 1.5 hours to get the old disposal out and to install the Waste King. Reading the reviews on Amazon was very helpful. It was good to know that this was a do-it-yourself job.My sink is fairly basic: Just one big sink with one drain.Everything that I needed came with the Waste King. I reused the gasket that was part of my old discharge elbow (slipped it off the old discharge elbow and onto the new discharge elbow that came with the Waste King...it helps to make a tight seal between the discharge elbow and the plumbing).The instructions were well written. I followed them closely. Here are some things to note:REMOVING THE OLD DISPOSALThe instructions talk about removing the old disposal completely, and then in the next section they talk about removing the dishwasher connection. When removing the old disposal, just be sure to remove all things attached to it before removing the old unit itself.SUPPORTING THE UNITWhether removing the old unit or installing the new one, I placed folded towels under the unit to hold it in place; this kept the unit from falling or tipping over. Folded towels worked well for me, since I could adjust the height of the support easily.FINAL TOUCHESI secured the discharge elbow loosely to the unit using the provided plate and screws.Then I inserted the discharge elbow into my plumbing (with folded towels supporting the unit).Then I tightened the mounting ring enough to support the unit.Then I tightened the discharge elbow to the unit.Then I tightened the discharge elbow to the plumbing.Then I plugged the dishwasher drain into the unit and tightened it.Finally, still with the folded towels supporting the unit, I tightened the mounting ring completely.I did not need a hammer to tightened the ring completely; I was able to tighten it completely using my hand.I found it was important to keep the unit supported while tightening the mounting ring completely, because I accidentally turned the ring the wrong way (but not enough for the unit to come-off). If the support wasn't there when I accidentally turned the ring the wrong way (and if the unit came off), then it would have placed strain on the dishwasher and plumbing connections.There were no leaks, thankfully. I ran the dishwasher briefly to make sure it didn't leak either. After flipping the electrical switch, the unit started immediately the first time. No complaints regarding the noise level.When turned-on, the unit sucks water through the splash guard somewhat, but I still had to push some items through the splash guard (like potato peals). So, I trimmed-off half of the small flaps from the splash guard, and now food items fall through the opening much easier. This means that I don't need to force food particles down the drain (I throw big stuff in the trash, so only small items go in the disposal).The Waste King is larger than my old unit, but that was expected since the old unit was only 1/3 Hp and the Waste King is 1 Hp. On Amazon, someone posted a picture of their old InSinkErator Badger 5 next to the Waste King (to show the size difference). The Badger 5 is only 3/4 Hp, so it still makes sense that the Waste King is larger.The Waste King is made in China.WASTE KING versus INSINKERATORWhy did I purchase this Waste King model instead of an InSinkErator model that is made in the USA?Because of the reviews for each brand and the warranties. I wanted something with a lifetime warranty and something that did not rust. Some reviews for InSinkErator mentioned rust and/or units failing right after the warranty. The Waste King L-8000 uses stainless steel parts; it has a lifetime warranty on the unit, including a lifetime corrosion warranty. And the price was right.I'm very pleased with my purchase and the easy installation.
D**6
A good disposer at a good price
This disposer replaced a 13 year old InSinkErator BadgerI that started leaking. It spins fast and is relatively quiet except at startup because the cutters jerk into place. It works well, rated #1 in Consumer Reports testing a few years ago, comes with a lifetime in home service and corrosion warranty, and is a lot less expensive than anything in its class. If you want a quieter disposer consider the KitchenAid Superba or the Evolution Excel.The disposer hangs down 16" from the bottom of the sink, so make sure you have enough room. I don't know why it comes with a power cord since most homes don't have an electrical outlet under the sink. If there's no outlet under your sink, you can either put one there (go to HD or Lowes and purchase a box and attach it to an inside wall), or attach the new disposer to the wires currently going to your existing disposer or outlet, which is the preferred method and may be code in your area. If it's been over 10 years or so, consider replacing your faucet and all other plumbing valves under the sink at the same time as the disposer, especially if you see any evidence of leaks. It's also a good time to clean your existing plumbing pipes or buy new ones. The whole set (plastic) can be purchased for less than $10.The power cord is fairly easy to replace but may be a little tricky for some. There's a metal cover plate on the bottom of the disposer that is attached with one nut. Remove the nut and then the plate and you'll find a black wire and a white wire crimped to the power cord wires, so you'll have to uncrimp them with pliers or an electrical crimping/stripping tool. Located under the plastic cover is a green colored ground screw. Removing it with a Philips screwdriver allows removal of the green ground wire.Once the wires are unattached, you then remove the power cord. It has a rubber piece that's held in place with a metal bracket and must be pushed out of the bracket. I found this to be a little difficult to do since it is very tight. Just use a screwdriver and keep trying. After that and before you attach your home wires to the disposer, replace the bottom cover plate and attach the new sink parts and disposer to the sink (consult the drawing in the instructions). Use a small amount of liquid hand soap or shampoo on the bottom surface of the rubber gasket to make the disposer turn easier. You must hold the metal mount ring in place with one hand while pushing up and turning the disposer at the same time. Make sure you understand how disposer installation works and then remove the disposer and bottom cover plate.At this point knock out the dishwasher plug if necessary and install the curved black waste elbow with rubber gasket, or a straight waste drain that connects to an opposite drain. I did the latter but had to cut it shorter to fit and used an InSinkErator rubber gasket purchased at HD.Before you connect your home cable wires to the Waste King, or to a new electrical box, use conduit to surround the cable and protect it. HD carries a 1/2" gray plastic type called Liquid Tuff used for wiring assemblies that comes with 6 ft. of conduit and 2 connectors - one straight and one 90 deg. - for under 9 bucks. It has everything you need and is worth the extra protection.First attach one of the conduit connectors into the metal power cord bracket at the bottom of the Waste King. Push the threaded end with the attached O-ring or gasket into the bracket hole and then screw on and tighten the locknut. At this point, make sure all electrical power to the circuit is off. Being careful, estimate how much conduit you'll need, cut it and then run your home cable through it, leaving a few inches of excess wire to connect to the disposer. Also, be sure to leave a few inches of conduit so you can insert a few inches into the floor or wall where your home cable enters. Wait to insert the conduit into the floor until after the disposer is installed.Next connect your home wires to the new disposer. In most home wiring in the US black wire is power, white is neutral, and green or bare wire is ground. So connect wires black to black, white to white, and bare or green to the green colored ground screw. Conform the ground wire into a clockwise circular hook shape and put it around the ground screw and tighten. I reused 2 red wirenuts that were used on my old Badger to connect the black and white wires. Do not use electrical tape to connect the wires - use wirenuts. If you don't know how to use them, it's not difficult and there's plenty of help on the Internet. Now attach the bottom cover plate and then insert the conduit into the connector and then install the disposer, and don't forget to replace your dishwasher drain hose. Insert a few inches of conduit into the floor.
Trustpilot
Hace 3 días
Hace 4 días